How to connect Chef Server with Nodes on Linux
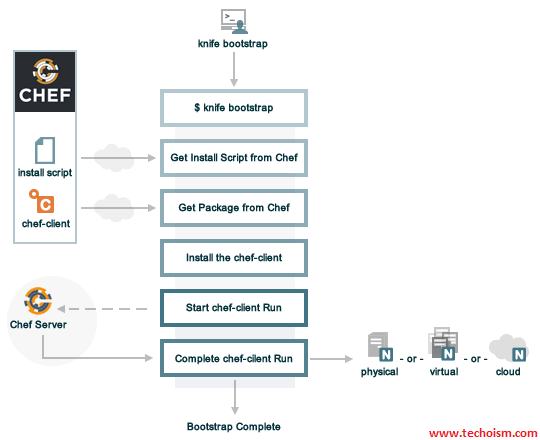
The main part of chef that allows you to connect a node to a chef server is called chef-client. A node is any physical, virtual, or cloud machine that is configured to be maintained by a chef-client. A bootstrap is a process that installs the chef-client on a target system so that it can run as a chef-client and communicate with a Chef server. There are two ways to do this:
See Also:
1. Search chef Install and Configure a Chef Workstation on CentOS/RHEL 7/6
2. How to Install the Chef Server on CentOS/RHEL 5/6/7
3. What is Chef Automation Tool and It’s Features
4. Puppet vs. Chef vs. Ansible vs. SaltStack
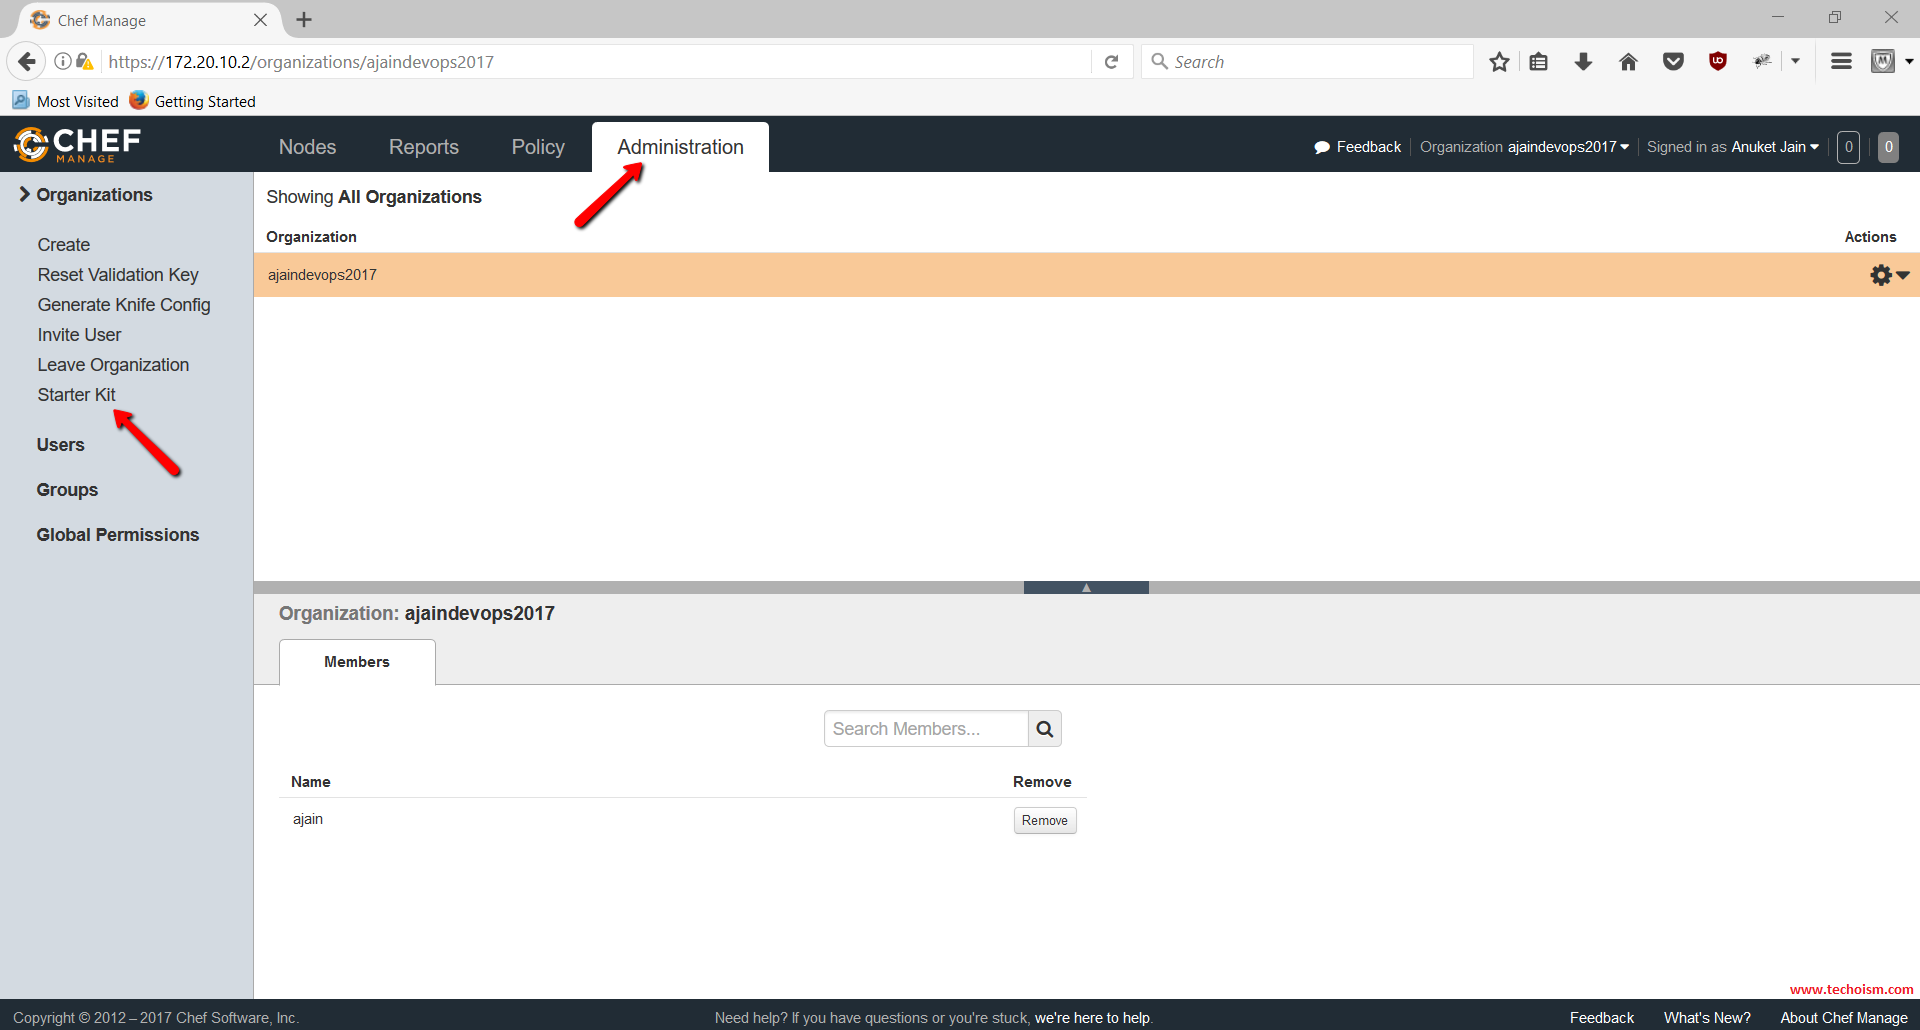
Download the Starter Kit for WorkStation
Firstly we need to download the Starter Kit for a workstation. In the Starter Kit all the necessary configuration file store such as knife.rb and user.pem file. These configuration files help you to interact with the Chef Server. Simply download the Starter Kit and move it to Chef workstation.
Choose any of your organization and download the Starter Kit from the Chef Server to our Work Station.
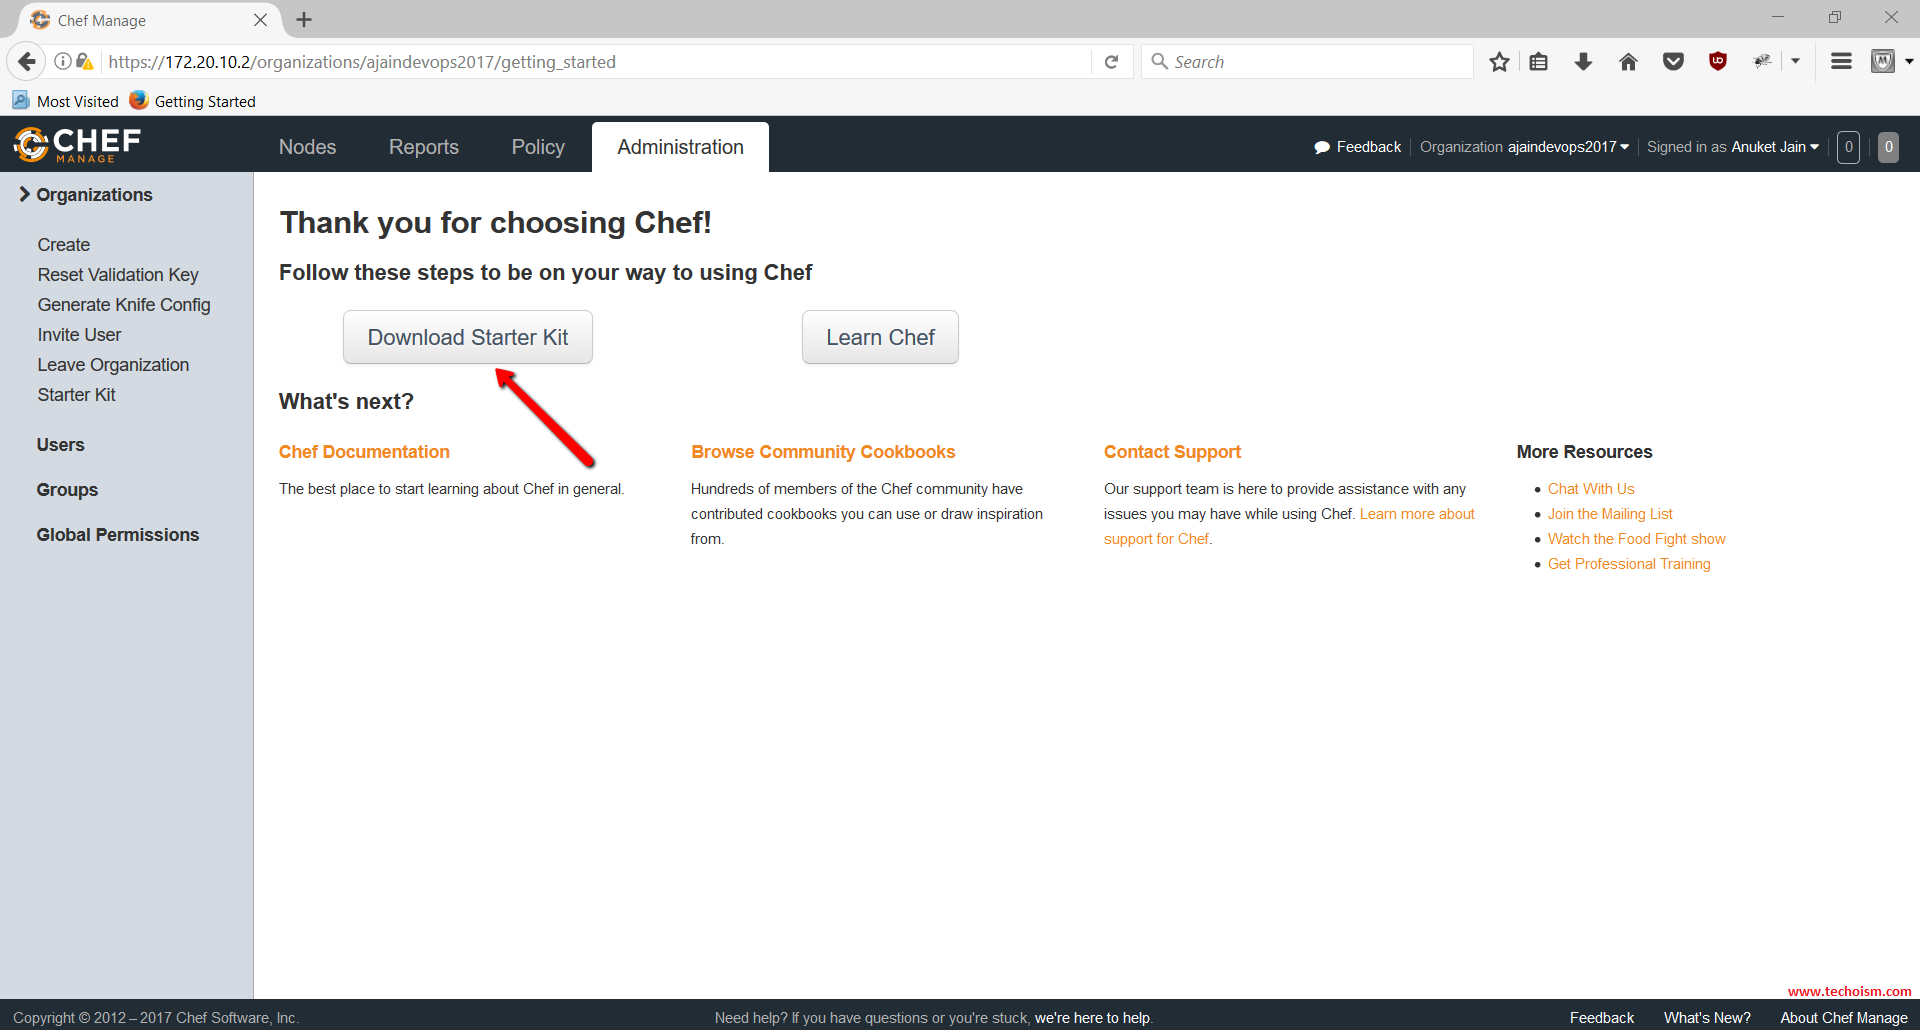
After downloading this kit. Move it your Workstation and extract it. This provides you with a default Starter Kit to start up with your Chef server.
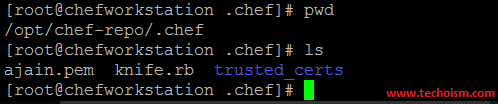
All the configuration files will store at .chef directory.
/opt/chef-repo/.chef
# ls
In knife.rb file all the inforation store regarding Chef Server, which help you to connect Chef Server with nodes.
# cat knife.rb
# See https://docs.getchef.com/config_rb_knife.html for more information on knife configuration options

current_dir = File.dirname(__FILE__)
log_level                :info
log_location             STDOUT
node_name                "ajain"
client_key               "#{current_dir}/ajain.pem"
chef_server_url          "https://chef.techoism.local/organizations/ajaindevops2017"
cookbook_path            ["#{current_dir}/../cookbooks"]
You can also configure knife.rb file using following command:
# knife configure --initial
Verify the Connection
Now run below command to verify the connection.
# knife client list
Note: After running above command If you get SSL error as below then you need to fetch the SSL certificate for our Chef server.
ERROR: SSL Validation failure connecting to host: chef.techoism.local - SSL_connect returned=1 errno=0 state=error: certificate verify failed
ERROR: Could not establish a secure connection to the server.
Use `knife ssl check` to troubleshoot your SSL configuration.
If your Chef Server uses a self-signed certificate, you can use
`knife ssl fetch` to make knife trust the server's certificates.

Original Exception: OpenSSL::SSL::SSLError: SSL Error connecting to https://chef.techoism.local/organizations/ajaindevops2017/clients - SSL_connect returned=1 errno=0 state=error: certificate verify failed
Run below command to fetch the SSL from Chef Server.
# knife ssl fetch
WARNING: Certificates from chef.techoism.local will be fetched and placed in your trusted_cert
directory (/opt/chef-repo/.chef/trusted_certs).

Knife has no means to verify these are the correct certificates. You should verify the authenticity of these certificates after downloading.

Adding certificate for chef_techoism_local in /opt/chef-repo/.chef/trusted_certs/chef_techoism_local.crt
SSL certificate will fetch on /opt/chef-repo/.chef/trusted_certs/ location on the server.
Install Chef Client on Node
Run below command to install the Chef Client on the Node.
# curl -L https://www.opscode.com/chef/install.sh | bash
Connect Nodes to a Chef Server
To connect the nodes will Chef Server is very simple. You just need to execute below bootstrape command to connect the node with Chef Server.
# knife bootstrap Server_IP -x User_Name -P Password --sudo -N Alias_Name
For example:
# knife bootstrap 172.20.10.12 -x root -P redhat --sudo -N NodeServer1
Creating new client for NodeServer1
Creating new node for NodeServer1
Connecting to 172.20.10.12
172.20.10.12 -----> Existing Chef installation detected
172.20.10.12 Starting the first Chef Client run...
172.20.10.12 Starting Chef Client, version 13.2.20
172.20.10.12 resolving cookbooks for run list: []
172.20.10.12 Synchronizing Cookbooks:
172.20.10.12 Installing Cookbook Gems:
172.20.10.12 Compiling Cookbooks...
172.20.10.12 [2017-08-13T13:38:17+05:30] WARN: Node NodeServer1 has an empty run list.
172.20.10.12 Converging 0 resources
172.20.10.12
172.20.10.12 Running handlers:
172.20.10.12 Running handlers complete
172.20.10.12 Chef Client finished, 0/0 resources updated in 04 seconds
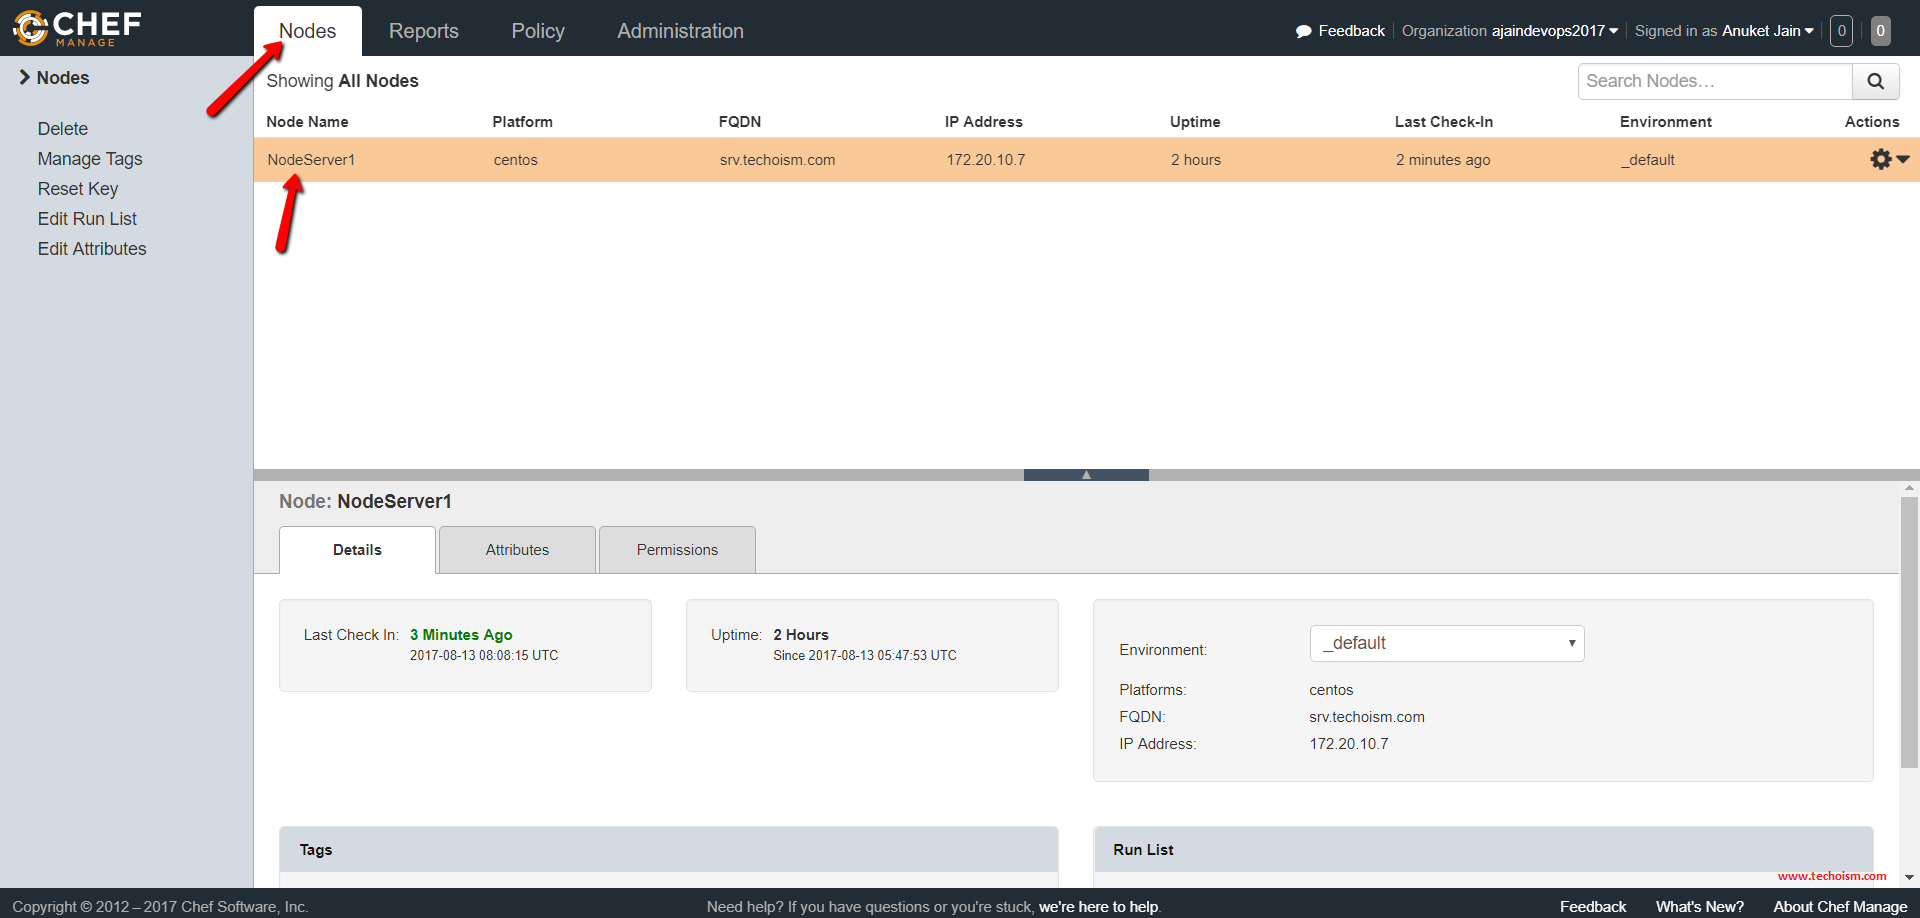
Also, you can verify in the Chef Server web console.
In Next article, we will explain who to create a cookbook and run that cookbook on Chef Node.
Now you have successfully connected the Node with Chef Server.
Enjoy it!

It’s refreshing to see multiple options when attempting to connect Chef Server with Nodes on Linux. I could see the variety of solutions being helpful tools to any IT person looking to improve their IT productivity. Thank you for the detailed tutorial on connecting Nodes to Chef Servers. I can’t wait to see what you’ll cook up in your next tutorial!
Good to hear that you like my article.
These days I am a little bit busy so not able to write an article but as soon as I will post an article also, If you required any article then Please let me know.