How to Install IIS on Windows Server 2012 R2 & Windows Server 2016
We’ve already seen how you can install IIS (Internet Information Services) on Windows 8 and Windows 10. Now, we’ll see how you can install IIS on a Windows server to host your website for production purposes.
Useful Articles:
- HOW TO INSTALL IIS ON WINDOWS 8 & WINDOWS 10
- HOW TO INSTALL GIT BASH ON WINDOWS
- HOW TO INSTALL VIRTUALBOX ON WINDOWS
- INSTALL MONGODB 3.2 ON WINDOWS
- USE OF IPCONFIG COMMAND IN WINDOWS
- HOW TO INSTALL VEMBU STOREGRID SERVER 4.4.1 ON WINDOWS
- RUN MULTIPLE SKYPE ACCOUNTS ON WINDOWS DESKTOP
- WHY IS LINUX MORE SECURE THAN WINDOWS AND ANY OTHER OS?
- WINDOWS BATCH SCRIPT TO TAKE BACKUP OF SERVER EVENT LOG
This article will help you to install the IIS on Windows Server 2012 R2 & Windows Server 2016.
Steps to Install IIS on Windows
Use following steps to install IIS on Windows Server 2012 R2 & Windows Server 2016.
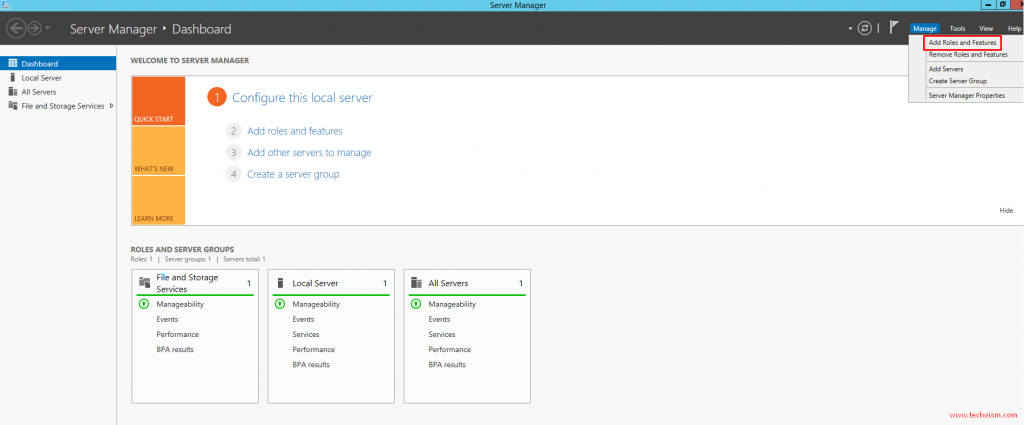
Step 1: Open the Server Manager and click Add Roles and Features:
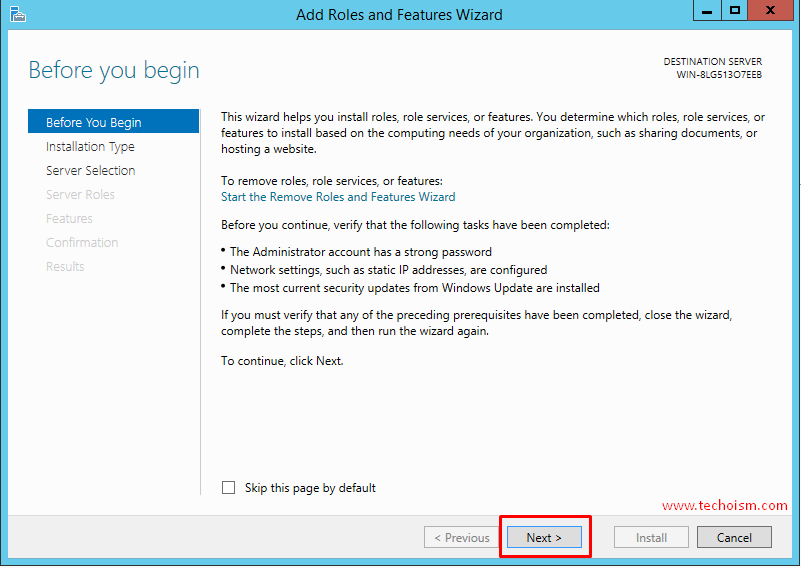
Step 2: This wizard helps you install roles, role services or features. Click “Next” to move forward.
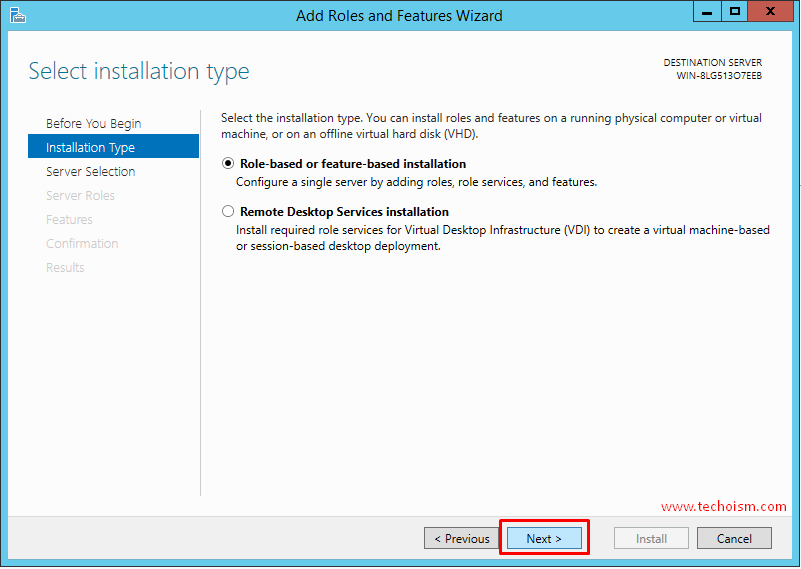
Step 3: Select the installation type you want to install roles and features.
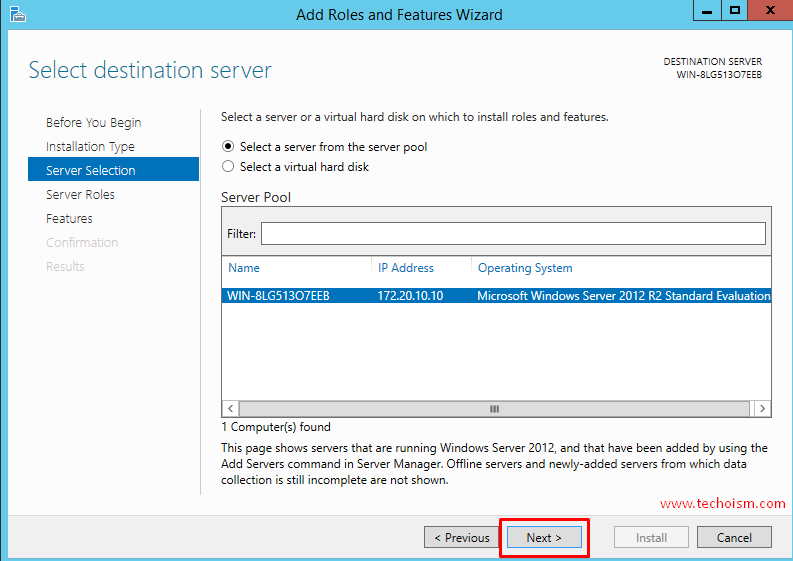
Step 4: Select a server or a virtual hard disk on which to install roles and features.
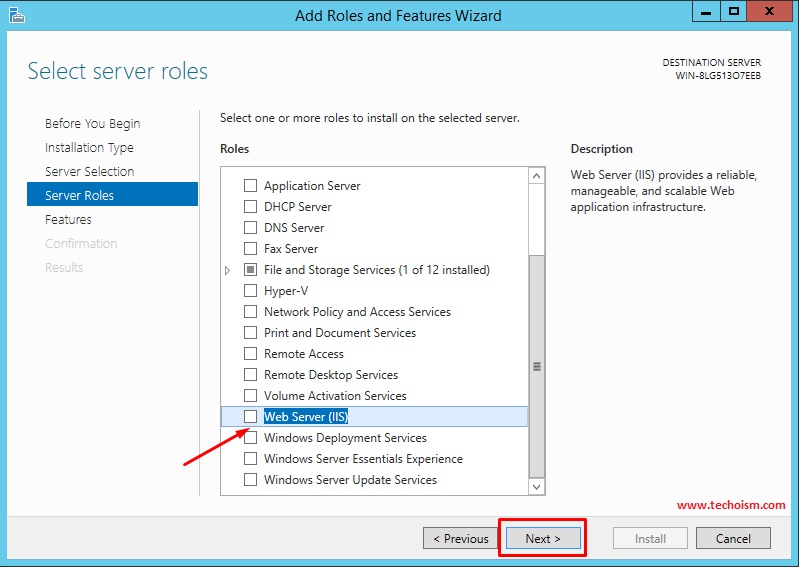
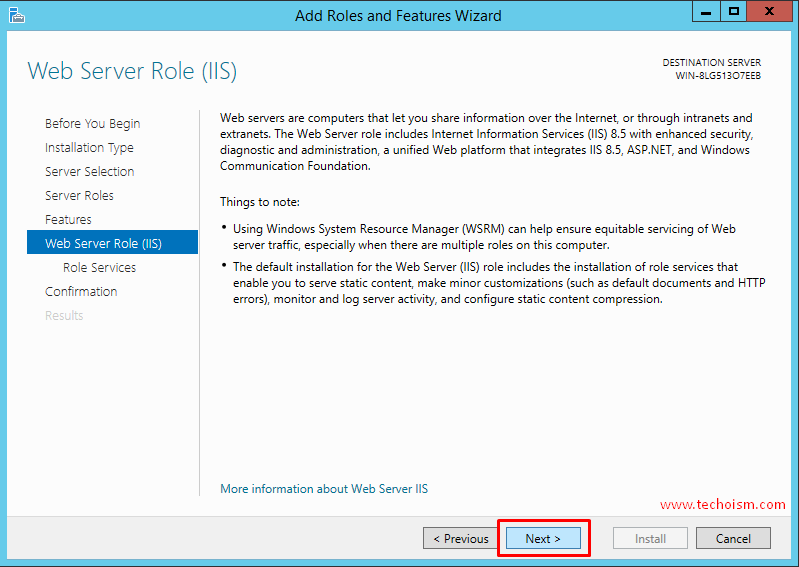
Step 5: Select the Web Server (IIS). You can select multiple roles also.
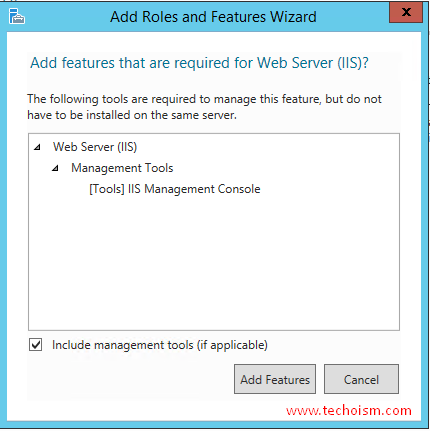
Step 6: Now, It will list the feature which is required to manage. Click Add Features
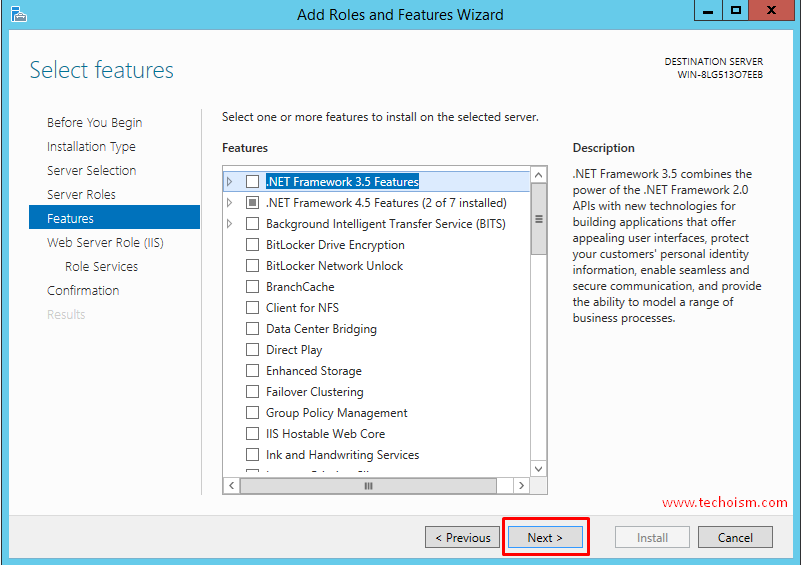
Step 7: Select one or more features to install on the selected server.
Step 8: Click Next.
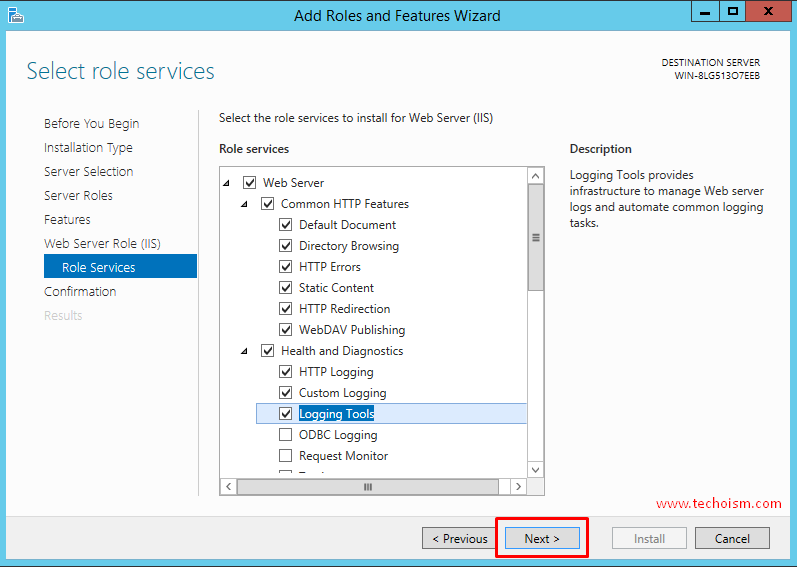
Step 9: Select the role services to install for Web Server (IIS)
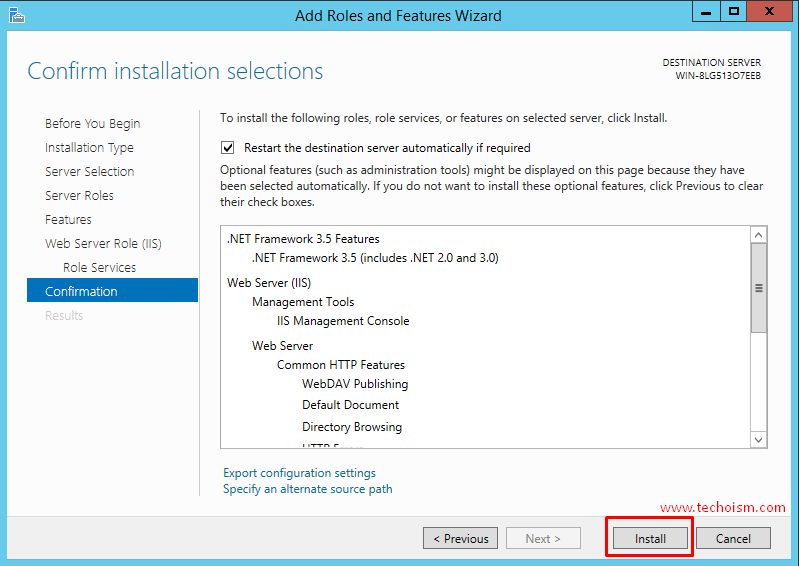
Step 10: Confirm installation selections and Click Install.
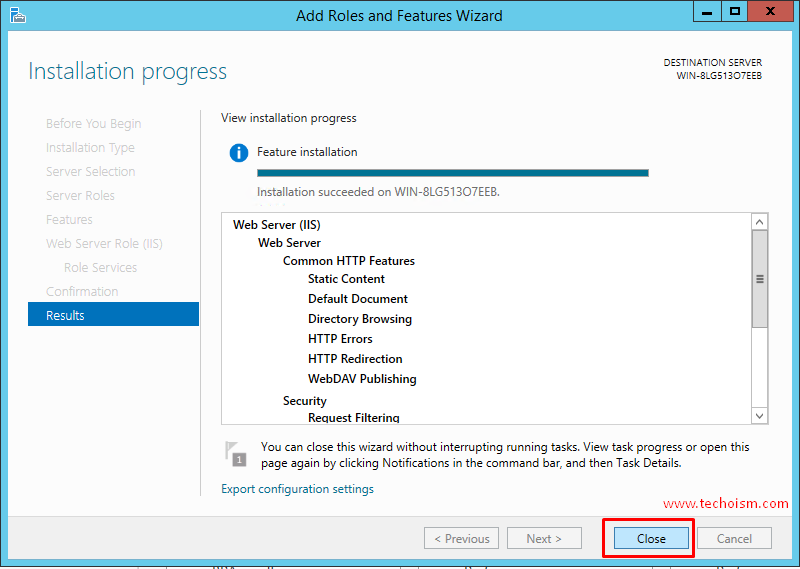
Step 11: After clicking Install, the installation process has been begun now. It will take a couple of mins to complete the installation process.
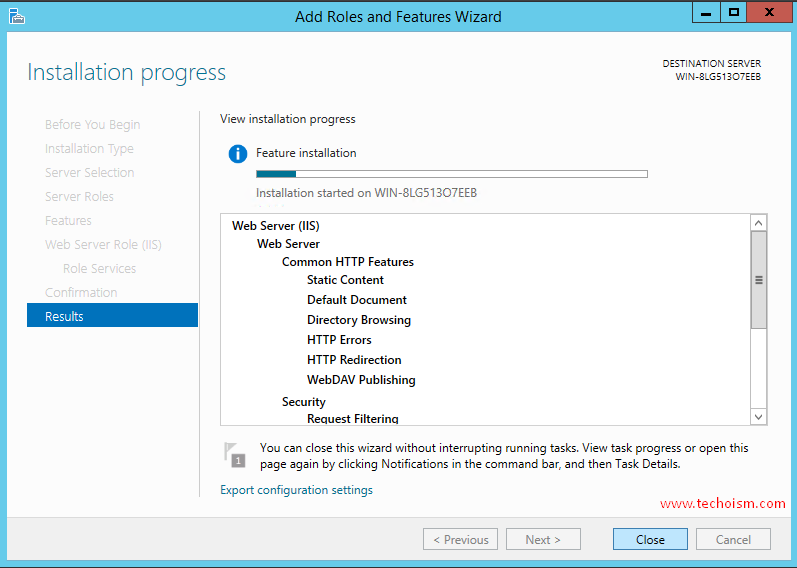
Step 12: Installation has been completed successfully.
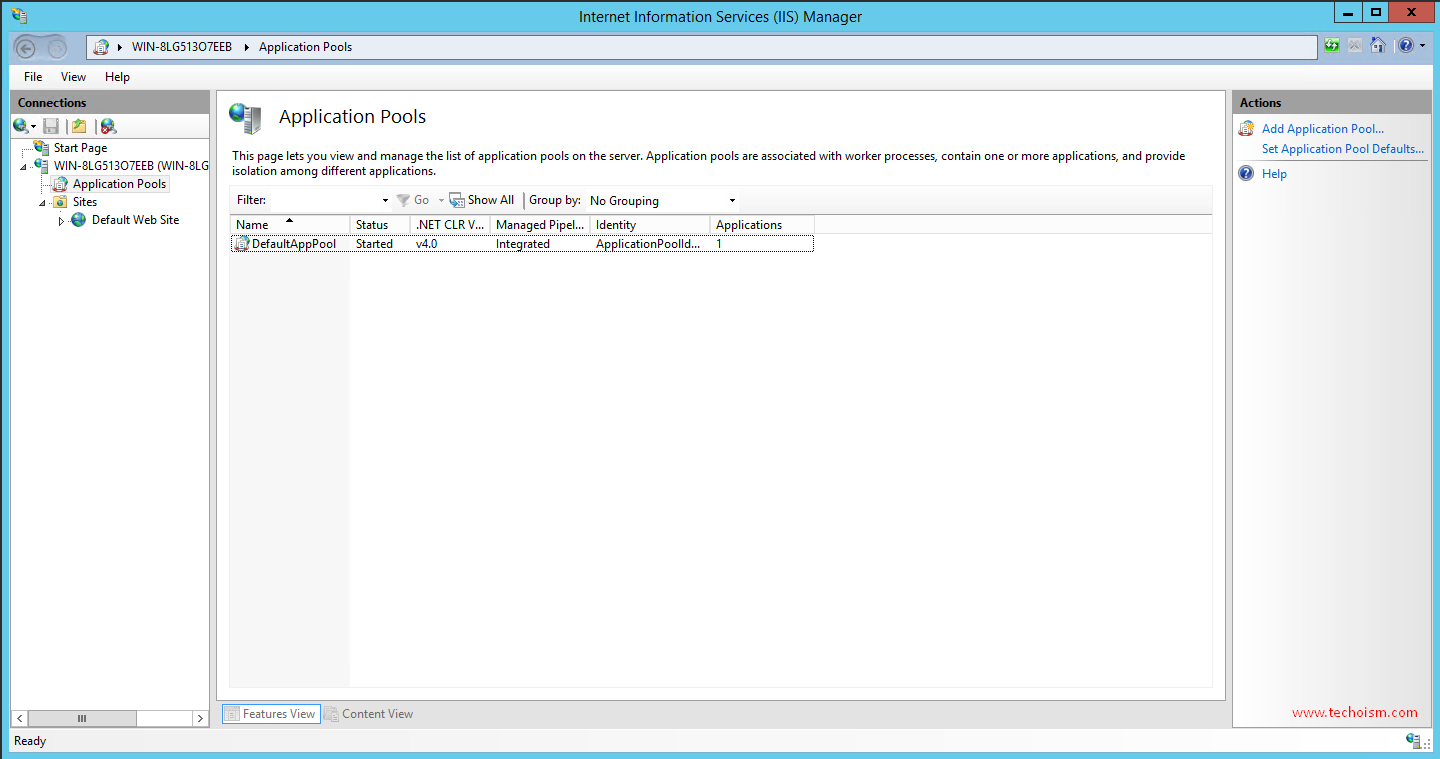
Step 13: After the installation finish, you can access IIS either type “inetmgr” in the run window or you can use a start menu.
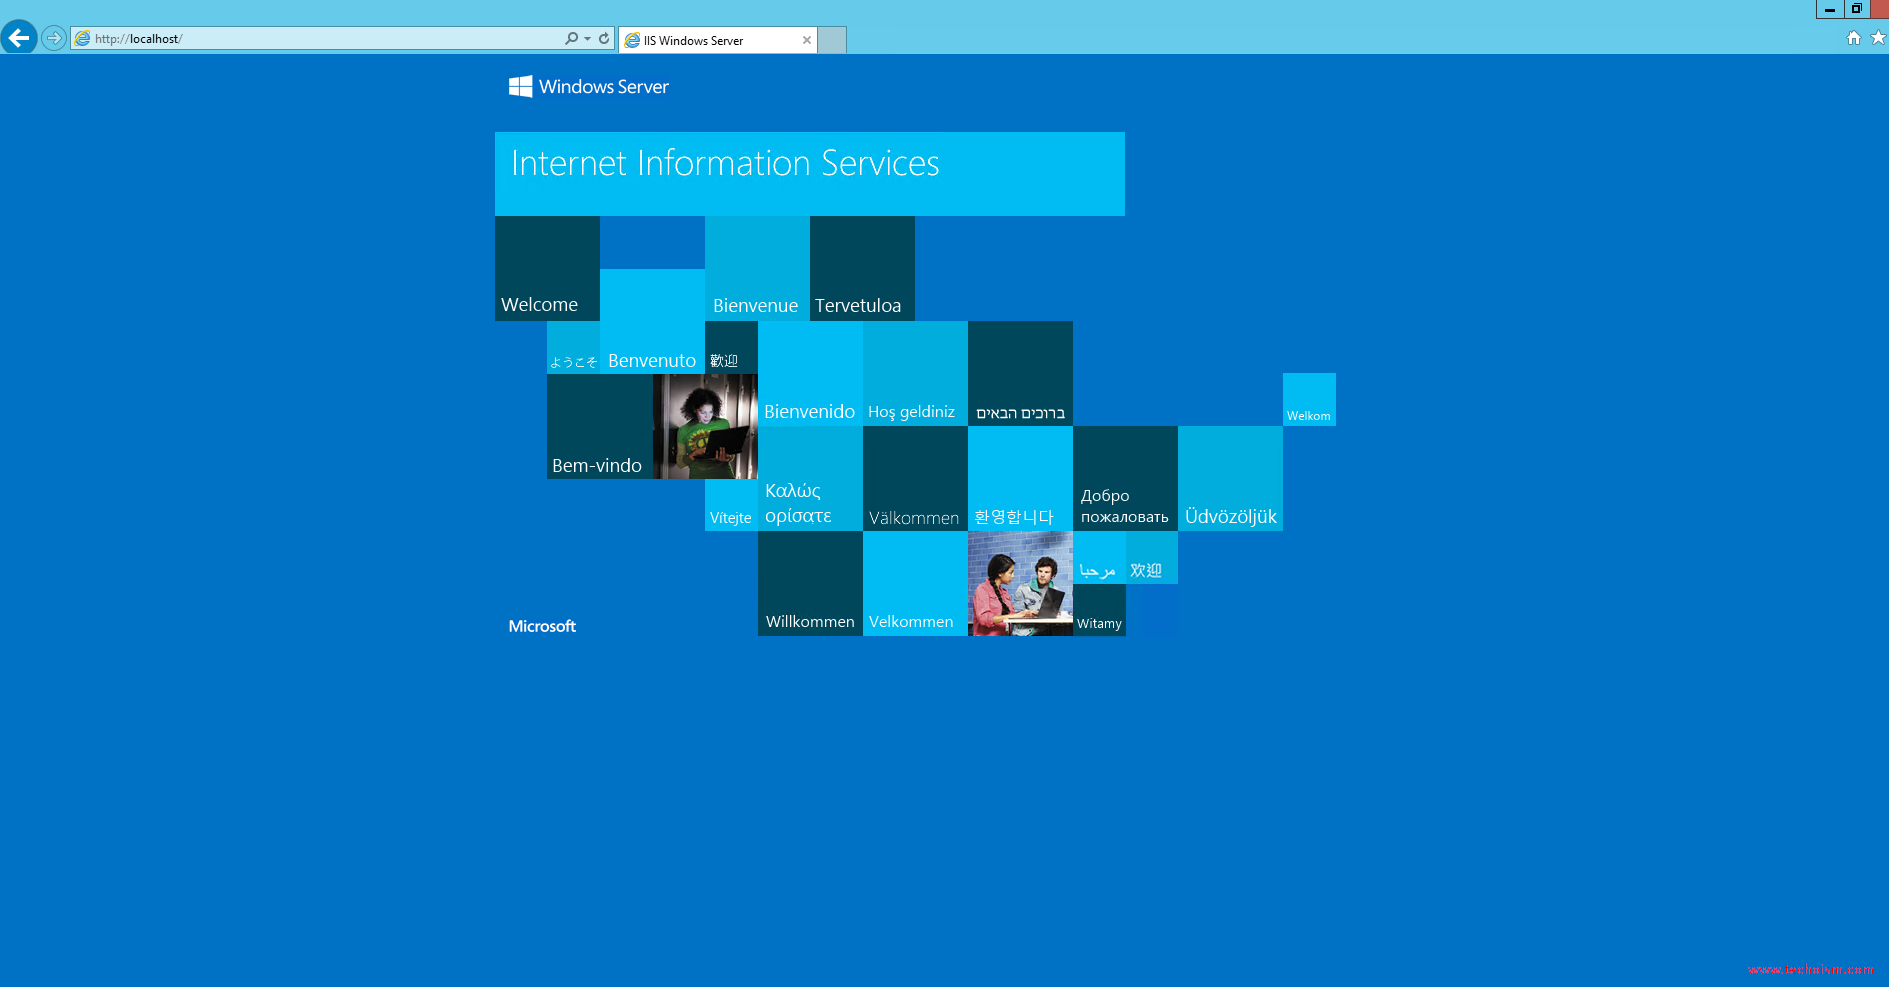
Step 14: Also you can visit localhost on the web browser you will see the default page of IIS. You can change the default page under directory C:\inetpub\wwwroot\
Enjoy it!
