How to Install Jira on CentOS/RHEL
It is a defect tracking/project management tool by Atlassian, Inc. Going to its pertinence to QA groups, it is widely utilized for bug tracking, following task level issues- like documentation finishing and for following ecological issues.
![]()
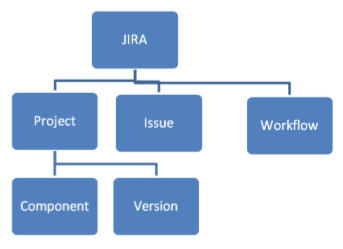
JIRA in its total is in light of 3 ideas.
Issue: Every task, bug, enhancement request; basically anything to be created and tracked via JIRA is considered an Issue.
Project: A collection of issues
Workflow: A workflow is simply the series of steps an issue goes through starting from creation to completion.
This guide describes how to install a new JIRA installation on Linux using the automated ‘Linux Installer’
Check Java Version
JAVA is the first requirement for JIRA establishment. Verify you have JAVA SE 6 or Later form introduced in your framework. Utilization taking after order to check in the event that you have java introduced as of now on your framework.
# java -version
java version "1.8.0_31"
Java(TM) SE Runtime Environment (build 1.8.0_31-b13)
Java HotSpot(TM) 64-Bit Server VM (build 25.31-b07, mixed mode)
If you do not have java installed, Use any article Install Java 7 or Install Java 8 in RHEL based systems.
Install Java 8 on CentOS/RHEL
Install Java 7 on CentOS/RHEL
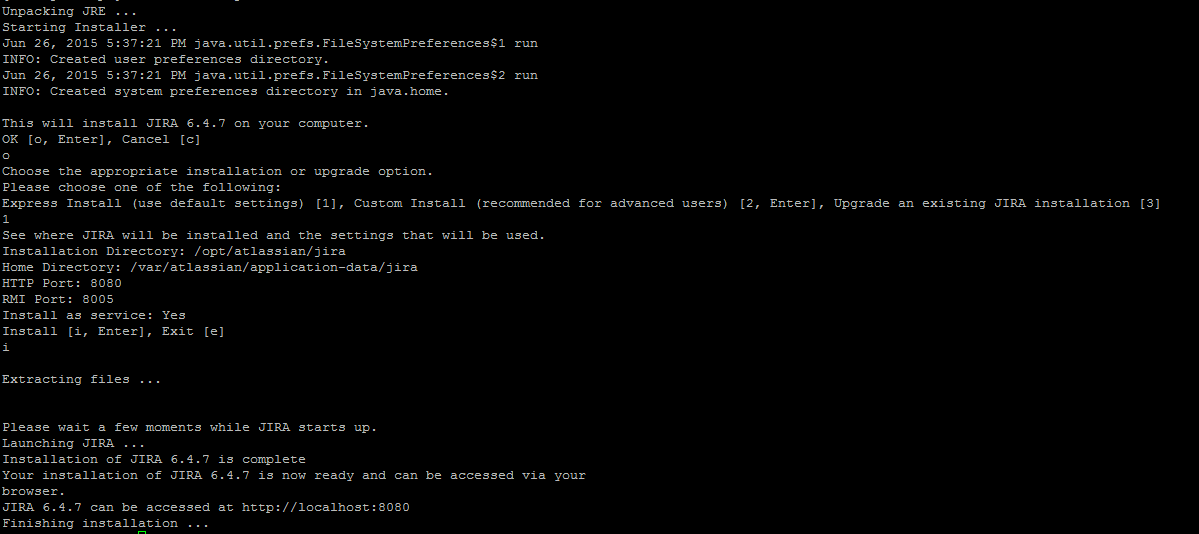
Download and Install the JIRA
After checking the Java version we need to download the latest appropriate JIRA ‘Linux 64-bit / 32-bit Installer’ (.bin) file from the JIRA official page. or you can also download it following bellow steps:
# cd /opt
For 64 Bit:
# wget https://www.atlassian.com/software/jira/downloads/binary/atlassian-jira-6.4.7-x64.bin
For 32 Bit:
# wget https://www.atlassian.com/software/jira/downloads/binary/atlassian-jira-6.4.7-x32.bin
Now give the execute permission to .bin file and install JIRA.
For 64 Bit:
# chmod +x atlassian-jira-6.4.7-x64.bin
# ./atlassian-jira-6.4.7-x64.bin
For 32 Bit:
# chmod +x atlassian-jira-6.4.7-x32.bin
# ./atlassian-jira-6.4.7-x32.bin
Connectivity to JIRA with MySQL
To connect JIRA with MySQL we require to copy the MySQL JDBC driver to your Jira server. Copy the MySQL JDBC driver jar file to the JIRA installation directory. Also create a database and new user for JIRA. Use following article to setup MySQL:
Steps to connecting JIRA with MySQL
Accessing JIRA
You can get to JIRA from any PC with network access to your JIRA server by opening an supported web browser on the PC and going by this URL:
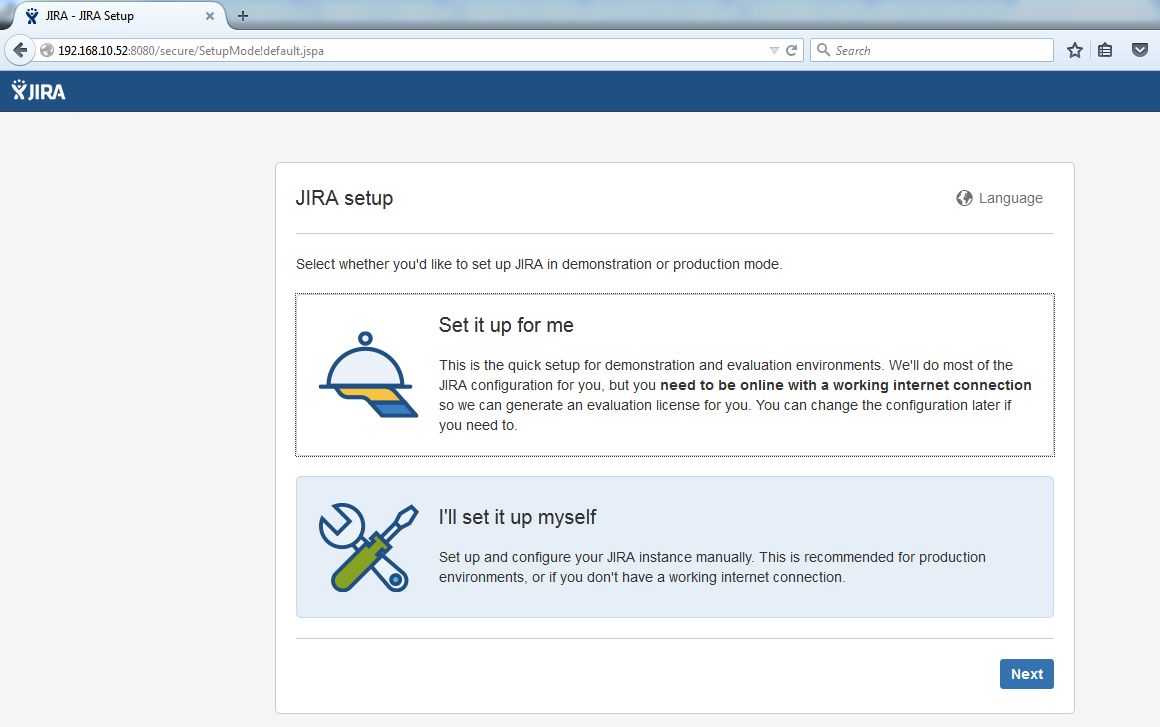
Run the Setup Wizard
In this you can install JIRA by selecting “Set it up for me” or I’ll set it up myself”. In this article we will install by selecting “I’ll set it up myself” type.
Select I’ll set it up myself and click Next.
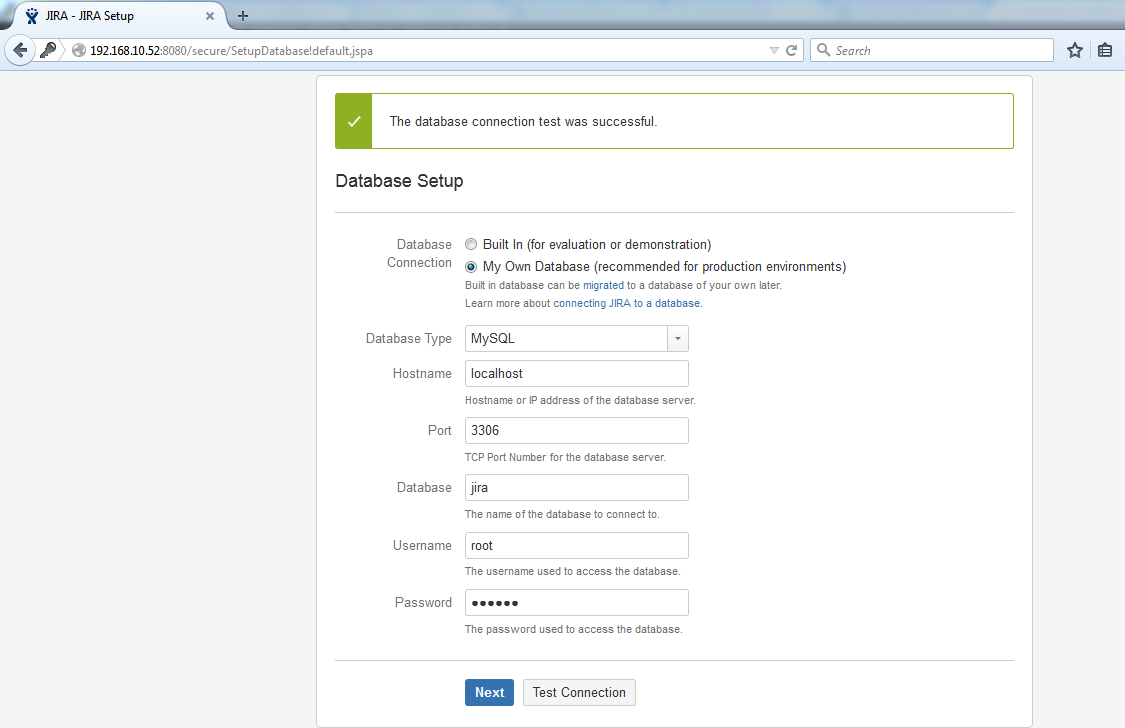
To connect with JIRA you are getting two option “the bundled database or My own database”. If you want to create database on your server then select My own database and fill the mysql information and click on Test Connection. If database connection test pass then click on next.
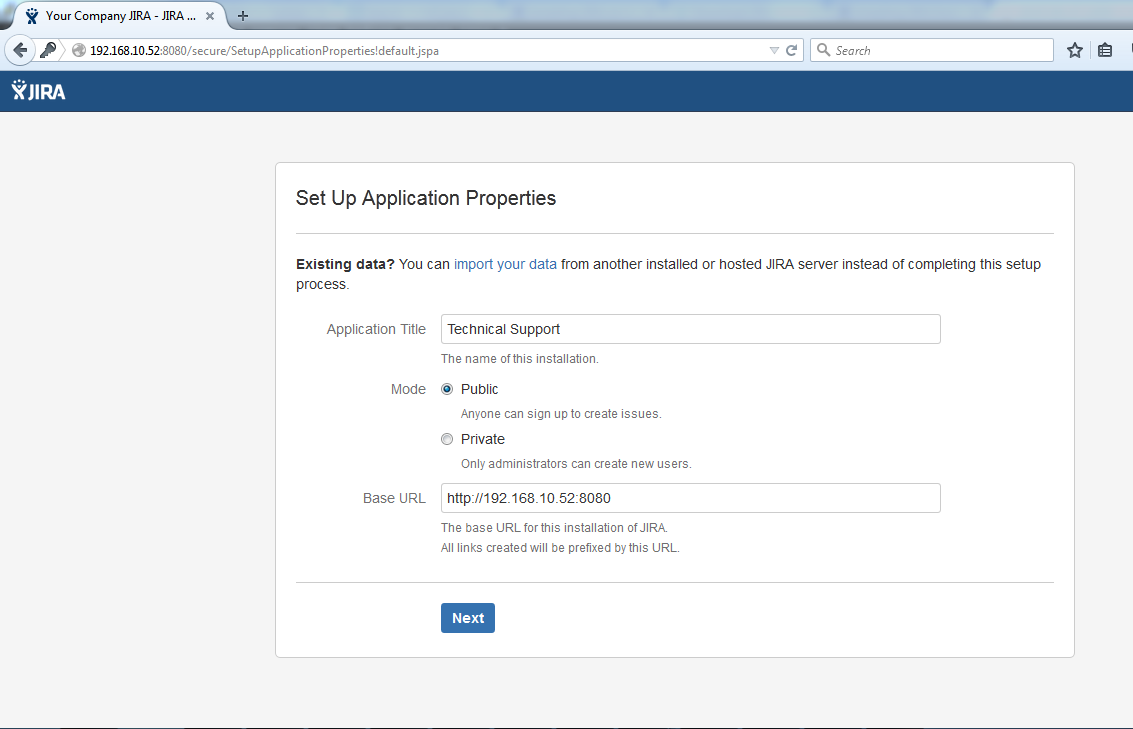
Now mention application title, mode on installation and base URL of JIRA and click on next.
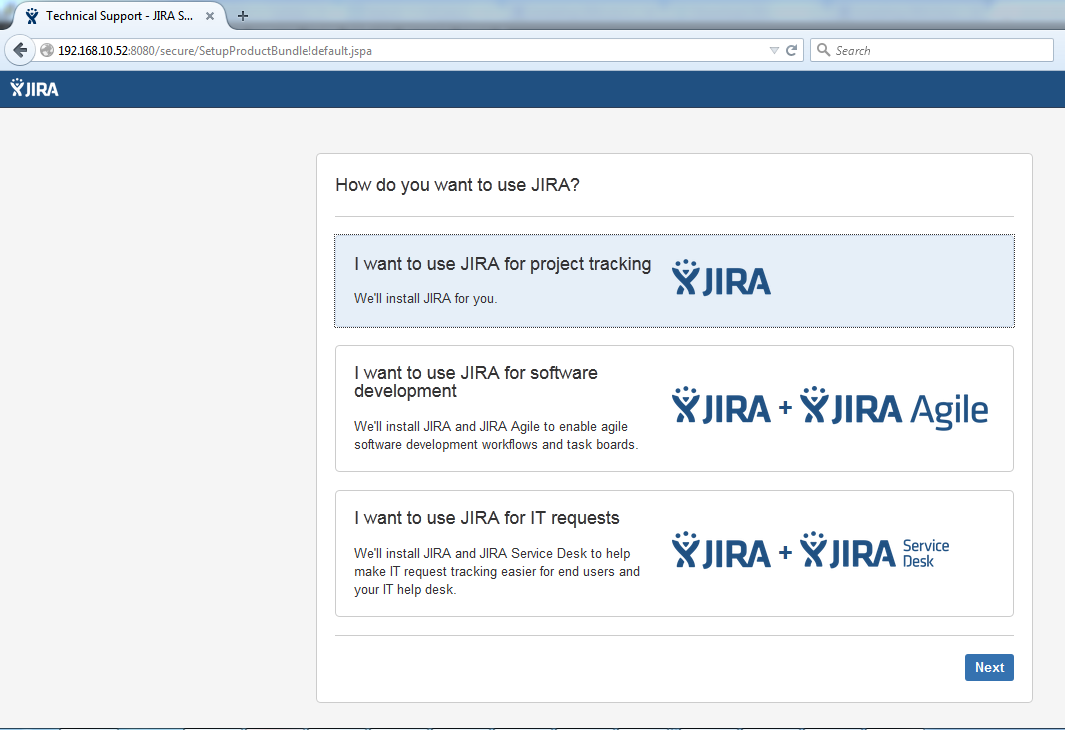
The JIRA installer now accompanies Agile and Service Desk bundled. On the off chance that you’d like to attempt both of these, select the relevant option, and it will be introduced with JIRA for you, or simply select JIRA and click Next.
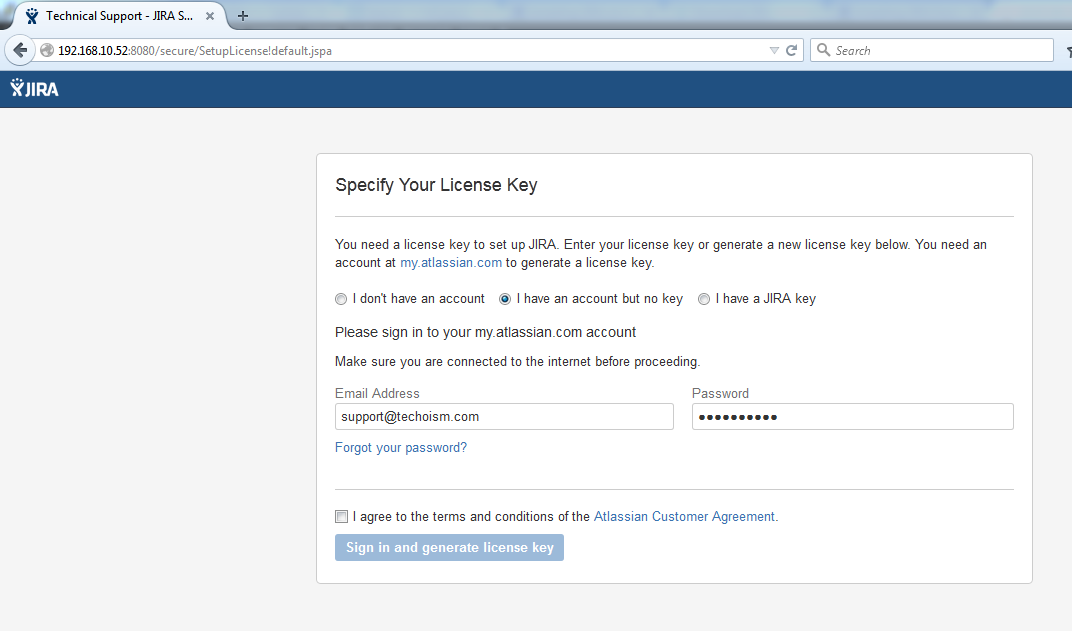
You need a license key to set up JIRA. Enter you License key or generate a new license key below. To create or generate a license key you need an account at my.atlassian.com.
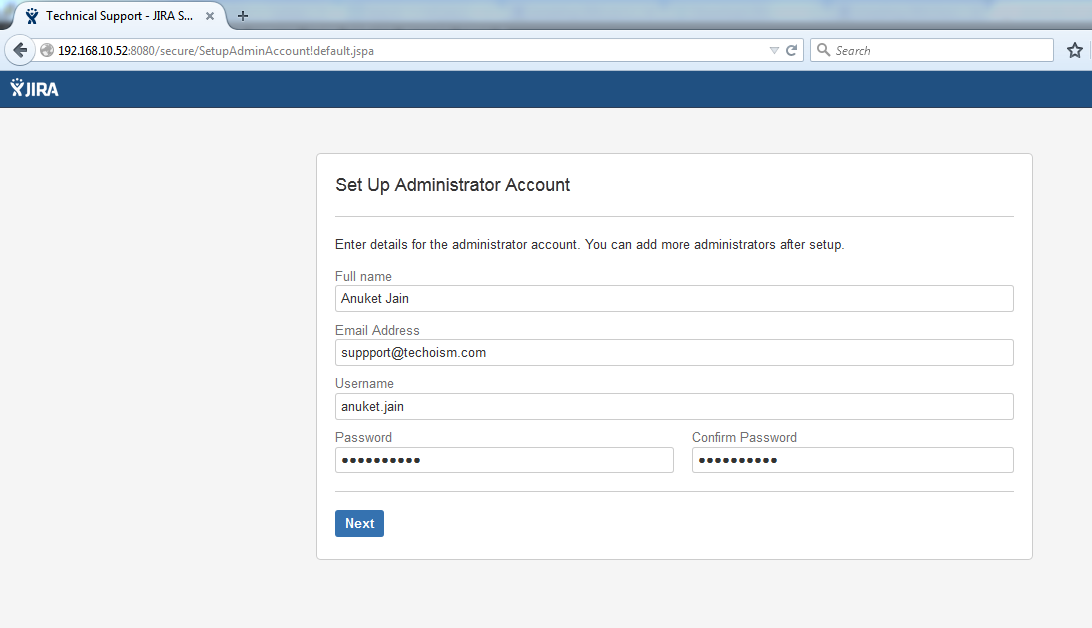
Enter you Administrator details. Also you can add more than one Administrator.
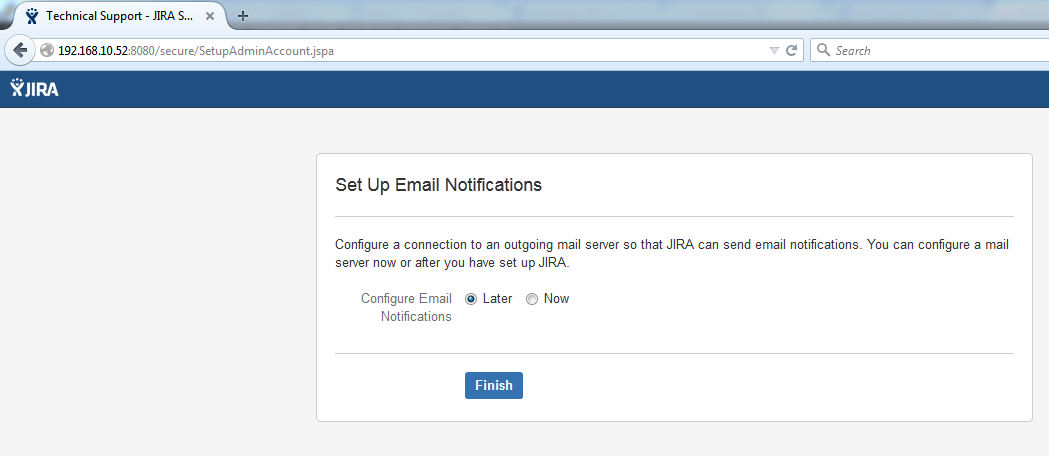
Configure a mail server so that JIRA can send email warnings. You can configure a mail server now or after you have setup JIRA and click on finish.
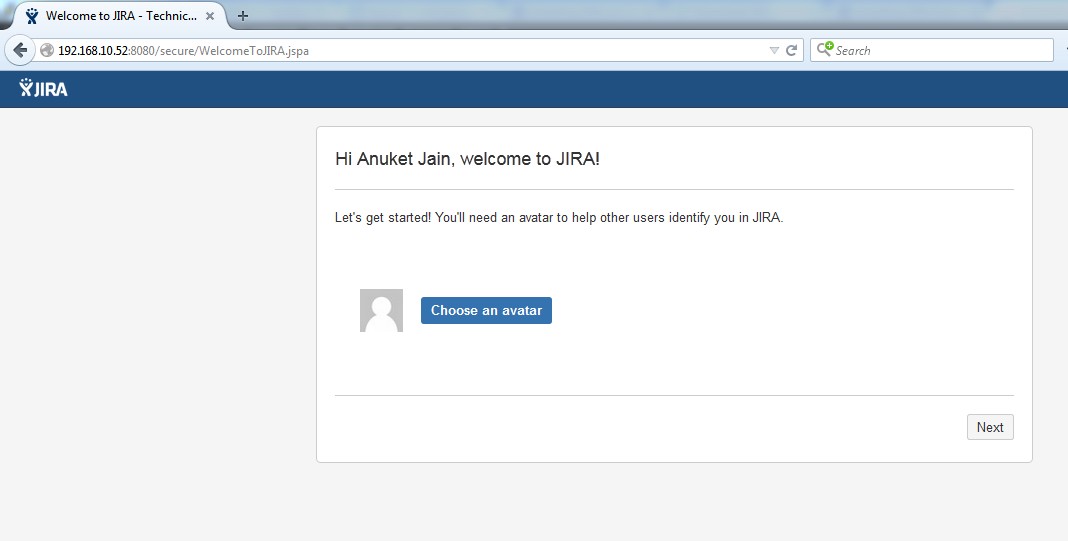
Once the setup is complete, you’re ready to get started! Select an avator or skip it and click next.
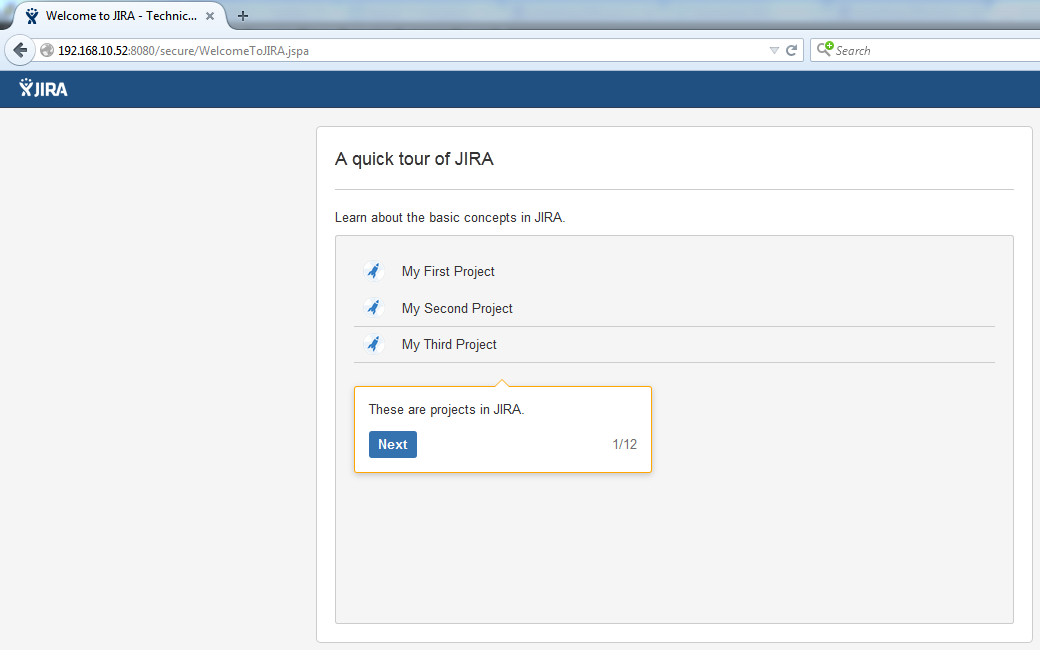
Now you can learn more basic concept of JIRA and after the basic concept create a new project or skip this step.
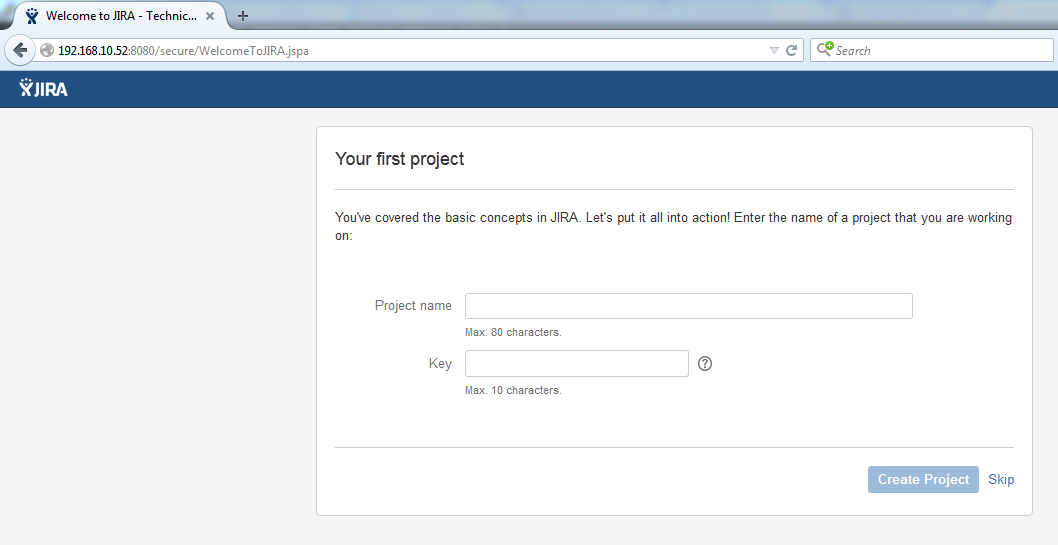
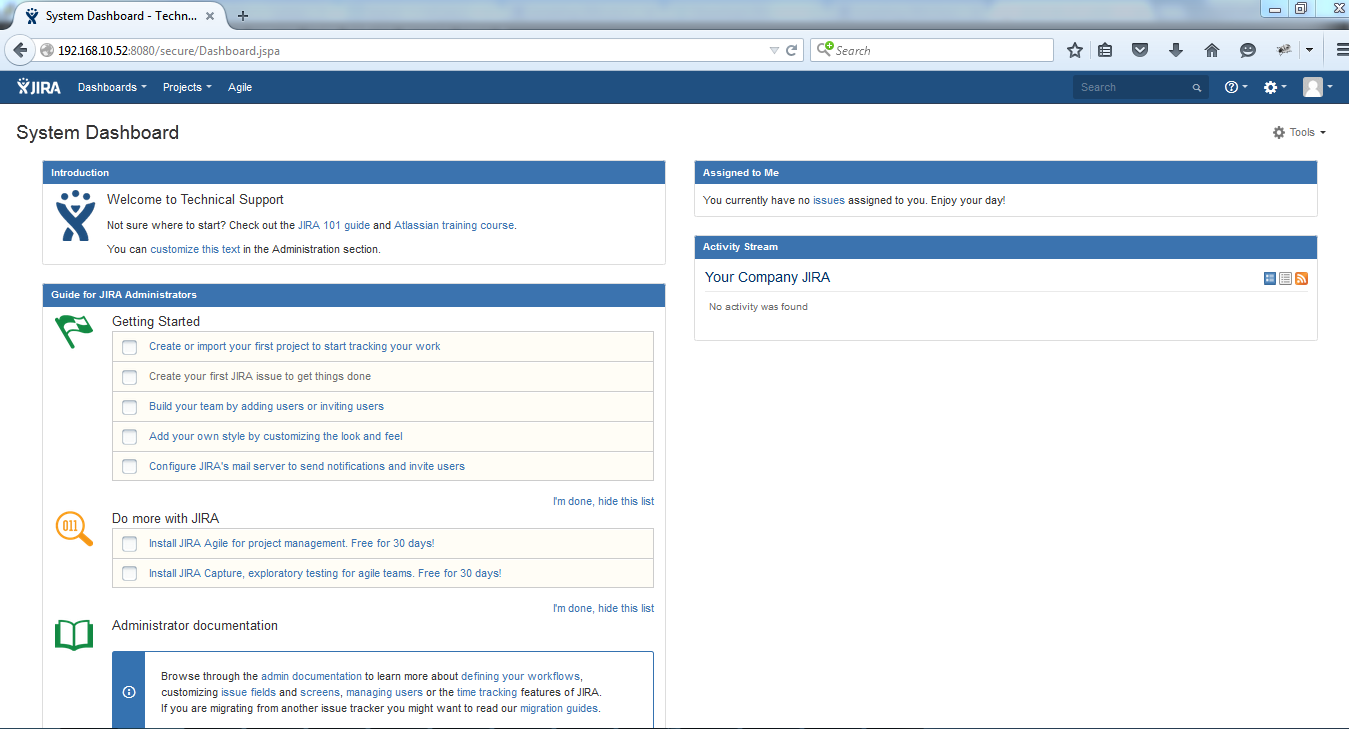
As you skip the step you will reach on the JIRA Dashborad.

really nice doc
Thanks
good job
Thanks!