Install Secure Samba Server in CentOS/RHEL 7/8
Samba is an open-source and most popular widely used program that provides server and client software to allow sharing between Linux and Windows machines. Samba has proven its reliability and high performance in many organisations. Using Windows smbclient (GUI) or file explorer, end users can connect to the Samba server from any Windows server.

Useful Articles:
- HOW TO INSTALL SAMBA SERVER IN CENTOS/RHEL 7/8 PASSWORD LESS
- HOW TO INSTALL SAMBA 4.3.4 ON CENTOS/RHEL 7
- INSTALL WEBMIN ADMINISTRATOR TOOL IN CENTOS/RHEL 8 USING RPM PACKAGE
- HOW TO INSTALL WEBMIN ADMINISTRATOR TOOL IN CENTOS/RHEL 8
- HOW TO BACKUP LINUX FILESYSTEM USING CLONEZILLA
- COMMONLY USE PORT NUMBERS FOR THE LINUX SYSTEM ADMINISTRATOR
- RSYNC (REMOTE SYNC) COMMAND IN LINUX
- HOW TO MIGRATE FROM CENTOS 8 TO ALMALINUX 8.6
This tutorial will explain how to install and configure secure Samba on CentOS/RHEL.
Step 1: Install Samba Server
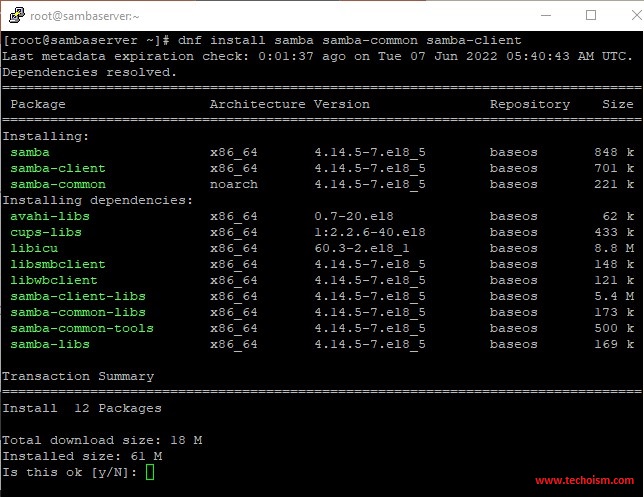
Samba is available in the standard CentOS repositories. you can install the samba package using the below command.
# dnf install samba samba-common samba-client
Step 2: Create Samba Share Directory and Set Permission
Next, create the Users share directory and configure SELinux If you are using it.
# mkdir -p /opt/techoism/secure
# chmod -R 755 /opt/techoism/secure
# chown -R  nobody:nobody /opt/techoism/secure
For SELinux:
# chcon -t samba_share_t /opt/techoism/secure
Step 3: Configuring Firewall and SELinux
Now, Samba is installed and running on your server and Firewall and SELinux is enabled then you’ll need to configure your firewall and SELinux.
For Firewall:
# firewall-cmd --permanent --zone=public --add-service=samba
# firewall-cmd reload
For SELinux:
# chcon -t samba_share_t /opt/techoism/secure
Step 4: Configuring Samba Shares
We need to create a new samba user and group. Also, need to add the new samba user to this group.
# useradd smbuser
# groupadd smb_group
# usermod -g smb_group smbuser
Set the password of the samba user.
# smbpasswd -a smbuser
Step 4: Configuring Samba Shares
Now edit the samba configuration file using your editor.
# vim /etc/samba/smb.conf
In the [global] section, add update the content as mentioned:
[global]
workgroup = WORKGROUP
server string = Samba Server %v
netbios name = centos-8
security = user
map to guest = bad user
dns proxy = no
ntlm auth = true
</pre>
After this change, we must append a new share at the end of the file.
[secure]
path = /opt/techoism/secure
valid users = @smb_group
guest ok = no
writable = no
browsable = yes
Now, verify the samba configuration for errors.
# testparm
Step 5: Start Samba Service
Now, start and enable the samba services.
# systemctl start smb
# systemctl enable smb
# systemctl start nmb
# systemctl enable nmb
## OR ##
# service smb start
# chkconfig smb on
# service start nmb
# chkconfig nmb on
Step 6: Accessing Samba Share from Windows
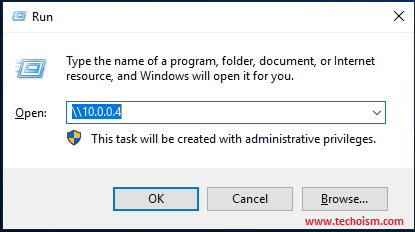
Now, that you are ready to access the samba share, press the Windows logo key + R to launch the Run box and enter the IP address.
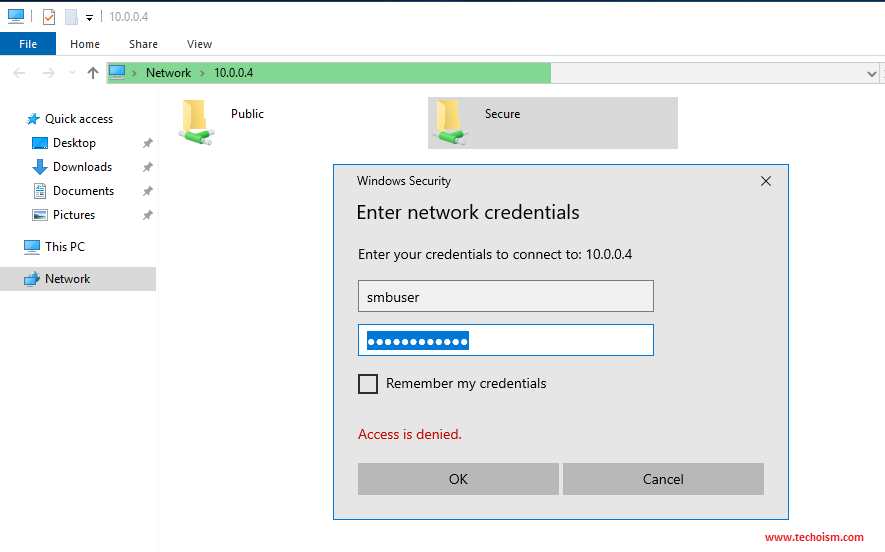
Now enter your samba username and password.
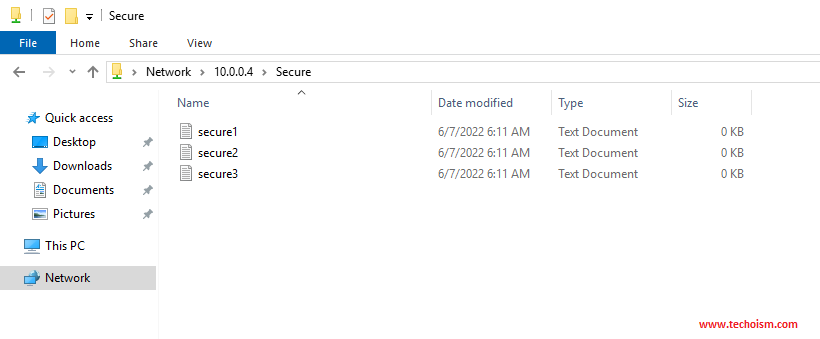
Once you connect, you will be presented with the ‘secure’ directory.
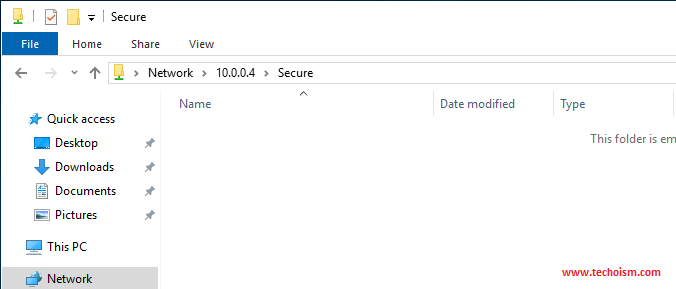
We don’t have any files in the Samba share, let’s create new files with the following command.
# cd /opt/techoism/secure
# touch secure{1..3}.txt
Once you have created files, refresh the samba share.
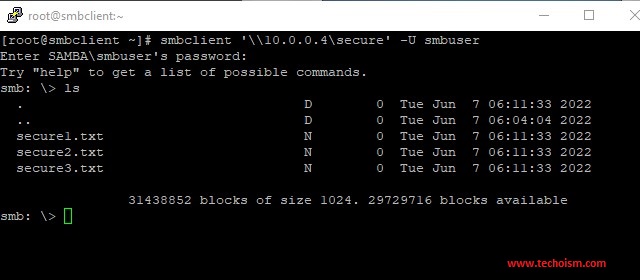
Now, we will try to access the samba share in the Linux server.
# dnf install samba-client
# smbclient ‘\\10.0.0.4\secure’ -U smbuser
Enjoy it!
