How to install Jenkins on CentOS/RHEL 8
Jenkins is a popular widely-used open-source, Java-based automation server that can be used to automate the repetitive tasks from building to deploying software in a simple and effective way. Jenkins supports version control tools, including AccuRev, CVS, Subversion, Git etc and also and can execute Apache Ant, Apache Maven etc based projects. To know more about Jenkins you can visit the official site.
Useful Articles:
- HOW TO INSTALL JENKINS ON CENTOS/RHEL
- PUPPET VS. CHEF VS. ANSIBLE VS. SALTSTACK
- HOW TO INSTALL APACHE TOMCAT 9 ON CENTOS/RHEL 8
In this article, we will guide you to install Jenkins on your system.
Step 1: Install JAVA
As, Jenkins is Java based application so the first we need to install the Java. Jenkins requires Java 8 or later version.
# dnf install java-11-openjdk-devel
Check the Java version using mention command.
# java -version

In case you are running an old version of Java and you installed the new version so you can switch Java to latest version using mention command.
# update-alternatives --config java
Step 2: Add Jenkins Repository
Jenkins is not available in CentOS/RHEL 8 default repository. So we need to install Jenkins official repository in your system to install Jenkins.
Add the Jenkins key to the system.
# rpm --import https://pkg.jenkins.io/redhat-stable/jenkins.io.key
Add the Jenkins repository to your system.
# curl --silent --location http://pkg.jenkins-ci.org/redhat-stable/jenkins.repo | sudo tee /etc/yum.repos.d/jenkins.repo
Step 3: Install Jenkins
After successfully adding the Jenkins repository, now run mention command to install the Jenkins.
# dnf install jenkins
Once Jenkins has been installed you can start and enable the Jenkins service.
# systemctl enable jenkins
# systemctl start jenkins
Step 4: Add Firewall Rules
Jenkins default port is 8080 so need to configure the firewall so that Jenkins portal can be access from external machines.
# firewall-cmd --permanent --zone=public --add-port=8080/tcp
# firewall-cmd --reload
Step 5: Setup Jenkins
Once, Jenkins basic configurations done, we need to setup the Jenkins before accessing the Jenkins web interface. Access Jenkins using Server IP/Hostname with port no.
http://IP_Address:8080
OR
http://Hostname:8080
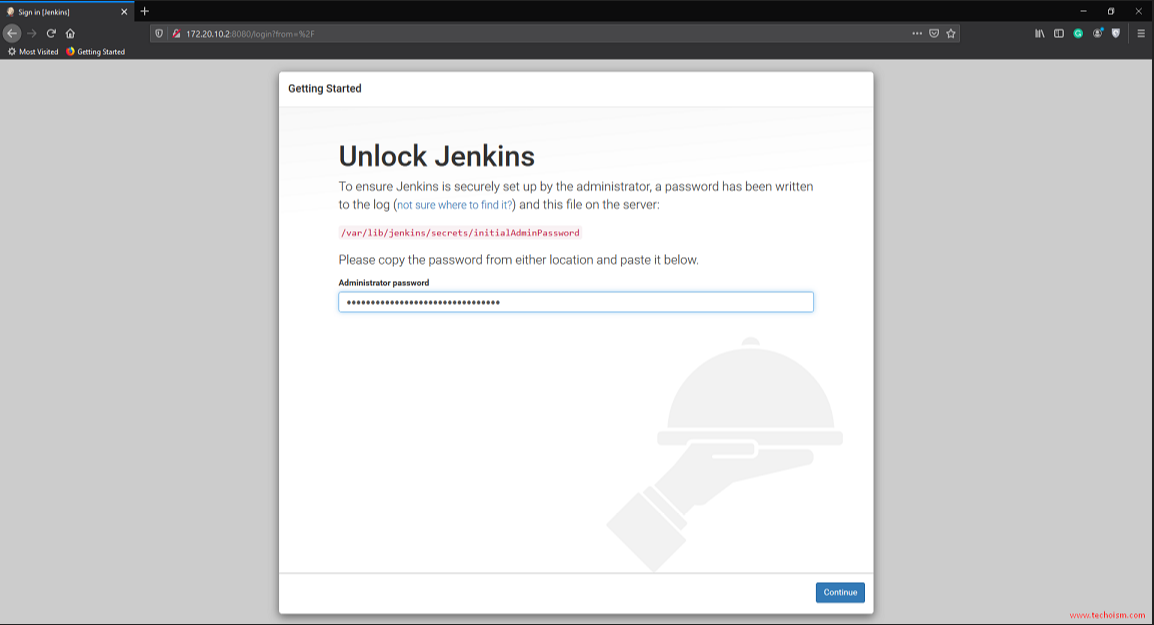
First you need to unlock Jenkins using a password. The password file is /var/lib/Jenkins/secrets/initialAdminPassword
# cat /var/lib/Jenkins/secrets/initialAdminPassword

Please copy the password from either location and paste in text field & click continue.
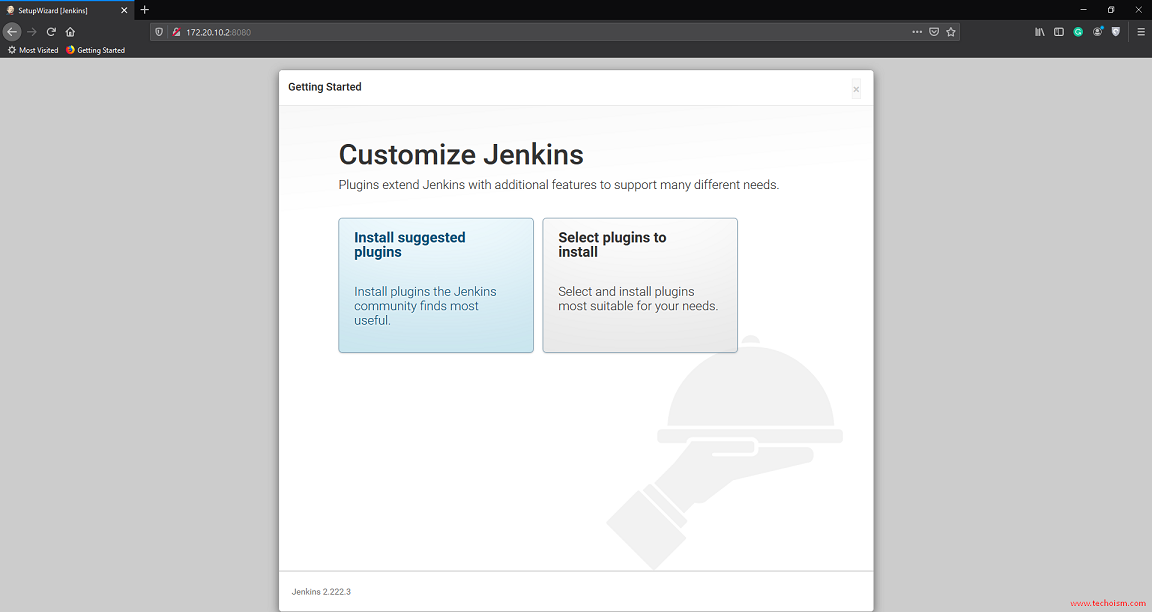
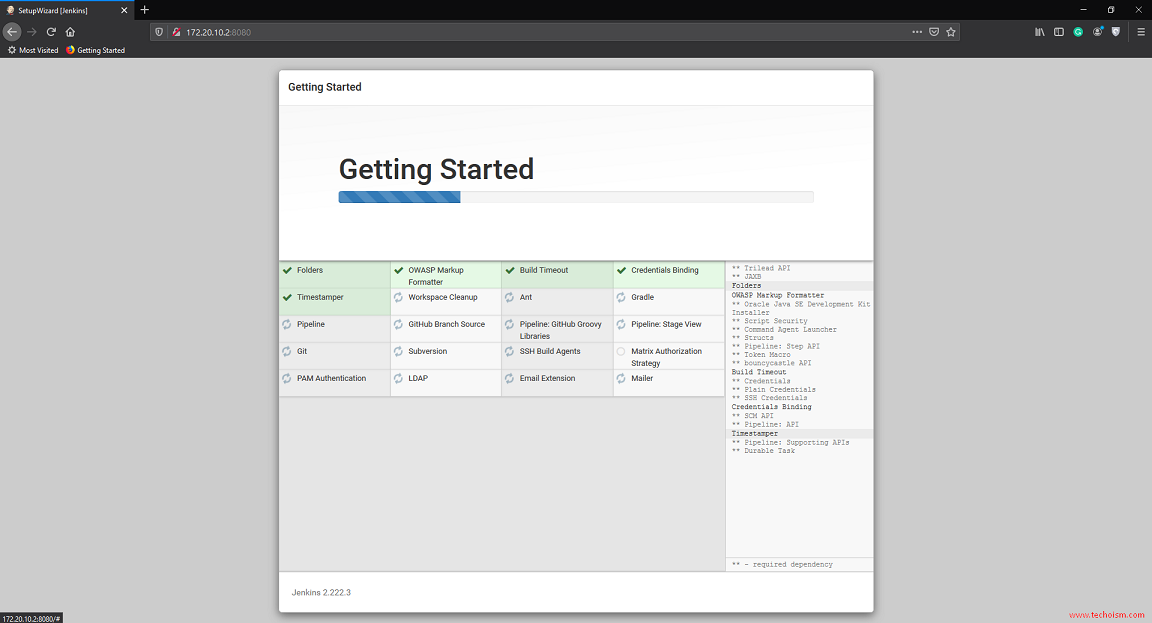
Now 2 options will be presented ‘Install using suggested plugins‘ or ‘Select plugins to install‘. For now, we are proceeding with the ‘Install using suggested plugins‘ option.
Installation of Jenkins plugins has been started. It will take couple of mins to completed the installation.
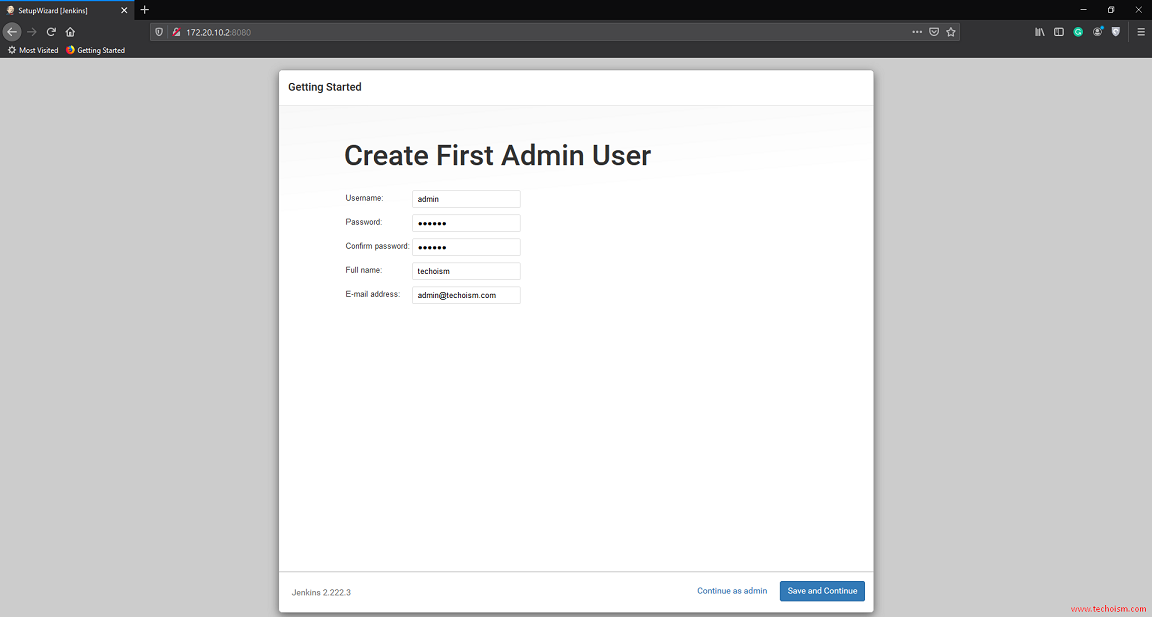
Create the Admin account for Jenkins Portal.
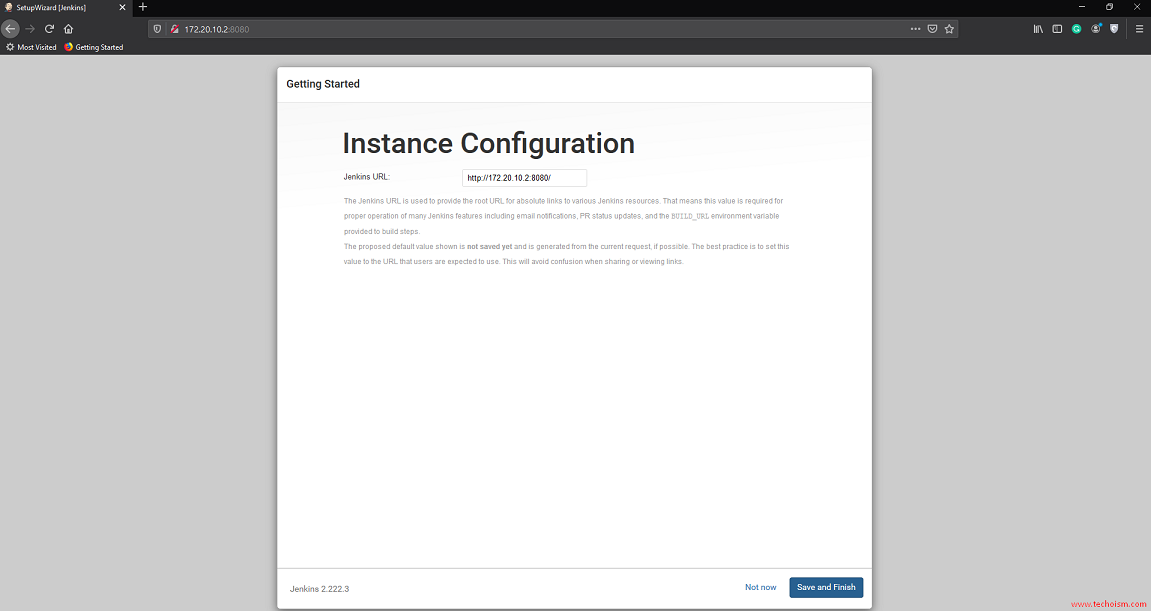
In ‘Instance Configuration‘ page, it will ask you to set the default URL for the Jenkins. Click on Save and Finish to proceed.
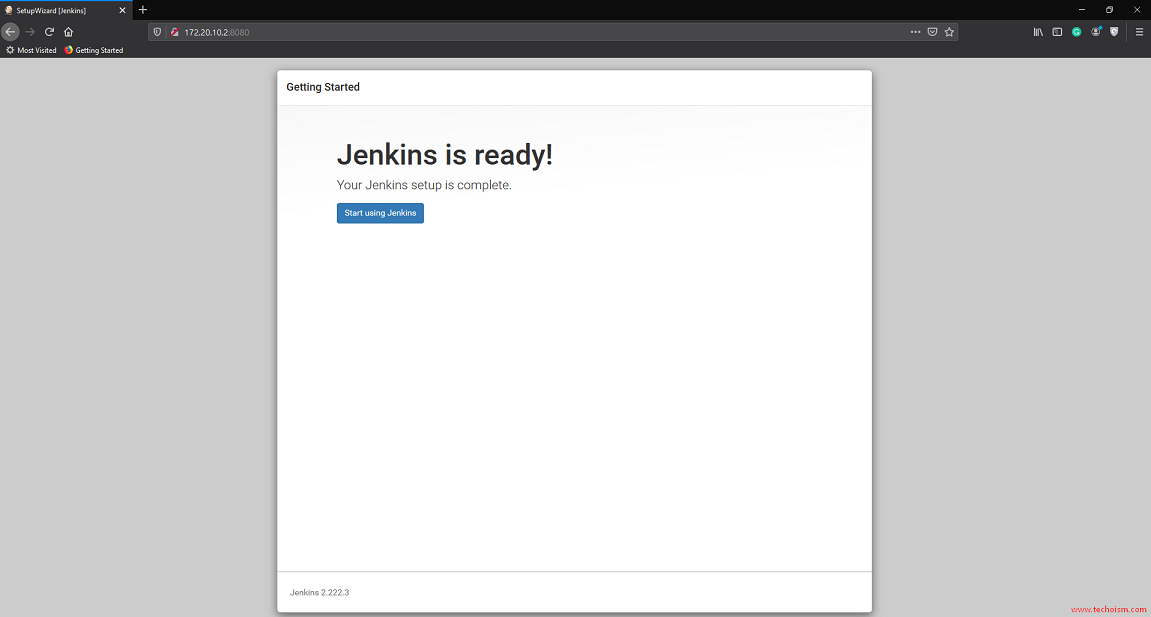
Jenkins installation has been completed successfully. Now, you can work on Jenkins by clicking on Start using Jenkins.
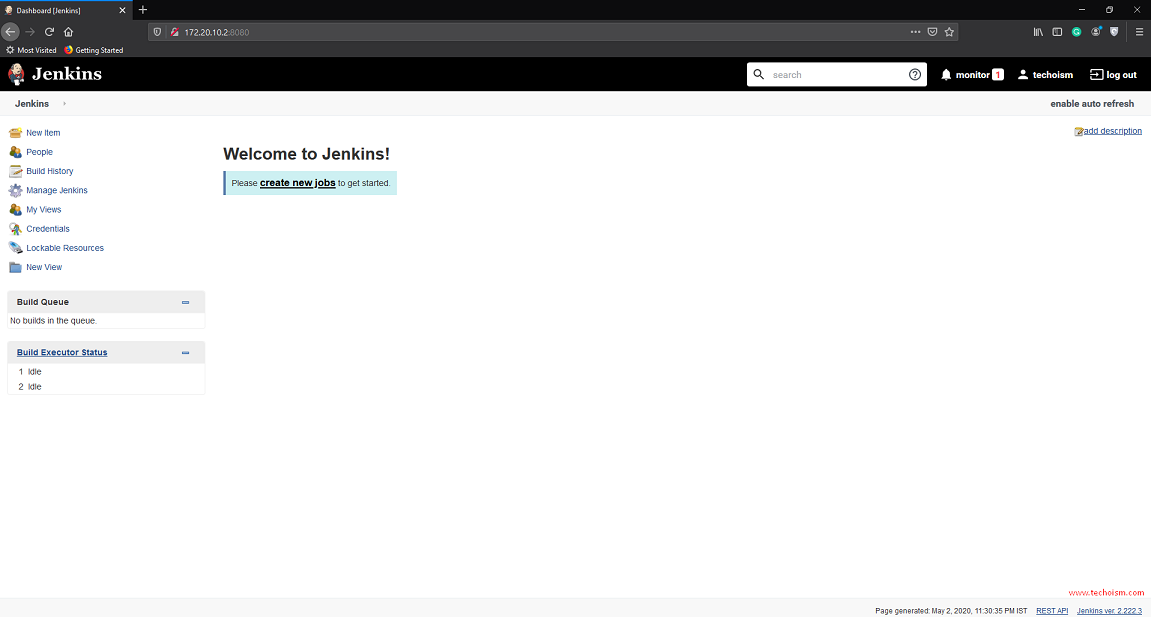
Jenkins’s dashboard is displayed below.
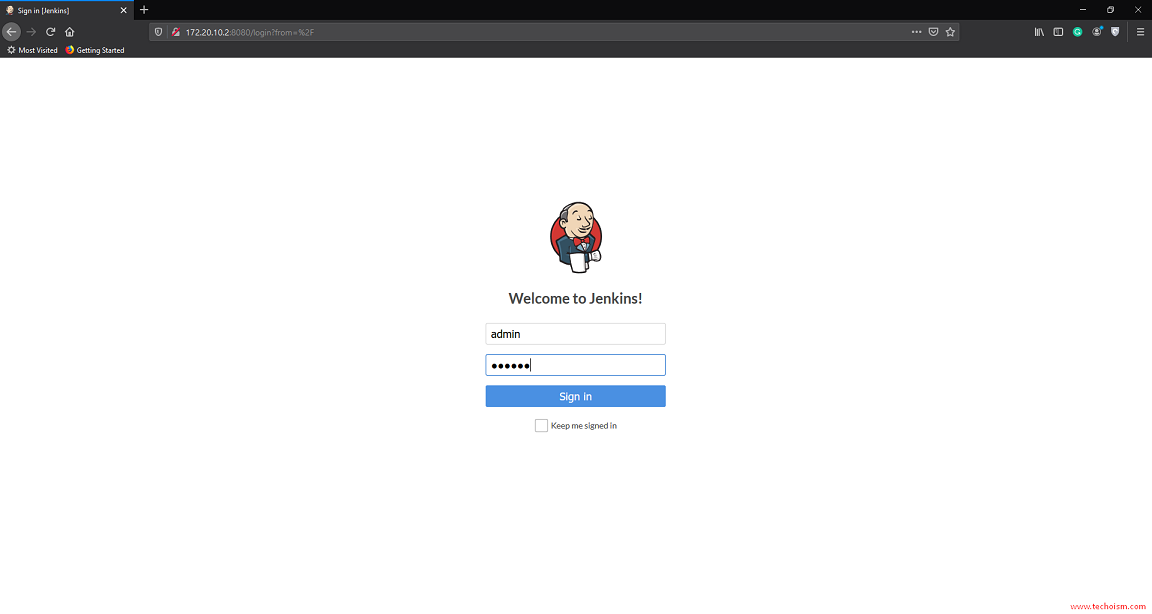
Step 6: Access Jenkins
Now you can access the Jenkins by simply providing Admin username and password.
Enjoy it!

Nice article…. Thanks.
Great article with valuable information found very resourceful and enjoyed reading it waiting for next blog updated thanks for sharing.