Install and Configure Ambari Server with MySQL in CentOS/RHEL 7/6
Apache Ambari is an open source administration tool deploy to manage Hadoop cluster and responsible to monitor running applications and their status. In other words, Apache Ambari is an open source web-based management tool that manages, monitors and provisions the health of Hadoop clusters. It provides a highly interactive dashboard which allows the administrators to visualize the progress and status of every application running over the Hadoop cluster. Its flexible and scalable user-interface permits a scope of tools, for example, Yarn, Hive, etc, to be installed on the cluster and administers their performances in an easy to use.

See Also:
- INSTALL MYSQL PASSWORD VALIDATION PLUGIN ON LINUX
- HOW TO CHANGE MYSQL PASSWORD POLICY LEVEL ON LINUX
- INSTALL LAMP (APACHE 2.4, MYSQL 5.6, AND PHP 7.0) ON UBUNTU USING PPA
- INSTALL LAMP (APACHE 2.4, MYSQL 5.6, AND PHP 7.0) ON CENTOS/RHEL 7
This article will help you to install and configure the Ambari Server in CentOS/RHEL.
Step 1: Prerequisites
Host File:
Before start installation of Apache Ambari add the system hostname in the host’s file.
127.0.0.1 srv.techoism.net srv
192.168.1.111 srv.techoism.net srv
Selinux:
Set secure Linux to permissive using selinux configuration file.
# vim /etc/sysconfig/selinx
Change the parameters.
SELINUX=permissive
Reboot the server or execute the mention command.
# setenforce Permissive
IPTables:
If on server Linux firewall is enabled, so you need to stop it and need to
For CentOS/RHEL 7
# systemctl stop firewalld
# systemctl disable firewalld
For CentOS/RHEL 6
# service iptables stop
# chkconfig iptables off
Step 2: Install and Start MySQL
MySQL is an open source relational database management system (RDBMS) based on Structured Query Language (SQL). Use-mention steps to install the MySQL.
# rpm -Uvh http://repo.mysql.com/mysql-community-release-el7-5.noarch.rpm
# yum install mysql-server
Now start MySQL service and enable to start on boot using below commands.
For CentOS/RHEL 7
# systemctl start mysqld.service
# systemctl enable mysqld.service
For CentOS/RHEL 6
# service mysqld start
# chkconfig mysqld on
Set MySQL Root Password
# mysql_secure_installation
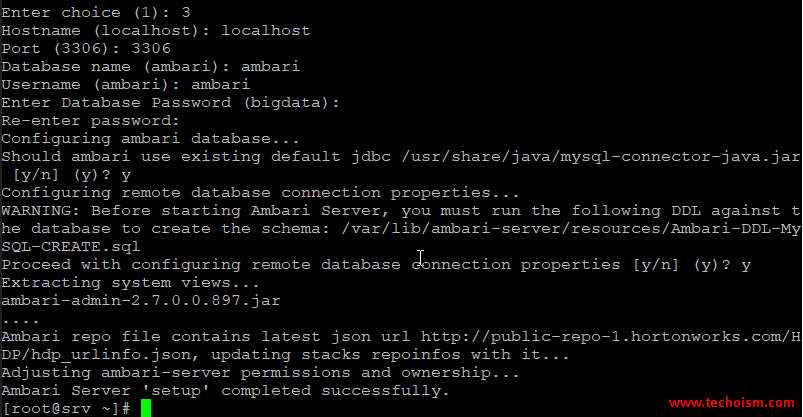
Step 3: Create MySQL Database and User
After installing MySQL database we need to create database and users. Use-mention steps you create the database and user.
# mysql -u root -p
mysql> create database ambari;
mysql> GRANT ALL ON ambari.* TO 'ambari'@'localhost' IDENTIFIED BY 'redhat';
mysql> FLUSH PRIVILEGES;
mysql> exit
Step 4: Install MySQL Java Connector
To connect MySQL with Apache Ambari we need to install the MySQL connector.
# yum install mysql-connector-java
Step 5: Add Ambari Repository
Apache Ambari repository provided by hortonworks. Run the following commands to download the repository.
# wget -nv http://public-repo-1.hortonworks.com/ambari/centos7/2.x/updates/2.5.2.0/ambari.repo -O /etc/yum.repos.d/ambari.repo
Step 6: Install Ambari Server
Install the Ambari bits. This also installs the default PostgreSQL Ambari database.
# yum install ambari-server
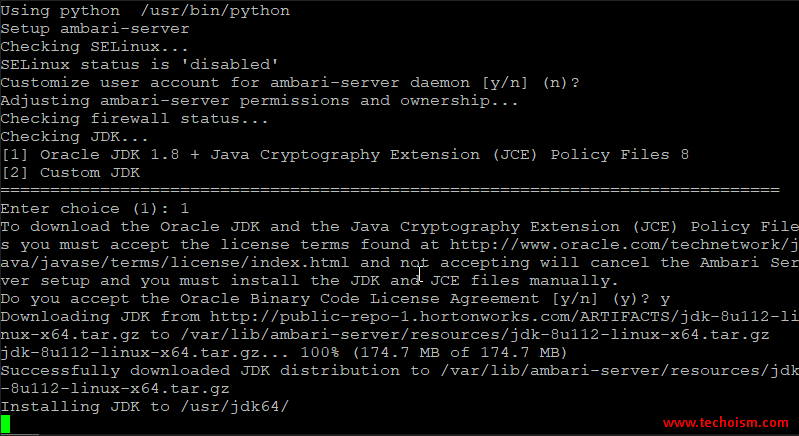
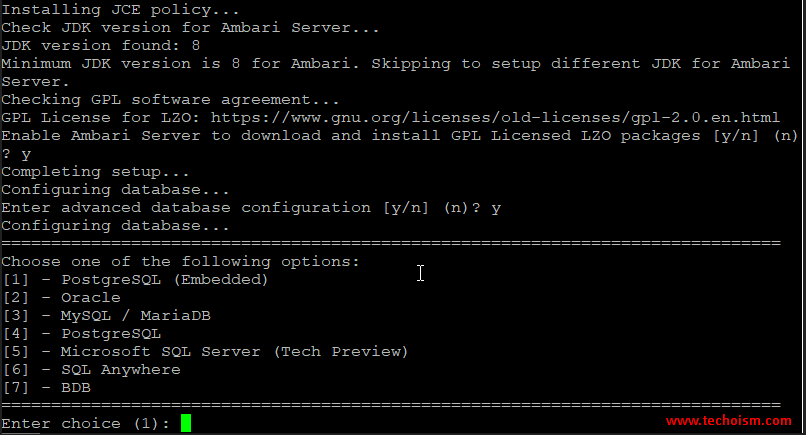
Step 7: Setup the Ambari Server
Before starting the Ambari Server, you must set up the Ambari Server. Setup configures Ambari to talk to the Ambari database, installs the JDK and allows you to customize the user account the Ambari Server daemon will run as. Execute the mentioned command and follow the instruction.
# ambari-server setup

Step 7: Import Metadata to Ambari Server Database
After Ambari server setup we need to import the metadata to the Ambari server database. Use-mention command to import metadata.
# mysql -u root -p ambari < /var/lib/ambari-server/resources/Ambari-DDL-MySQL-CREATE.sql
Note: Sometime while importing metadata you can get mention error.
ERROR 1709 (HY000) at line 113: Index column size too large. The maximum column size is 767 bytes.
Use mention steps to resolve the error.
# mysql -u root -p
mysql> SELECT schema_name,default_character_set_name FROM information_schema.SCHEMATA;
mysql> ALTER DATABASE ambari CHARACTER SET utf8 COLLATE utf8_general_ci;

Step 8: Start Ambari Service
Now you are good to start the Ambari server. You can use mention command to start the Ambari service.
# ambari-server start
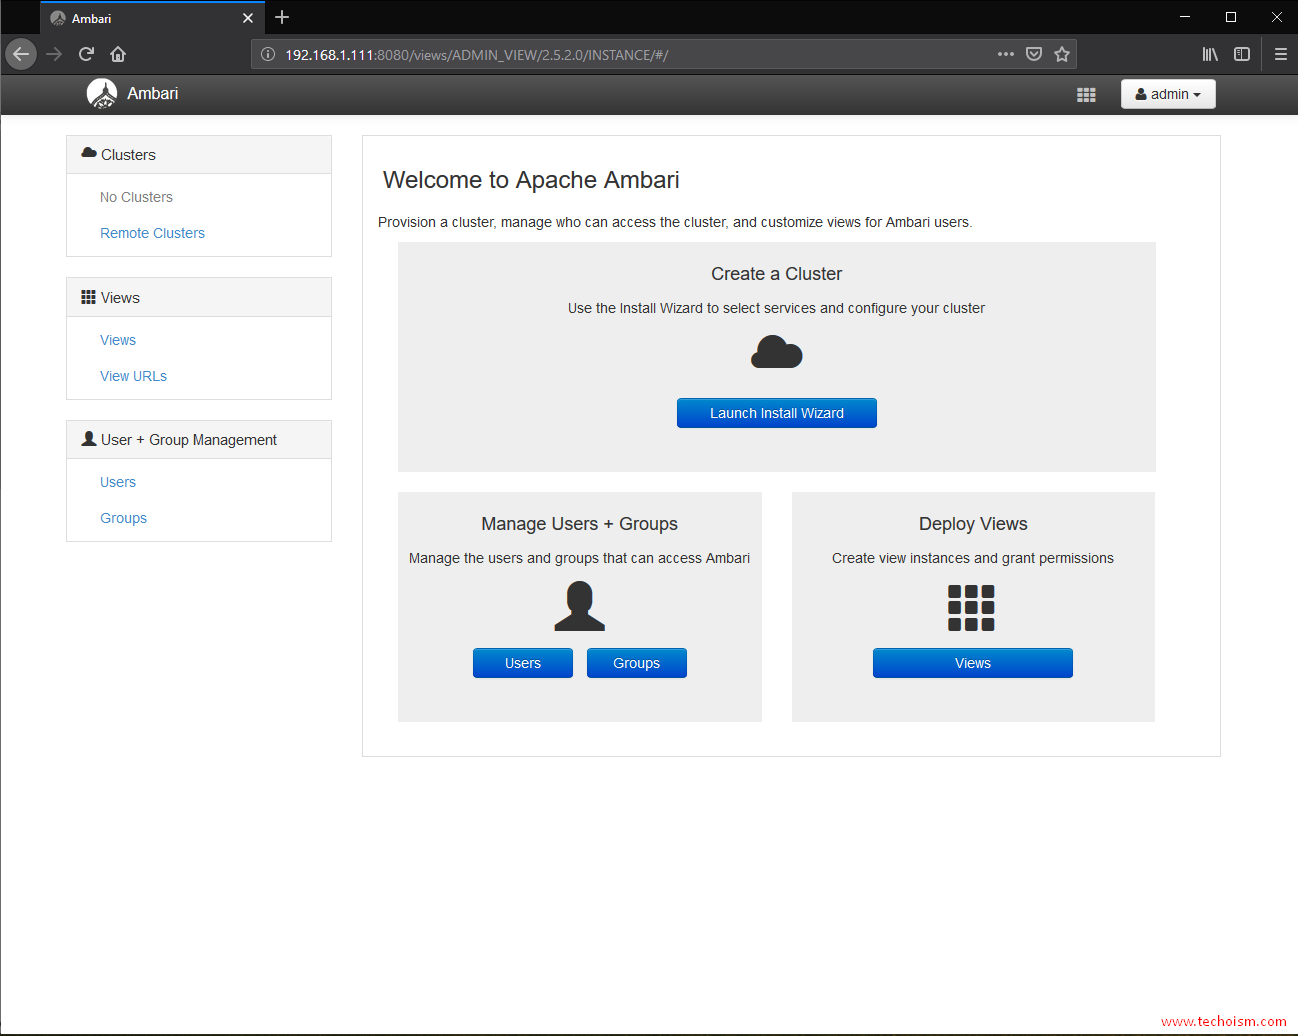
Step 9: Login the Ambari Server
You can access the Ambari Server using your
favorite browser.
http://hostname:8080
OR
http://IP-Address:8080
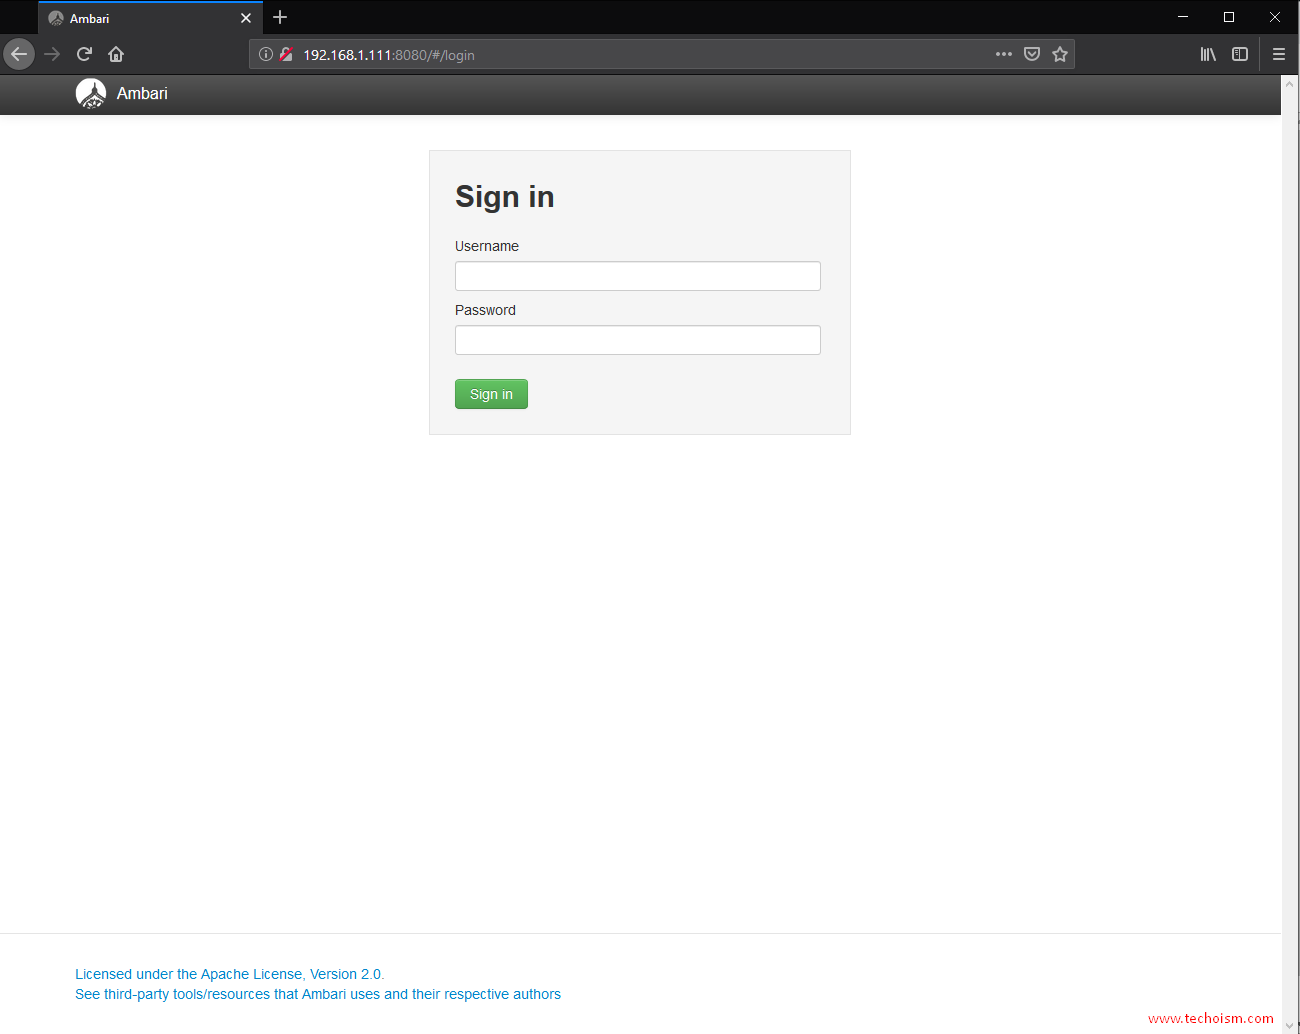
Default username and password is admin/admin.
Enjoy it!
