How to Install Vagrant on CentOS 7
Vagrant is an open source tool for creating virtual machine configuration and provisioning utility such as VirtualBox, VMWare, KVM etc. With the help of Vagrant, a project organizer can easily setup a unified code running environment for every team member. Vagrant runs on AWS, Docker, and VMware too. But I am going to use VirtualBox in this tutorial.

See Also:
1. Multiple Vagrant VMs in One Vagrantfile
2. How configure X11 Forwarding in CentOS/RHEL 6/7
3. How to Configure a Chroot Jail for SSH Access in Linux
This article will help you to built new VM in VirtualBox using Vagrant.
Step 1: Prerequisites
Before start installation of Vagrant we need to install VirtualBox because Vagrant use VirtualBox to install virtal machine. So first install VirtualBox on the server.
First install all the dependencies required for VirtualBox.
# yum -y install epel-release
# yum -y update
# yum -y install gcc dkms make qt libgomp patch
# yum -y install kernel-headers kernel-devel binutils glibc-headers glibc-devel font-forge
Now add the VirtualBox repository.
# cd /etc/yum.repos.d/
# wget http://download.virtualbox.org/virtualbox/rpm/rhel/virtualbox.repo
Install the VirtualBox using yum command.
# yum -y install VirtualBox-5.1
Finally build VirtualBox Kernal Module.
# /sbin/vboxconfig
vboxdrv.sh: Stopping VirtualBox services.
vboxdrv.sh: Building VirtualBox kernel modules.
vboxdrv.sh: Starting VirtualBox services.
Step 2: Install Vagrant
You need to download the Vagrant as per your system architecture. Right now 1.9.7 is the latest version of Vagrant. You can download the latest version of Vagrant from the official site.
Download the RPM file as per you system architechture.
For 64 Bit
# wget https://releases.hashicorp.com/vagrant/1.9.7/vagrant_1.9.7_x86_64.rpm
For 32 Bit
# wget https://releases.hashicorp.com/vagrant/1.9.7/vagrant_1.9.7_i686.rpm
Once downloaded complete, install the Vagrant using yum command.
For 64 Bit
# yum localinstall -y vagrant_1.9.7_x86_64.rpm
For 32 Bit
# yum localinstall -y vagrant_1.9.7_i686.rpm
Step 3: Create a Directory For Your Project
You can create a directory under your home directory to contain your project environment:
# cd /home
# mkdir development
Step 4: Install Operating System For Your Project
Now install the operating system for you project using below command.
# cd /home/development
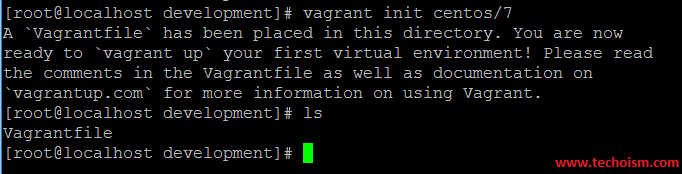
For CentOS
# vagrant init centos/7
For Ubuntu
# vagrant init ubuntu/xenial64
A Vagrant file will we created in the current working directory. This file contains all the configuration for Virtual Machine. The file name is Vagrantfile.
Sample Output:
Step 5: Manage and Configure Vagrant
If you want to built new operating system, then modify Vagrantfile file in your current directory.
# vim /home/development/Vagrantfile
Change the below setting.
config.vm.box = “ubuntu/xenial64”
You can also configure you private IP using Vagrantfile file.
Dev.vm.network "private_network", ip: "172.20.10.11"
Port forwarding using following changes.
Dev.vm.network "forwarded_port", guest: 80, host: 81
You can also define the vCPU and memory use by VirtualBox using following content.
Dev.vm.provider "virtualbox" do |v|
     v.memory = 512
     v.cpus = 2
Define the hostname.
Dev.vm.hostname = "dev.techoism.local"
After done with your modification run below command.
# vagrant up
Let’s wait for the operating system built completely. It will not take much time because everything depends on your internet speed.
You can check available pre-configured virtual machine from Vagrant office site.
Managing virtual server using following command.
# vagrant halt     [shutdown server]
# vagrant up       [start server]
# vagrant destroy  [delete server]
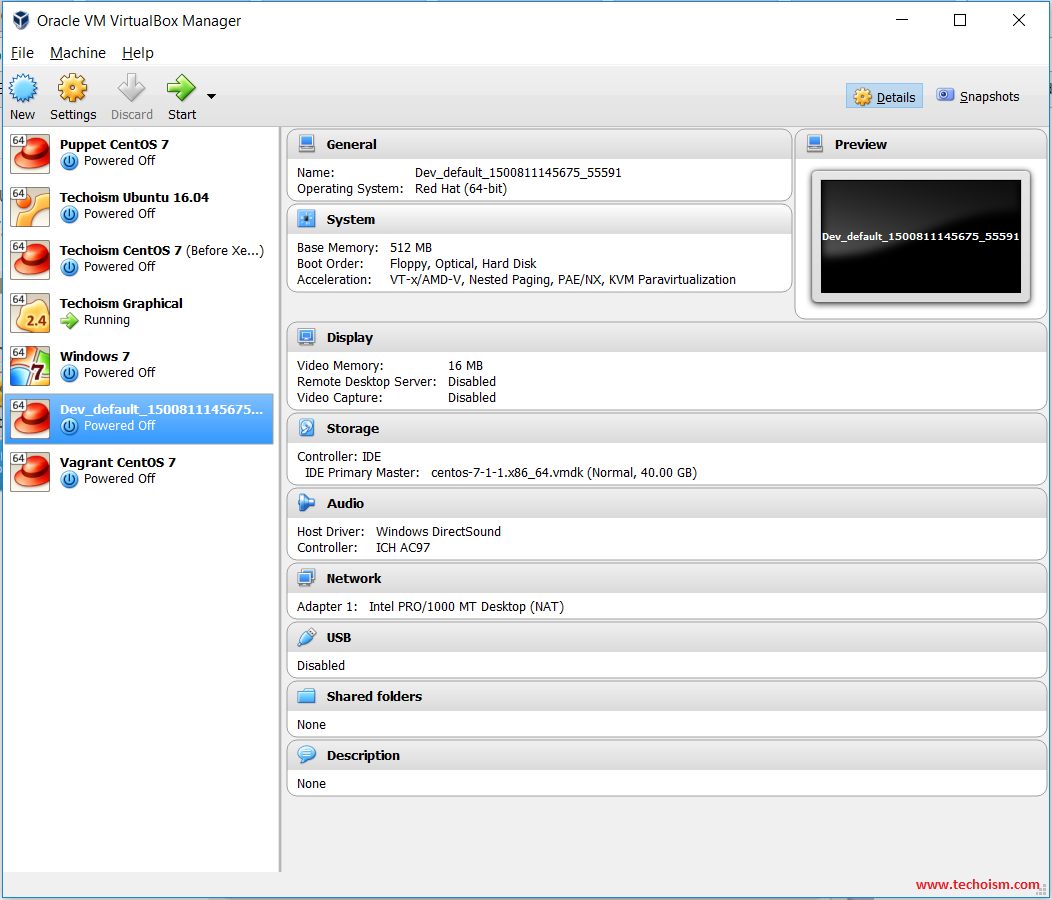
Launch Virtualbox to see a built VM.
Step 6: Log in Virtal Machine
You can login into the virtual machine using below command.
# vagrant ssh
Also If you are running Microsoft Windows, you need to use a third-party application in order to log in to the virtual machine. Here we are using putty application to access the machine. Download putty from putty official site.
HostName (or IP address): 127.0.0.1  OR 172.20.10.11
Port: 2222
Connection type: SSH
Enjoy it!
