How to Backup Linux Filesystem Using Clonezilla
Clonezilla is a free, disaster-recovery open source backup tool. Clonezilla helps us to take a clone of a single drive or a single partition within the drive and then recover it in future if required. You can also backup entire disks or individual partitions remotely (using SSH, Samba or NFS shares). If filesystem gets failed so you can easily restore the filesystem on the same system or into some other machine.

Filesystem clone is the process of copying data from a hard disk to another hard disk. If you copy & paste data manually then it won’t be able to copy the hidden files and folders. In this article, we will explain to you how to take a backup of a filesystem.
Limitations:
- The destination partition must be equal or larger than the source one.
- Incremental backup is not implemented yet.
- You can’t clone drive while the system is running because cloned can be taken when the filesystem is unmounted.
- Recovery Clonezilla live with multiple CDs or DVDs is not implemented yet.
Download Clonezilla ISO
First, we need to download the Clonezilla iso before starting the backup of a filesystem. Make sure you download a stable version of this tool.
http://clonezilla.org/downloads.php
Steps for Cloning Filesystem
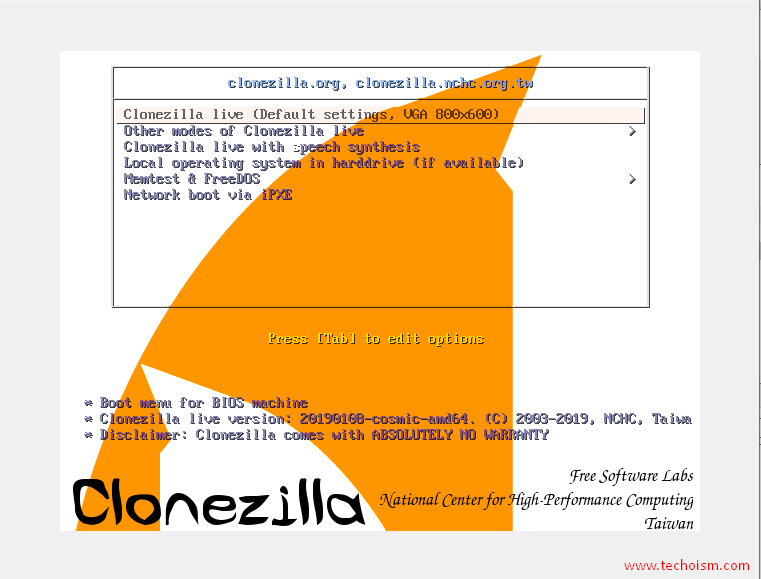
Now insert your Clonezilla iso and reboot the system. You have to boot your machine from the Clonezilla iso and you will get the following screen select default option Clonezilla live.
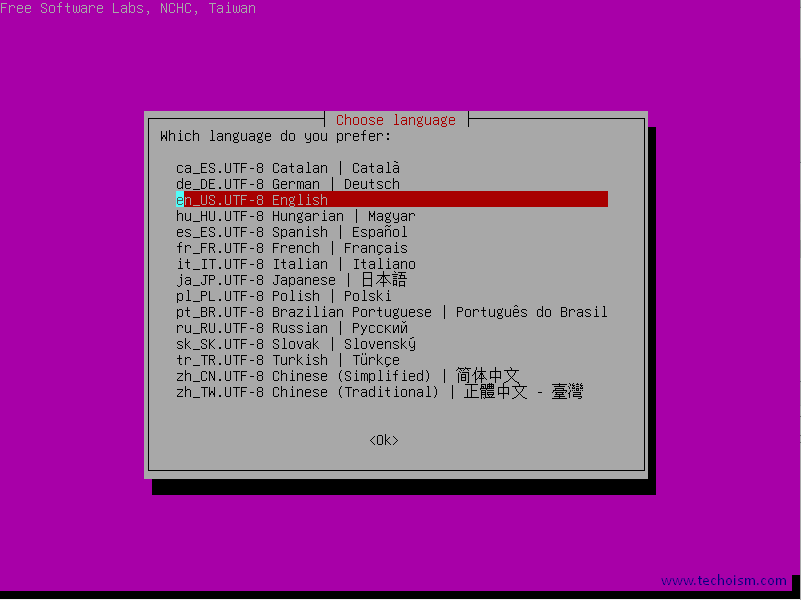
Now you need to select the language you want to use for the process.
If you want to change the default keyboard configuration then you can change it and click “Ok”

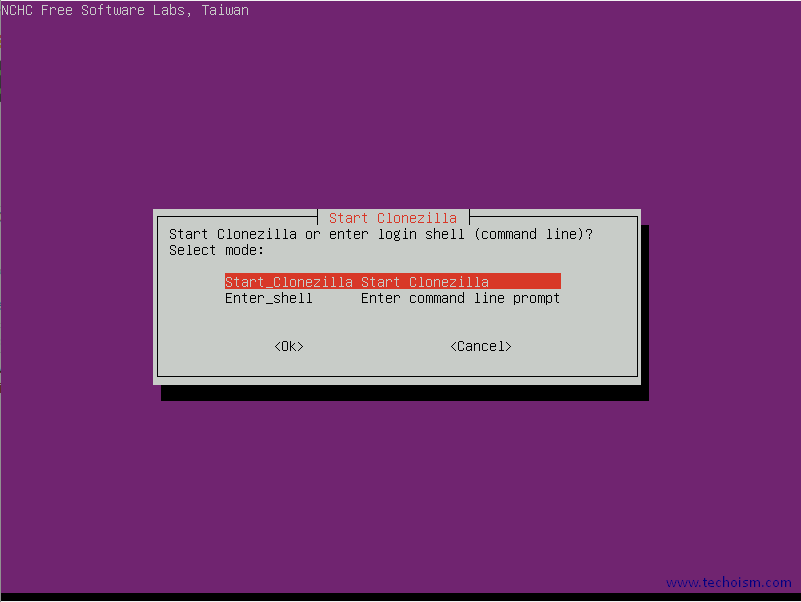
Now choose Start Clonezilla in order to enter Clonezilla interactive console.
Also, make sure that the new hard-dive plugged-in into your machine and properly detected by your machine also If you want to take backup remotely then you have information on the remote machine.
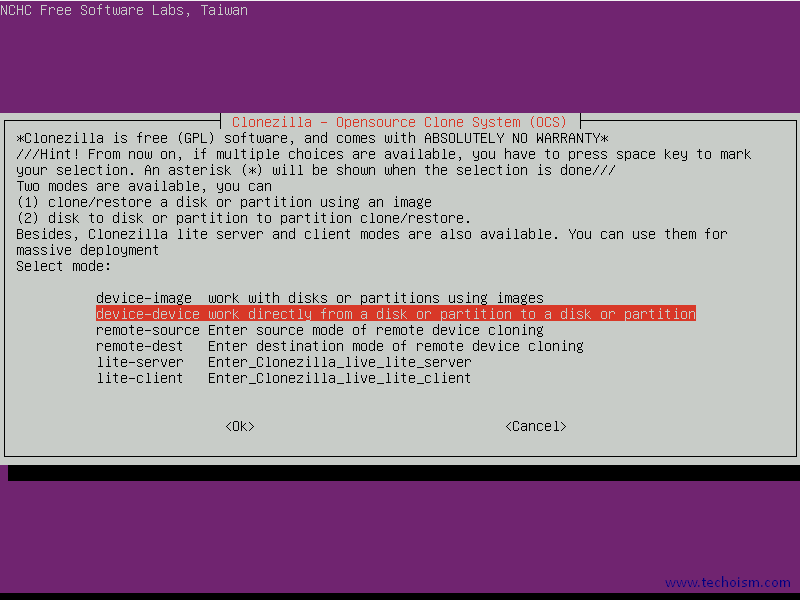
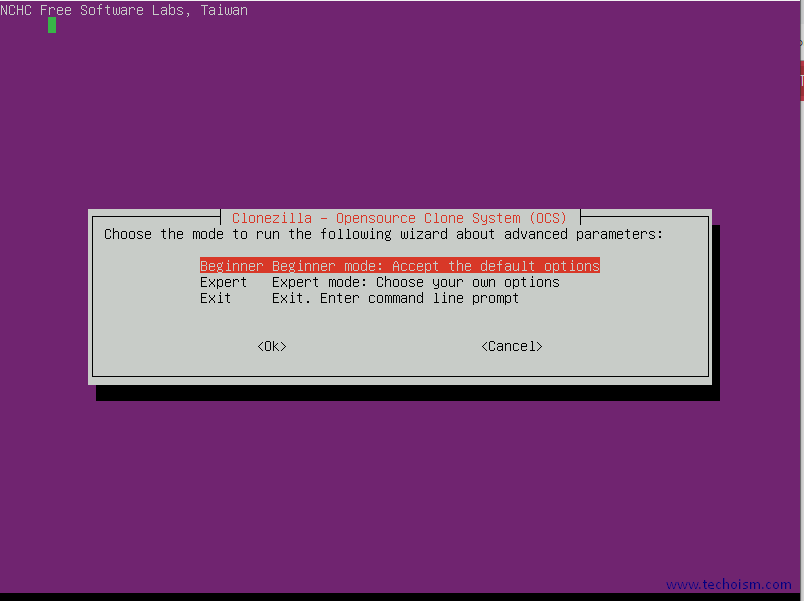
Now choose mode and press Enter key to move to the next screen. If the new hard disk is larger than old one then choose Expert mode else to choose Beginner Mode.
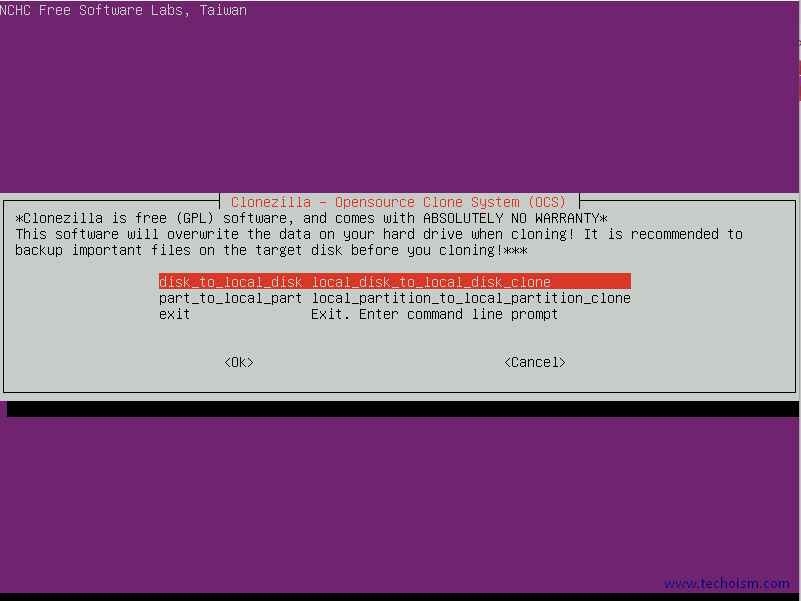
Now choose disk_to_local_disk option If you are copying to local drive and press Enter to continue.
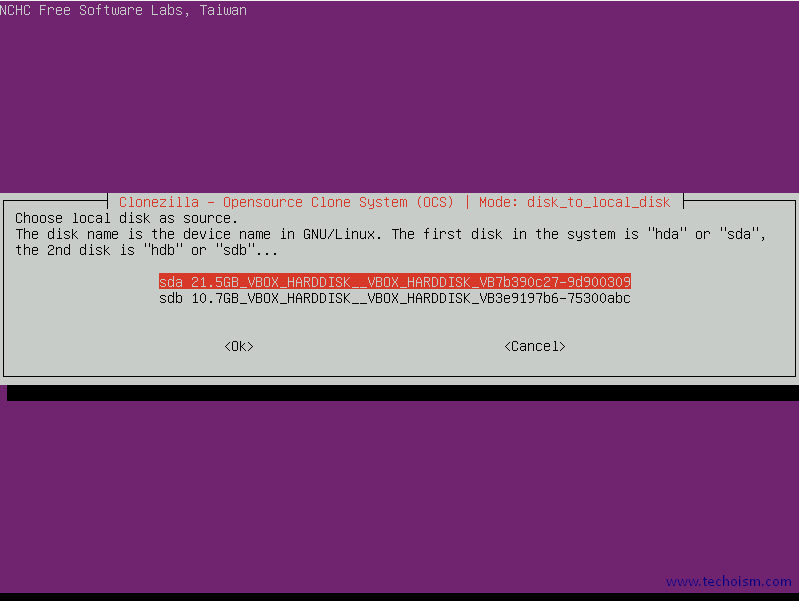
Choose the source disk you are planning to clone. Here source disk is sda.
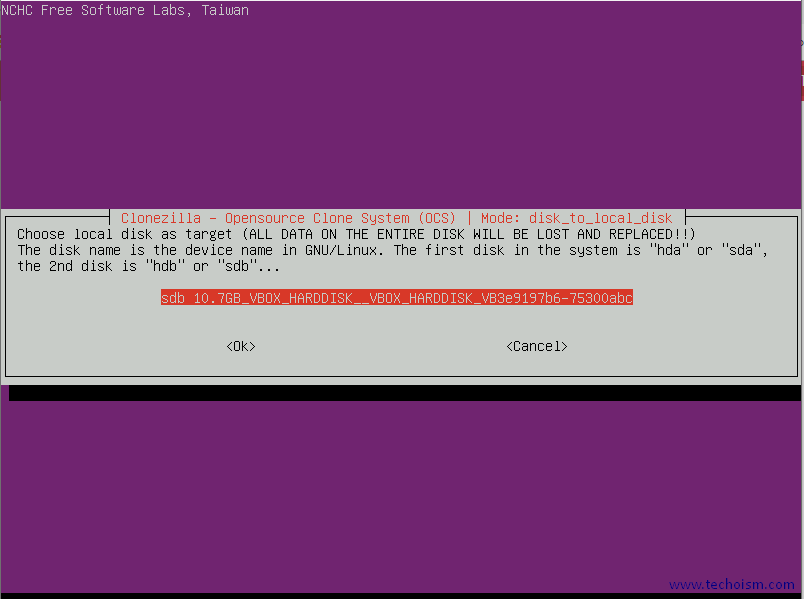
Next, choose the destination disk where you want to take the clone. Here destination disk is sdb.
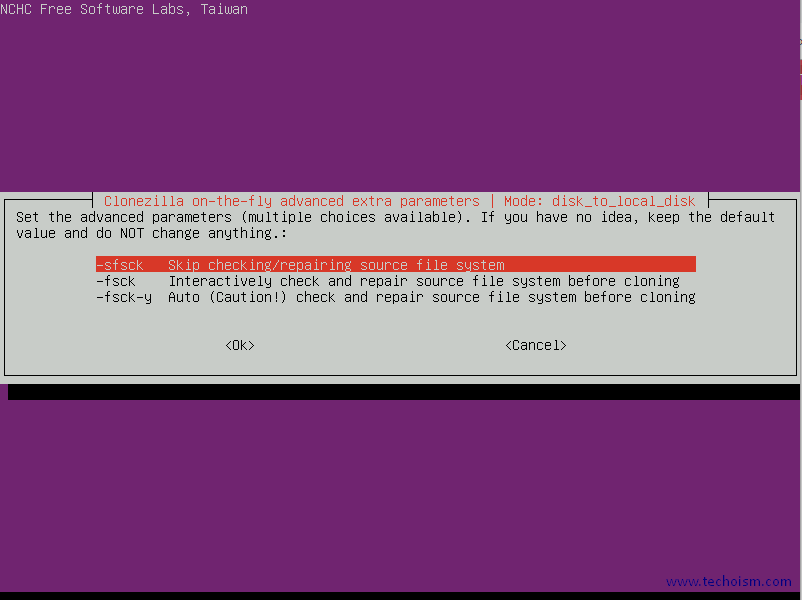
Set the advance parameters and If you have an idea, keep the default value and don’t change anything.
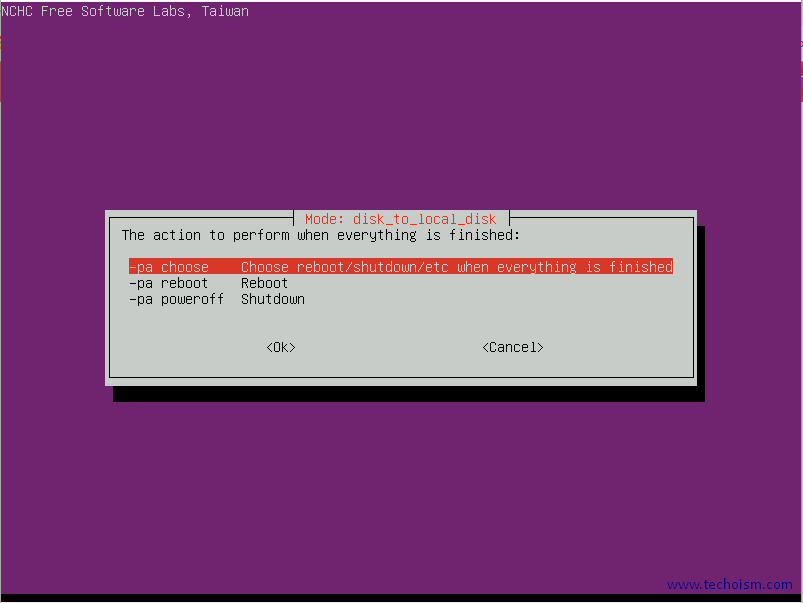
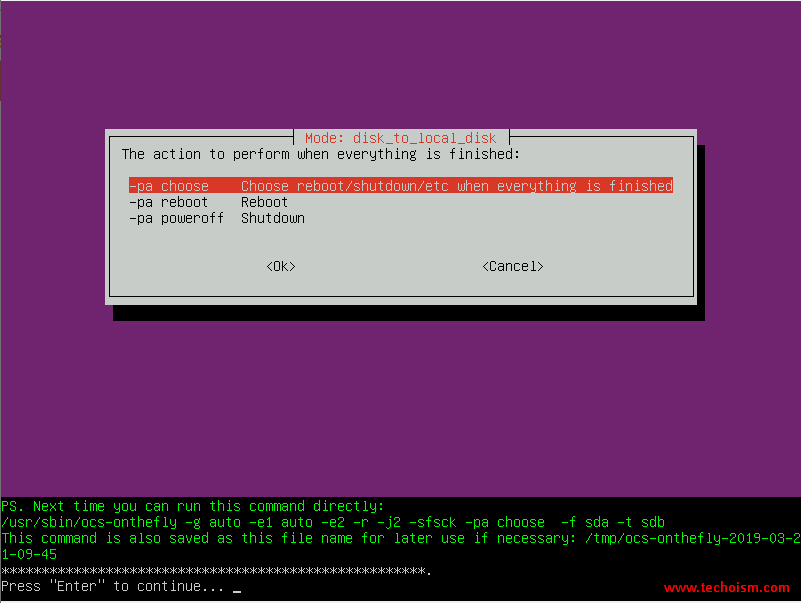
This action to perform when everything is finished.
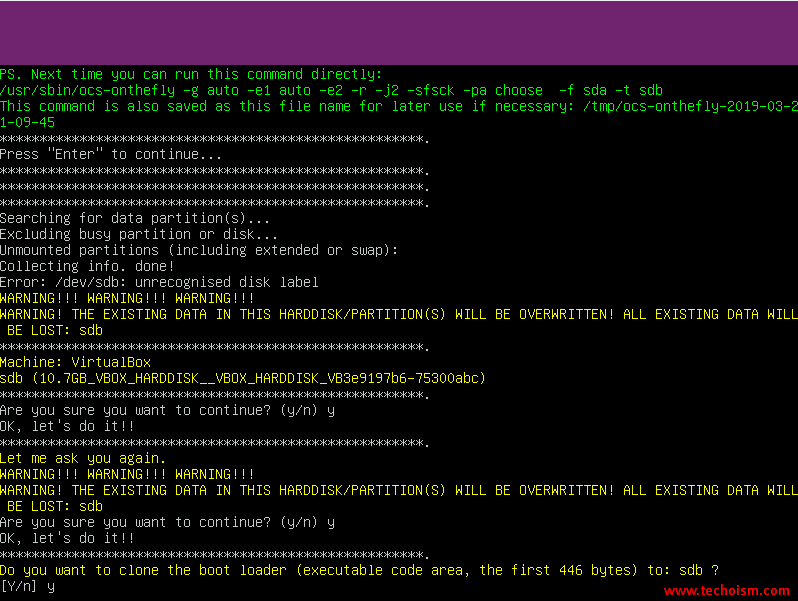
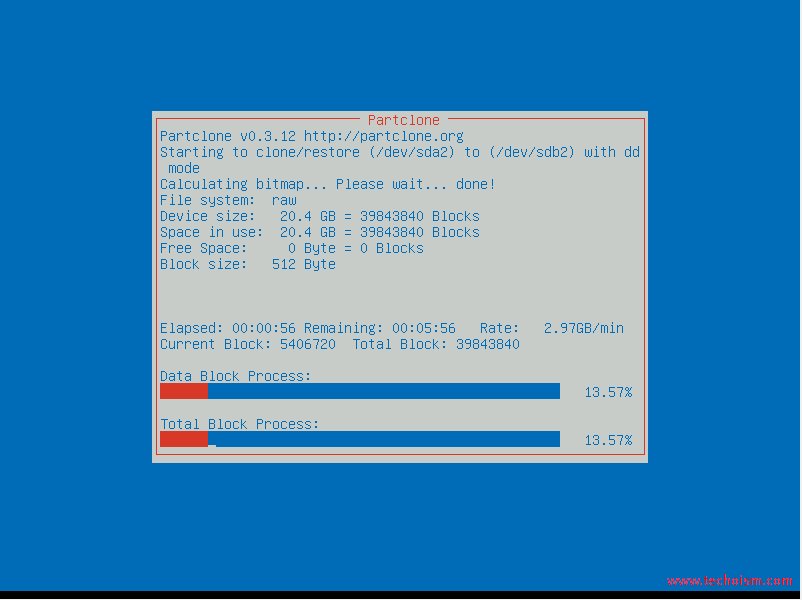
Clonezilla shows you the complete command which runs to take the close of a drive. Press Enter to continue.
Before doing the real cloning, Clonezilla will ask confirmation.
First, it creates the partition layout in the target Disk and then Clonezilla starts cloning the data from source disk to the target disk.
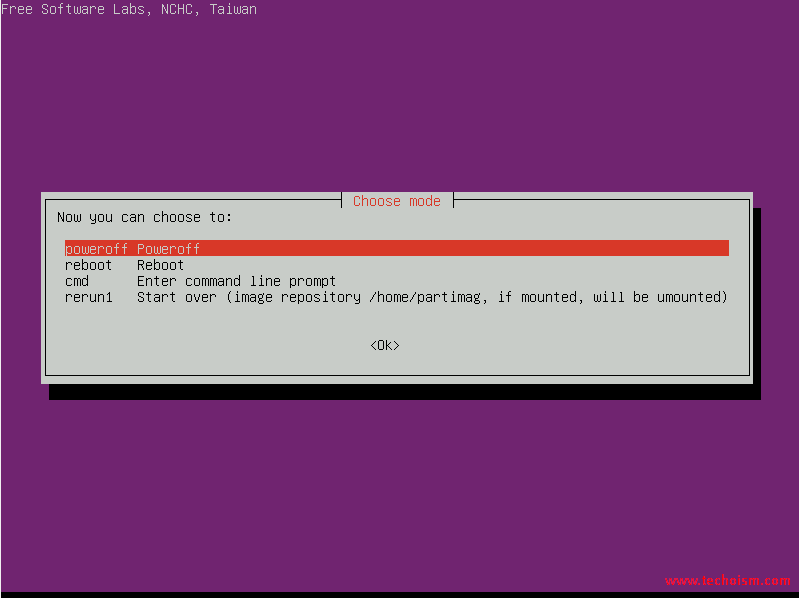
Now choose Poweroff or Reboot
Now the Source Disk has been Cloned to Target Disk successfully and target disk is ready to use.
Enjoy it!
