How to Install CodeIgniter on Ubuntu 18.04
CodeIgniter is an Open-Source and powerful PHP framework. It is used to develop web applications which are very small but very powerful. CodeIgniter’s helps people to write their own applications which is much faster and easier by providing useful libraries.

This tutorial will help you to install CodeIgniter on Ubuntu 18.04 Bionic system.
Step 1: Prerequisites
CodeIgniter framework required PHP, MySQL and Apache/Nginx on the system. Use one the following tutorial to install LAMP server on your system.
Step 2: Download and Extract CodeIgniter
Now,
# cd /var/www/html
# wget https://github.com/bcit-ci/CodeIgniter/archive/3.1.9.zip
Extract the archive file and place in document root.
# unzio 3.1.9.zip
# mv CodeIgniter-3.1.9/ codeigniter
Step 3: Create a Database
Now connect MySQL with root and create the database for CodeIgniter.
# mysql -u root -p
mysql> create database codeigniter;
mysql> GRANT ALL ON codeigniter.* TO 'codeigniter'@'localhost' IDENTIFIED BY 'redhat';
mysql> FLUSH PRIVILEGES;
mysql> quit
Step 4: Configure CodeIgniter
After creating the database, edit database configuration file and update the database setting.
# vim /var/www/html/codeigniter/config/database.php
$db['default'] = array(
         'dsn'   => '',
         'hostname' => 'localhost',
         'username' => 'codeigniter',
         'password' => 'redhat',
         'database' => 'codeigniter',
         'dbdriver' => 'mysqli',
         'dbprefix' => '',
         'pconnect' => FALSE,
         'db_debug' => (ENVIRONMENT !== 'production'),
         'cache_on' => FALSE,
         'cachedir' => '',
         'char_set' => 'utf8',
         'dbcollat' => 'utf8_general_ci',
         'swap_pre' => '',
         'encrypt' => FALSE,
         'compress' => FALSE,
         'stricton' => FALSE,
         'failover' => array(),
         'save_queries' => TRUE
 );
Now configure the base URL for your application.
# vim /var/www/html/codeigniter/config/config.php
update base_url with your domain name:
$config['base_url'] = 'http://srv.techoism.net';
Step 5: Configure Apache
As we are using Apache, so create apache virtual host for your CodeIgniter.
# vim /etc/apache2/sites-available/codeigniter.conf
<VirtualHost *:80>
   ServerAdmin dennis.r@techoism.com
   DocumentRoot /var/www/html/codeigniter
   ServerName codeigniter.techoism.net
   ErrorLog ${APACHE_LOG_DIR}/error.log
   CustomLog ${APACHE_LOG_DIR}/access.log combined
<Directory "/var/www/html/codeigniter">
   Options Indexes FollowSymLinks
   AllowOverride All Order allow,deny
   Allow from all Require all granted
</Directory>
</VirtualHost>
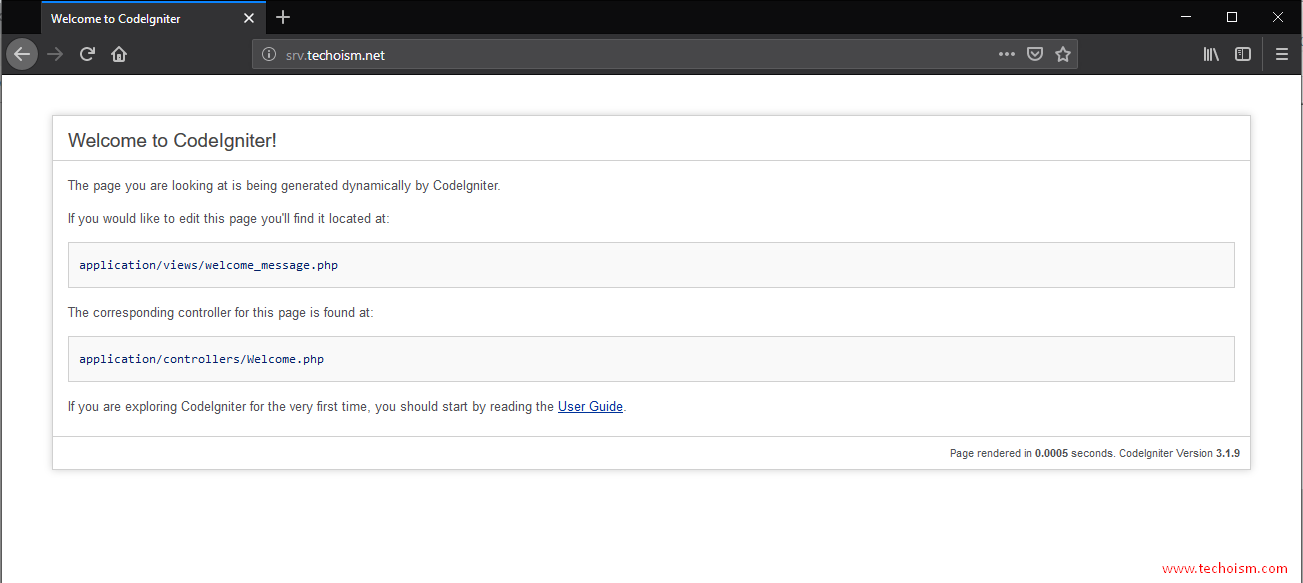
Step 6: Access CodeIgniter
You have successfully setup CodeIgniter. Now you can access CodeIgniter application in your browser and start developing from CodeIgniter.
# http://srv.techoism.net
Enjoy it!
