How to Install Zabbix Server 3.0 on Ubuntu 14.04
Zabbix is an open source software for monitoring availability and performance. Zabbix comes at no cost. Zabbix offers great performance for data gathering and can be scaled to very large environments. It can be used to keep track of multiple physical or virtual private server instances. Web monitoring as well as monitoring of WMware virtual machines is possible with Zabbix. Click here to know more about zabbix.
![]()
This article will help you install Zabbix on Ubuntu Systems.
Step #1 Prerequisites
Before installing Zabbix, we should have install and configure LAMP stack on server. Use below command to install these services If it’s not installed.
# sudo apt-get update
# sudo apt-get install apache2
# sudo apt-get install mysql-server
# sudo apt-get install php5 php5-cli php5-common php5-mysql
Step #2 Update Timezone in PHP Configuration
In this step, we will update timezone in php configuration file.
#sudo vim /etc/php5/apache2/php.ini
;[Date]
date.timezone = 'Asia/Kolkata'
Step #3 Adding Apt Repository
Before installing Zabbix first install the zabbix repository in our system, use following commands to install the zabbix repository.
# wget http://repo.zabbix.com/zabbix/3.0/ubuntu/pool/main/z/zabbix-release/zabbix-release_3.0-1+trusty_all.deb
# sudo dpkg -i zabbix-release_3.0-1+trusty_all.deb
# sudo apt-get update
Step #4 Install Zabbix Server
After adding zabbix apt repository in your system use following command to install Zabbix using mysql database.
# sudo apt-get install zabbix-server-mysql zabbix-frontend-php
Step #5 Create Database Schema
Now create a database for zabbix server. Use following commands to create mysql database and user for your zabbix server.
# mysql -u root -p
mysql> CREATE DATABASE zabbixdb;
mysql> GRANT ALL on zabbixdb.* to zabbix@localhost IDENTIFIED BY 'secretpassword';
mysql> FLUSH PRIVILEGES;
mysql> quit
Now import zabbix database schema in newly created database
# cd /usr/share/doc/zabbix-server-mysql
# gunzip create.sql.gz
# mysql -u root -p zabbixdb < create.sql
Step #6 Edit Zabbix Configuration File
Now edit zabbix server configuration file and update following entries.
# vim /etc/zabbix/zabbix_server.conf
  DBHost=localhost
  DBName=zabbixdb
  DBUser=zabbix
  DBPassword=secretpassword
Step #7 Restart Apache and Zabbix
Use following command to restart Apache service.
# sudo service apache2 restart
Use following command to restart Zabbix service.
# sudo service zabbix-server restart
After starting zabbix service, let’s go to zabbix web installer and finish the installation.
Step #8 Zabbix Web Installer
Zabbix web installer can be access using following url.
http://server.techoism.com/zabbix/
Now follow the steps as per given instructions.
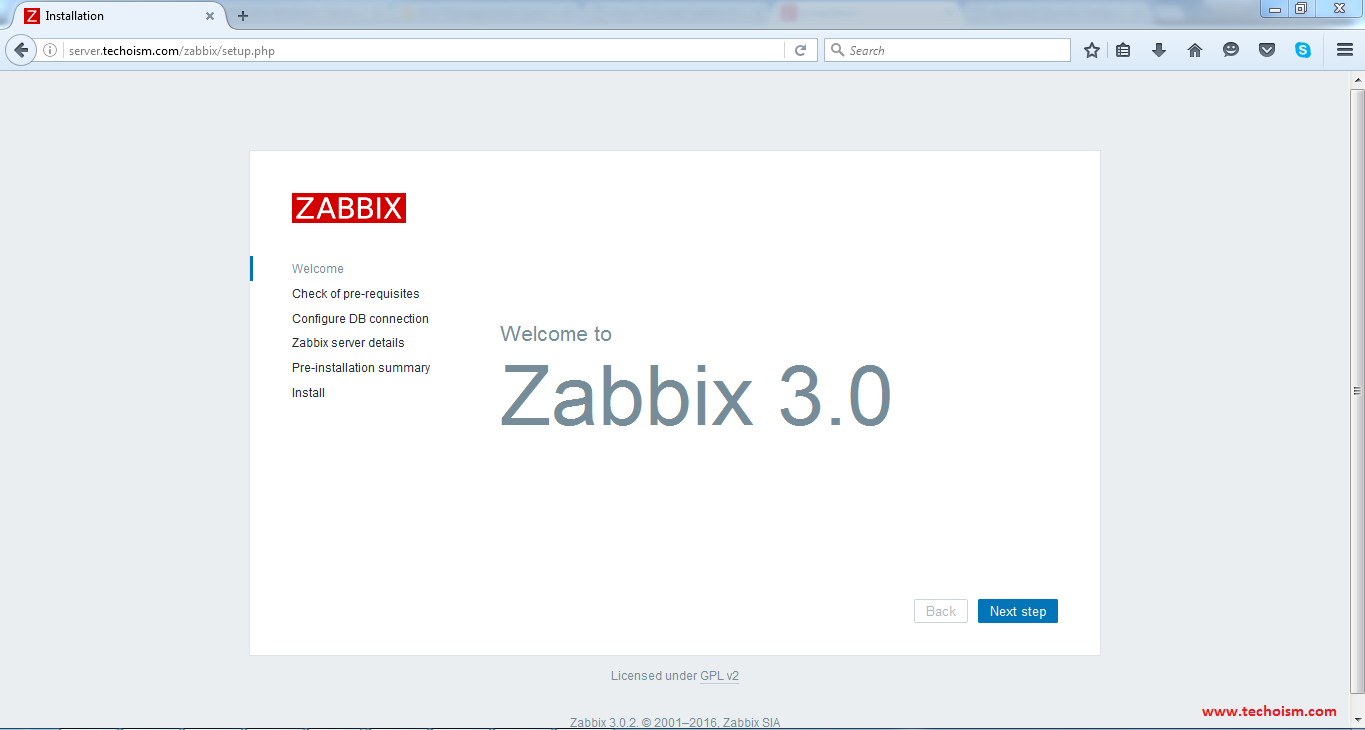
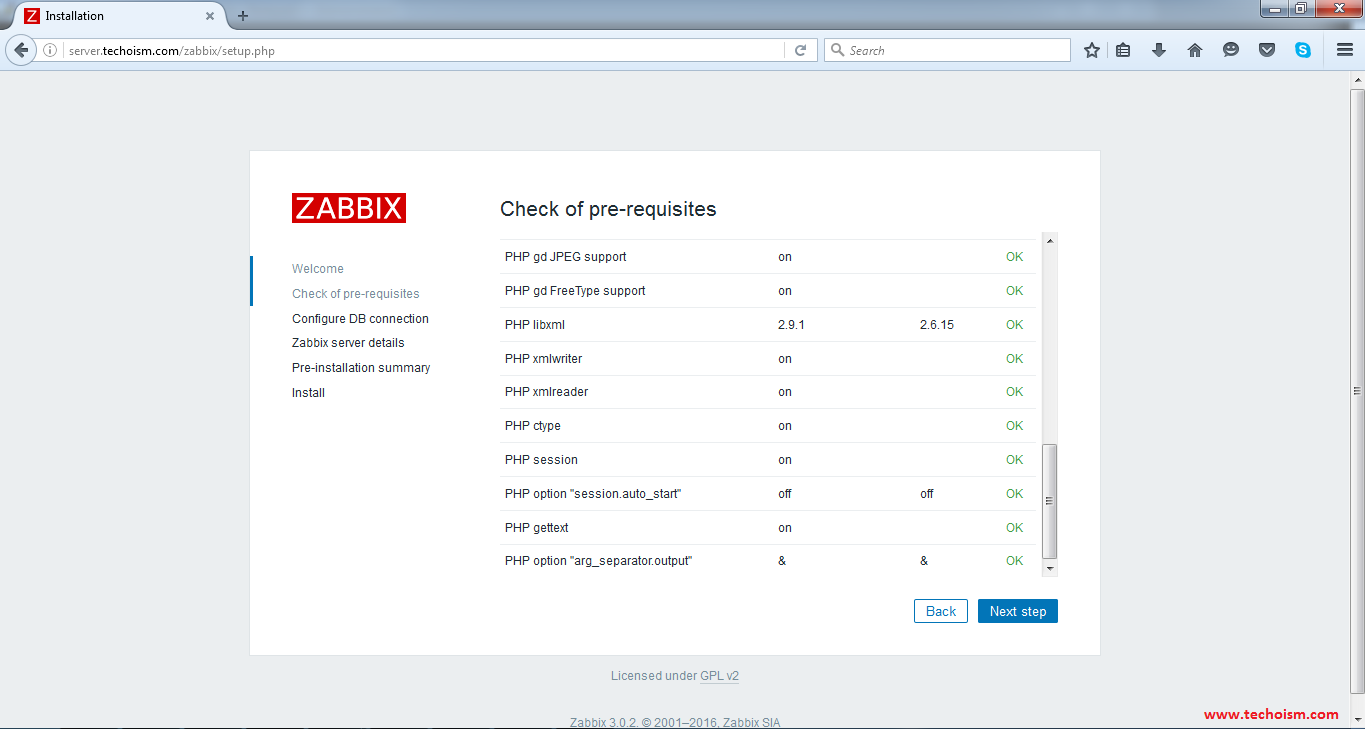
Check if your system have all required packages, if everything is ok click "Next step".
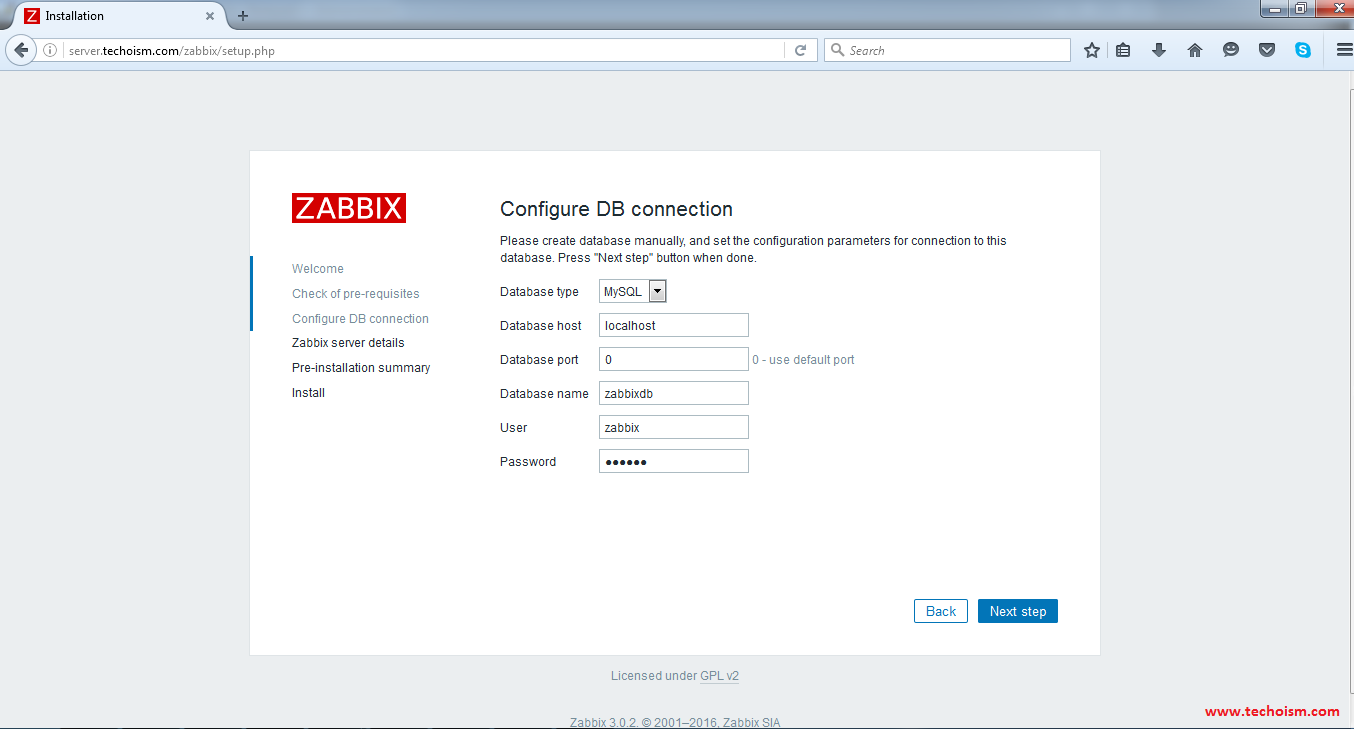
Enter database details and click Test Connection. If database connection is correct, it will show ok message. After that click "Next step".
Now enter Zabbix Server Details and click next.

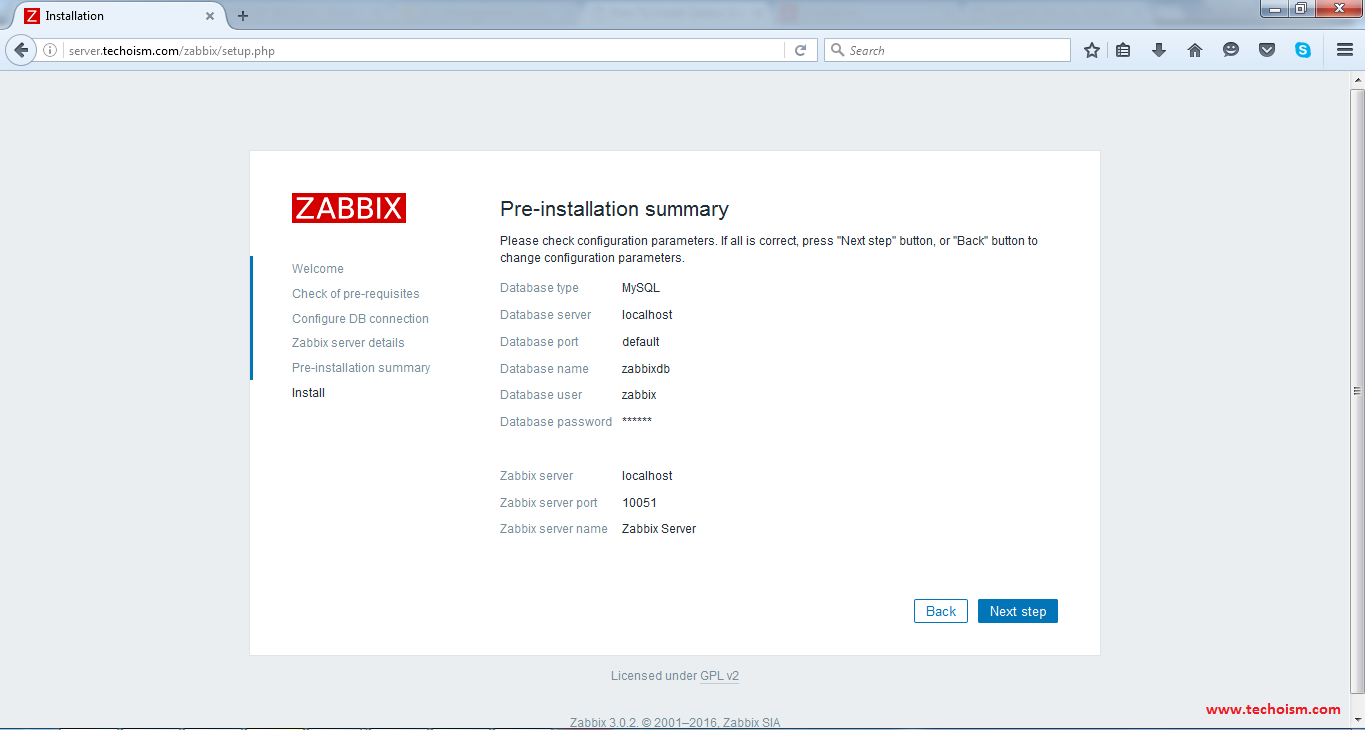
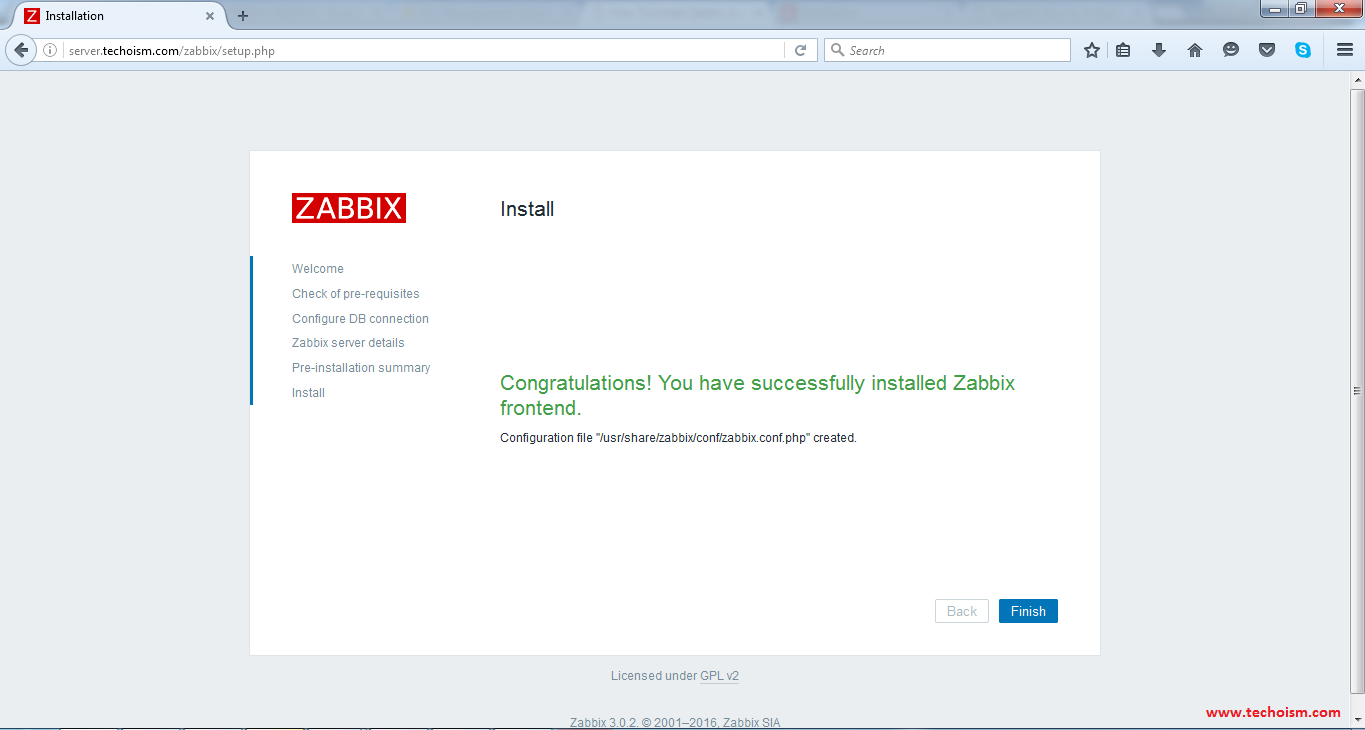
Please check configuration parameters, If all is correct press "Next step"
You have successfully installed zabbix.
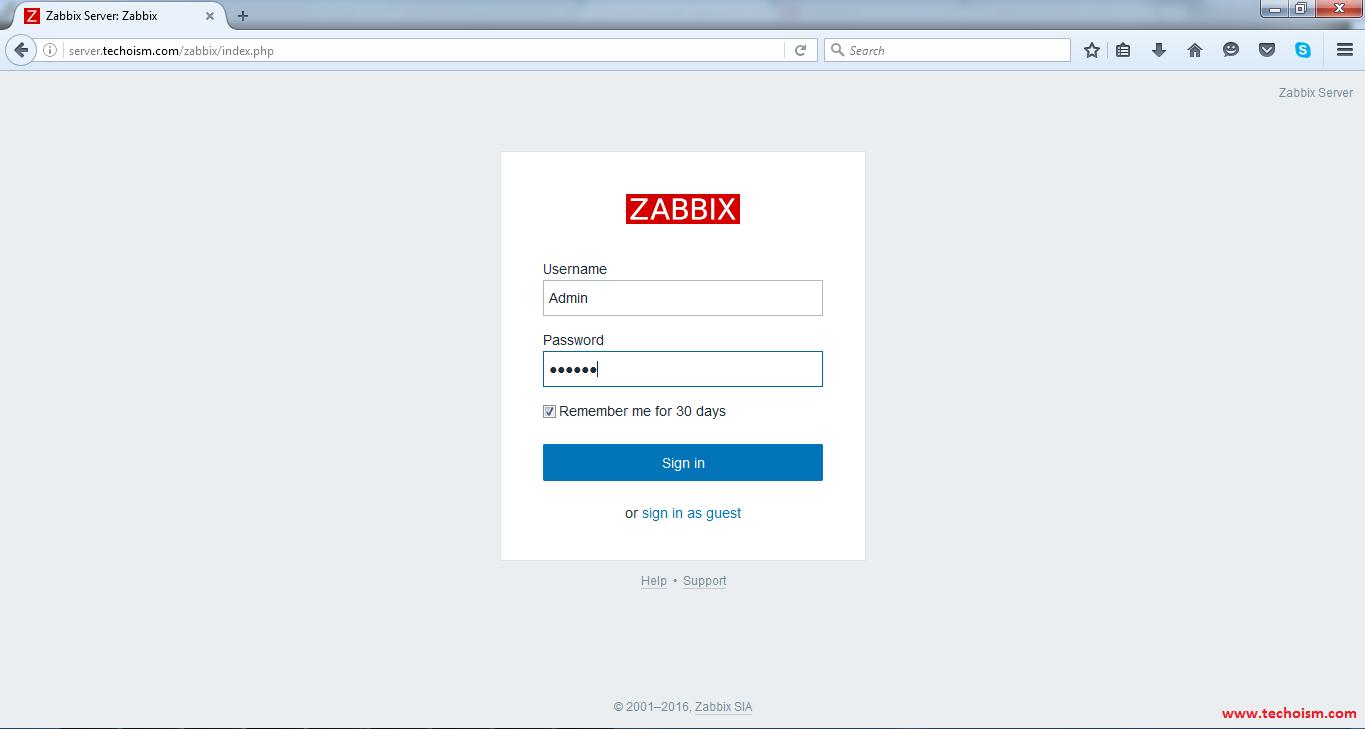
Zabbix Login Screen
Login to Zabbix using below default credentials.
   Username:  admin
   Password:  zabbix
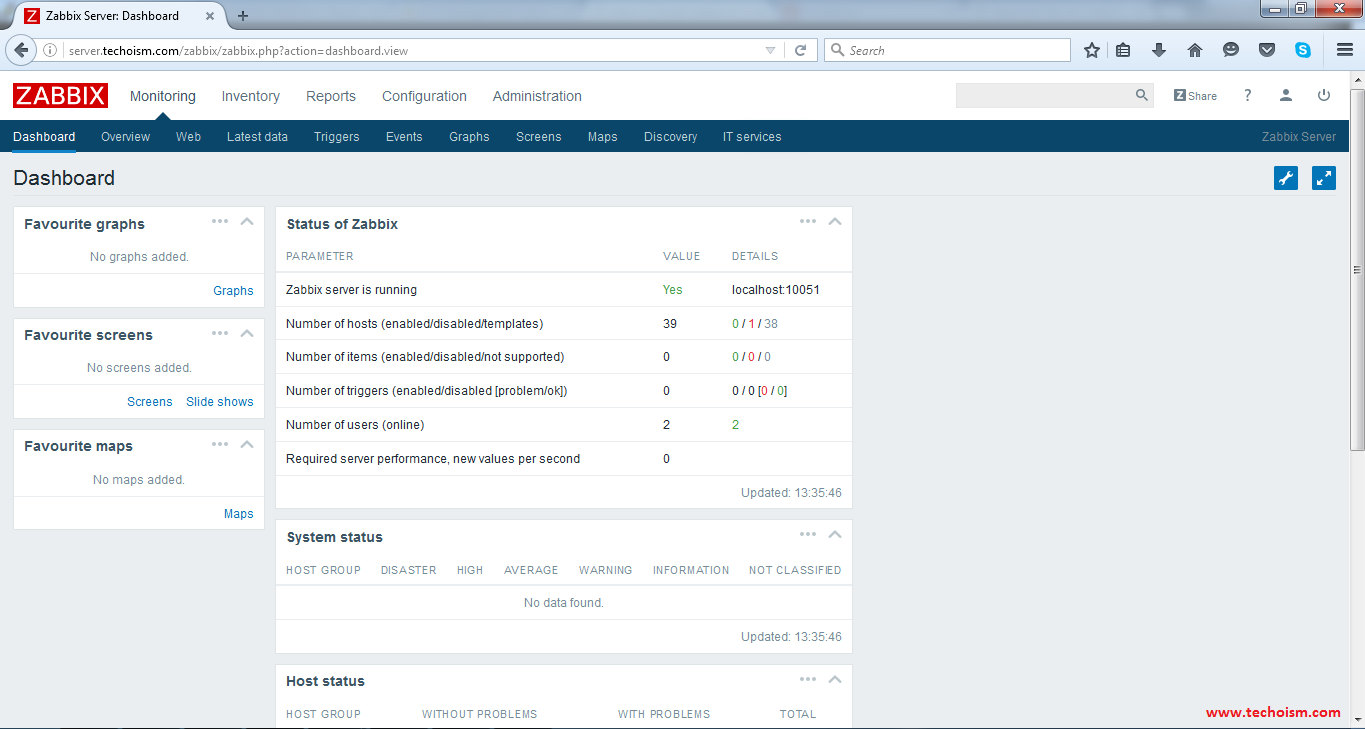
After successful login you will get zabbix dashboard like below.
Enjoy it!
