How to Install the Chef Server on CentOS/RHEL 5/6/7
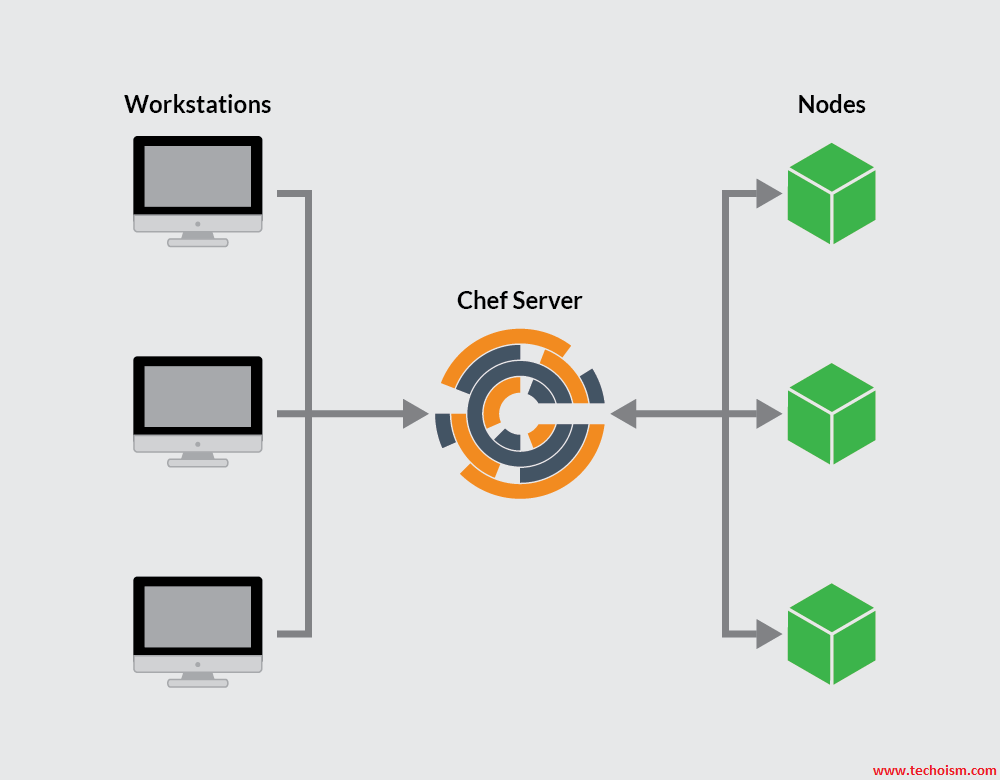
A chef is a Ruby-based configuration management engine. Chef server acts as a single point of contact for agents to pull configurations that are applicable to them. Chef server stores cookbooks, metadata of the nodes, environment and policy details etc. Nodes use the chef-client to ask the server for configuration details, such as recipes, templates, and file distributions.
See Also:
1. What is Chef Automation Tool and It’s Features
2. Puppet vs. Chef vs. Ansible vs. SaltStack
3. Install and Configure a Chef Workstation on CentOS/RHEL 7/6
4. How to connect Chef Server with Nodes on Linux
In this article, we will explain how to Install Chef Server.
Step 1: Prerequisite
First we need to install below packages.
# yum install -y wget curl
Also, It is important to set up a domain name for your Chef server to resolve requests correctly.
# hostname -f
chef.techoism.local
Step 2: Download and Install Chef Server
Next step is to download Chef server package from official website and install it.
CentOS/RHEL 7
For 64 Bit
# wget https://packages.chef.io/files/stable/chef-server/12.15.8/el/7/chef-server-core-12.15.8-1.el7.x86_64.rpm
For 32 Bit
# wget https://packages.chef.io/files/stable/chef-server/12.15.8/el/7/chef-server-core-12.15.8-1.el7.s390x.rpm
CentOS/RHEL 6
For 64 Bit
# wget https://packages.chef.io/files/stable/chef-server/12.15.8/el/6/chef-server-core-12.15.8-1.el6.x86_64.rpm
For 32 Bit
# wget https://packages.chef.io/files/stable/chef-server/12.15.8/el/6/chef-server-core-12.15.8-1.el6.s390x.rpm
CentOS/RHEL 5
For 64 Bit
# wget https://packages.chef.io/files/stable/chef-server/12.15.8/el/5/chef-server-core-12.15.8-1.el5.x86_64.rpm
Install the downloaded package using the below command as per your system architecture.
CentOS/RHEL 7
For 64 Bit
# rpm -ivh chef-server-core-12.15.8-1.el7.x86_64.rpm
For 32 Bit
# rpm -ivh chef-server-core-12.15.8-1.el7.s390x.rpm
CentOS/RHEL 6
For 64 Bit
# rpm -ivh chef-server-core-12.15.8-1.el6.x86_64.rpm
For 32 Bit
# rpm -ivh chef-server-core-12.15.8-1.el6.s390x.rpm
CentOS/RHEL 5
For 64 Bit
# rpm -ivh chef-server-core-12.15.8-1.el5.x86_64.rpm
Step 3: Configure Chef Server
The Chef server is made out of many different services that work together to create a functioning system. Run below command to configure Chef Server and start all the services.
# chef-server-ctl reconfigure
Above command may take a few minutes to complete. Also whenever you do any changes in Chef Server we need to run this command to reconfigure.
Step 4: Create Administrator User
Now we need to create the administrator user to access and manage the Chef Server. You can create multiple administrator users.
# chef-server-ctl user-create USER_NAME FIRST_NAME LAST_NAME EMAIL 'PASSWORD' --filename /tmp/to/user_name.pem
User RSA private key will be generated automatically and you need to save user’s private key at a safe location.
# chef-server-ctl user-create ajain Anuket Jain ajain@techoism.com 'redhat' --filename /opt/chefuser/ajain.pem
Step 5: Create Organization
Run the following command to create organization and provide the access to the user to whom you want to provide the access.
# chef-server-ctl org-create short_name 'full_organization_name' --association_user user_name --filename ORGANIZATION-validator.pem
The name must begin with a lower-case letter or digit, may only contain lower-case letters, digits, hyphens, and underscores, and must be between 1 and 255 characters.
# chef-server-ctl org-create ajaindevops2017 'Technical World' --association_user ajain --filename /opt/cheforg/technical.pem
Step 6: Configure Chef Management Console
This is the additional feature of the Chef Server. If you want to use your Chef Management Console then follow below steps.
# chef-server-ctl install chef-manage
Use Chef management console to manage data bags, attributes, run-lists, roles, environments, and cookbooks from a web user interface.
OR
If you want then you can also download Chef Management Console from official website and install it manually.
CentOS/RHEL 7
For 64 Bit
# wget https://packages.chef.io/files/stable/chef-manage/2.5.4/el/7/chef-manage-2.5.4-1.el7.x86_64.rpm
CentOS/RHEL 6
For 64 Bit
# wget https://packages.chef.io/files/stable/chef-manage/2.5.4/el/6/chef-manage-2.5.4-1.el6.x86_64.rpm
CentOS/RHEL 5
For 64 Bit
# wget https://packages.chef.io/files/stable/chef-manage/2.5.4/el/5/chef-manage-2.5.4-1.el5.x86_64.rpm
CentOS/RHEL 7
For 64 Bit
# rpm -ivh chef-manage-2.5.4-1.el7.x86_64.rpm
CentOS/RHEL 6
For 64 Bit
# rpm -ivh chef-manage-2.5.4-1.el6.x86_64.rpm
CentOS/RHEL 5
For 64 Bit
# rpm -ivh chef-manage-2.5.4-1.el5.x86_64.rpm
Step 7: Configure Chef Management Console
Now you need to reconfigure the Chef Server using below command.
# chef-server-ctl reconfigure
# chef-manage-ctl reconfigure
You can access Chef Management Console using your server IPAddress or hostname
http://chef.techoism.local
OR
http://192.168.1.101
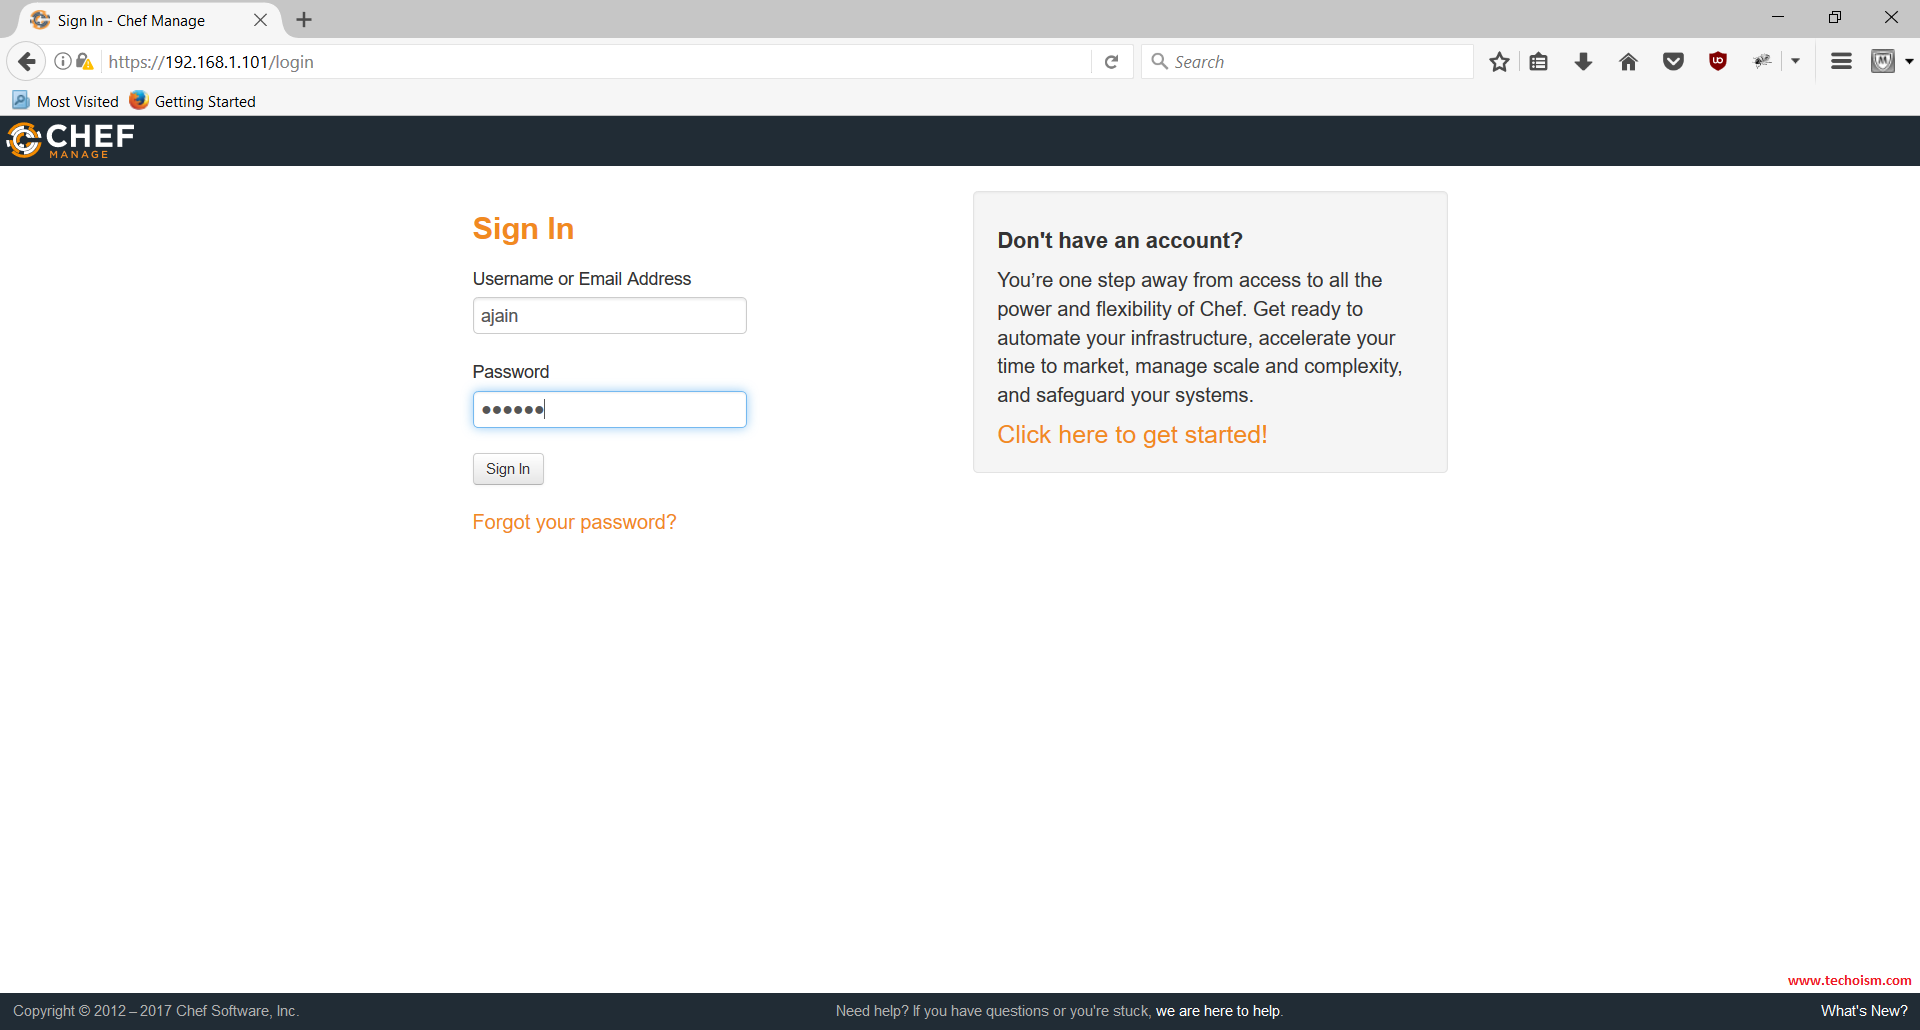
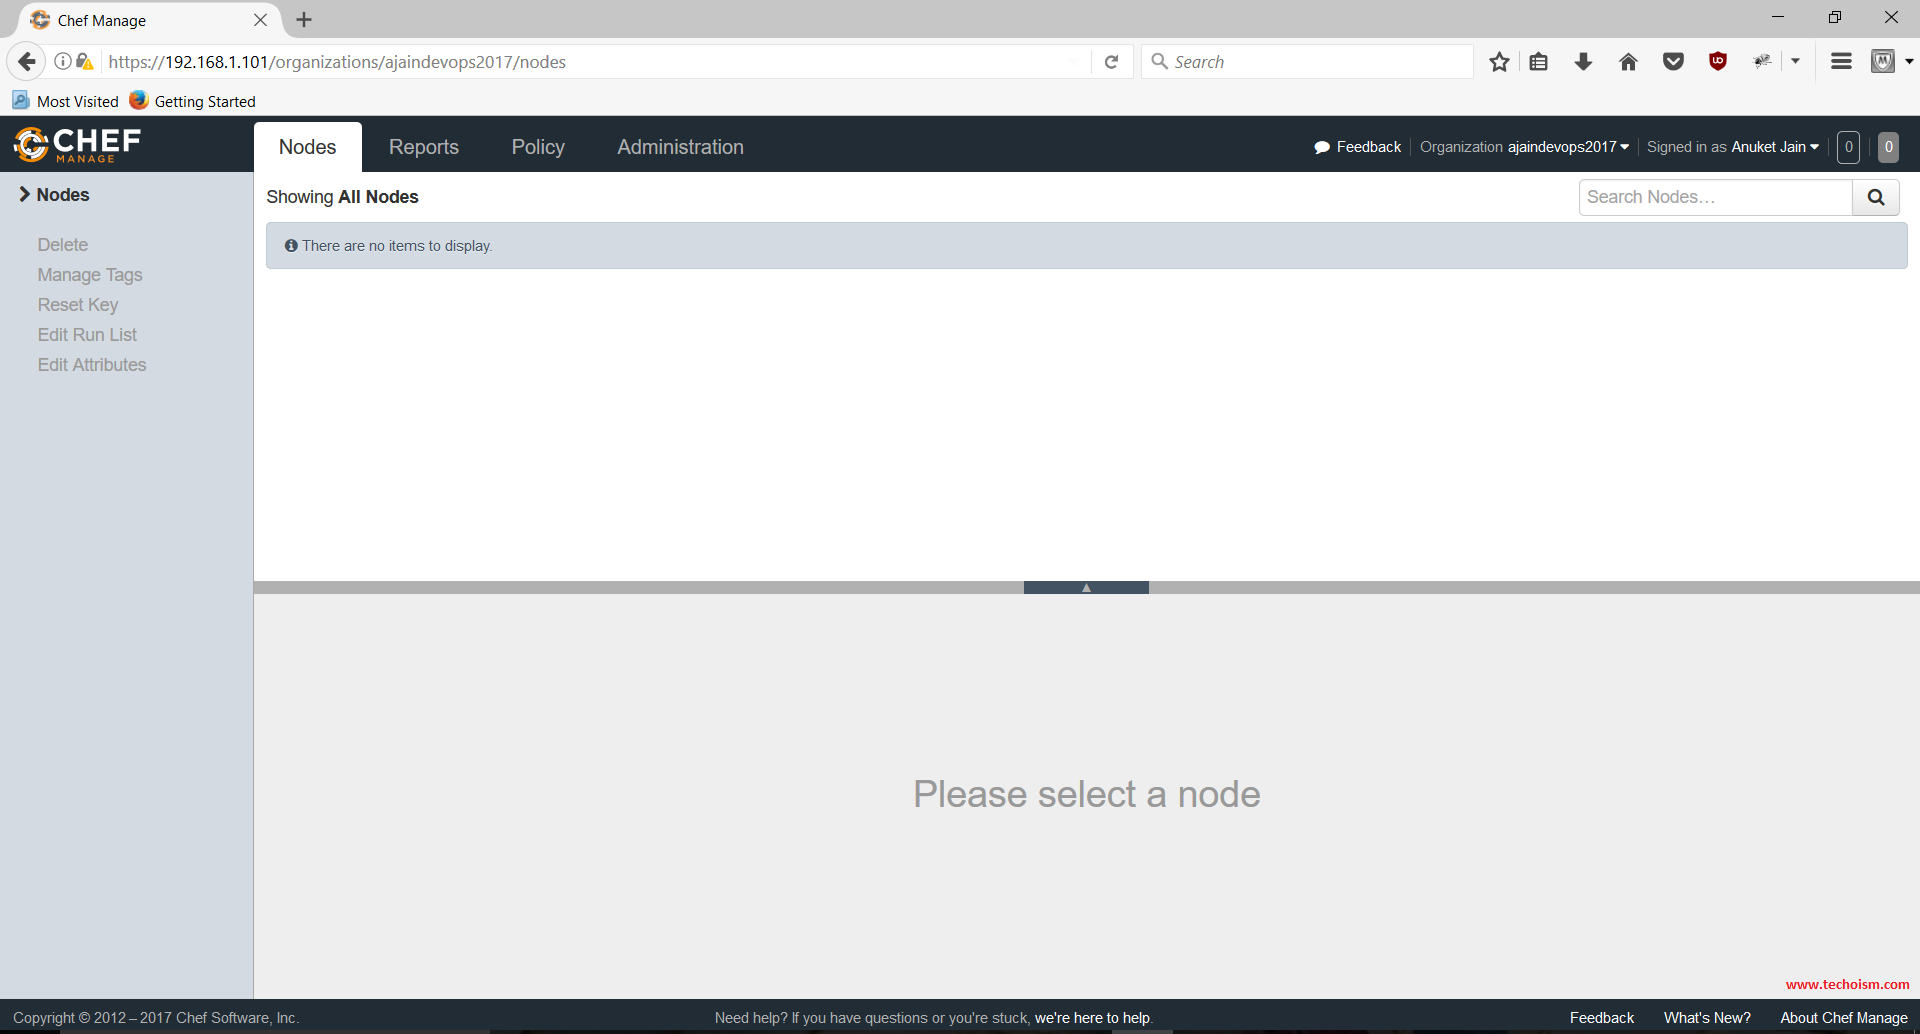
You should now have a Chef server with Chef Management Console.
Reference:
1. https://docs.chef.io/install_server.html
Enjoy it!

This message is posted here using XRumer + XEvil 4.0
XEvil 4.0 is a revolutionary application that can break any anti-botnet CAPTCHA’s.
Captcha Solution Google (ReCaptcha-1, ReCaptcha-2), Facebook, BING, Hotmail, Yahoo,
Yandex, VKontakte, Captcha Com – and over 8.4 million other types!
You read this – it means it works! 😉
Details on the official website of XEvil.Net, there is a free demo version.
Check YouTube video “XEvil ReCaptcha2”
Do you have a spam problem on this website; I
also am a blogger, and I was curious about your situation; many of us have developed some
nice methods and we are looking to trade techniques with other folks, be sure to
shoot me an e-mail if interested.
I am not facing any spam problem.
Happy to hear that.