Create New Virtual Machine using existing Snapshot
Snapshots in Azure feature that allows you to take a read-only snapshot of a Virtual Machine’s disk. You can take a snapshot of a VM’s OS or data disk. You can use this snapshot to revert the VM, or you can create a new VM using it.
Useful Articles:
- STEPS TO CREATE AZURE VIRTUAL MACHINE SCALE SET
- HOW TO CREATE AZURE VIRTUAL MACHINE USING AZURE PORTAL
- STEPS TO CREATE AZURE CUSTOM VM IMAGE
- AZURE VIRTUAL MACHINE SCALE SET & AUTO SCALING
- HOW TO TAKE AZURE VIRTUAL MACHINE SNAPSHOTS FOR DISKS
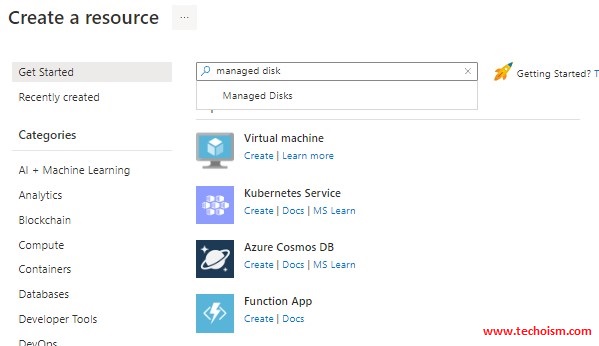
In the Create a resource search box, type Managed Disk and then select it.
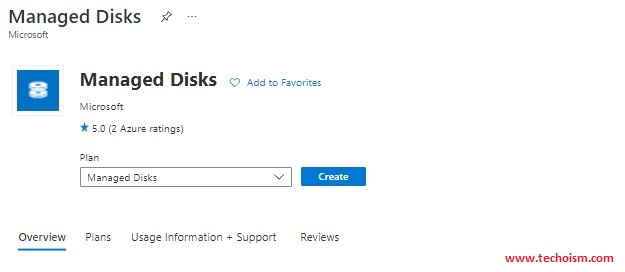
Click Create to create the Managed disk using snapshot.
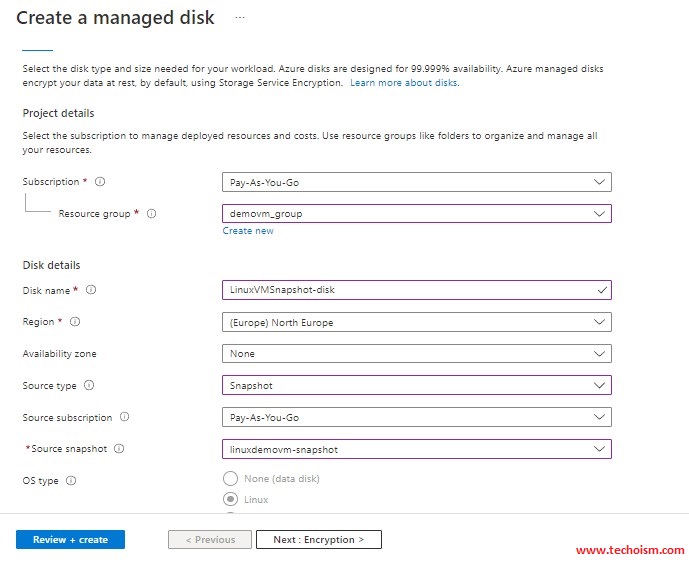
Enter the name for the managed disk and then the Source type as Snapshot. Also In the Source snapshot, select the snapshot that we had created.
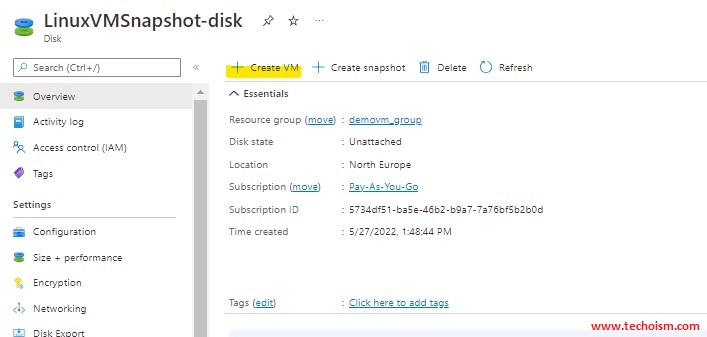
After successfully deploying the Managed disk, select the managed disk in the Overview, and click + Create VM.
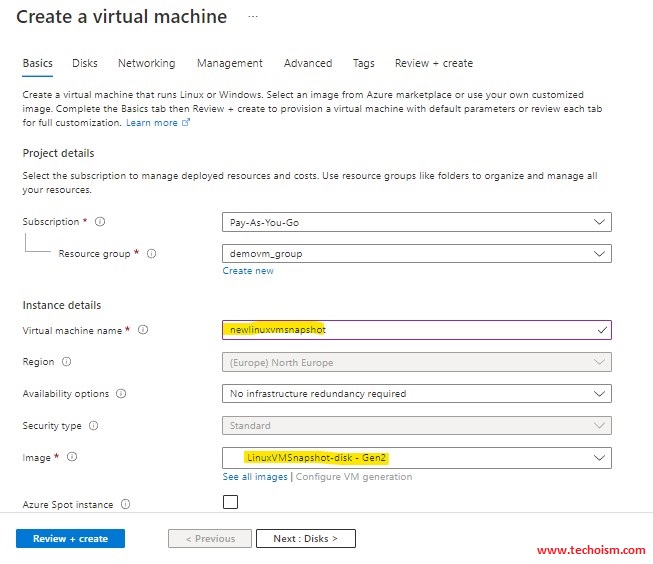
In the Create a virtual machine page, enter the virtual machine’s name, and then you can find that our Managed disk is automatically selected in the Image option.
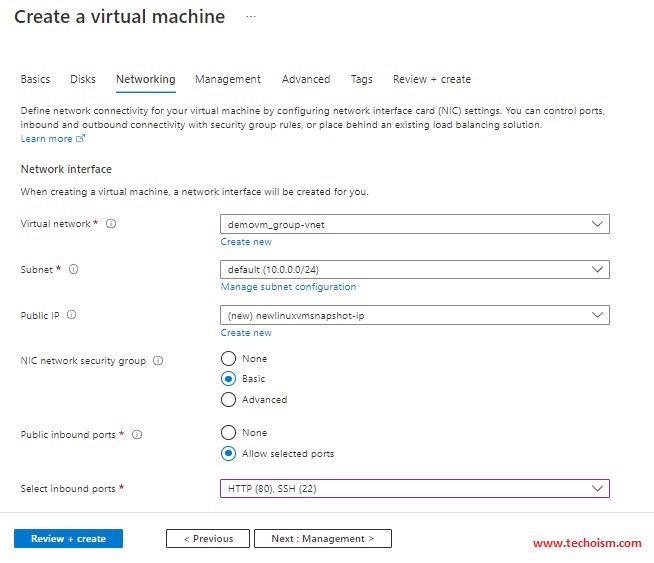
On the Networking page, we can select the existing Virtual Network or create a new Virtual network. After that, we can click Create + Review.
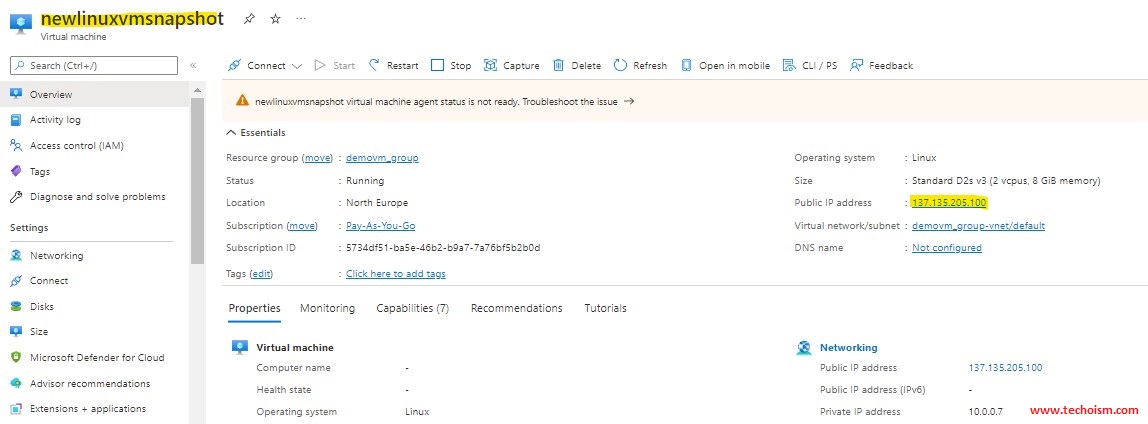
We have successfully deployed the new Virtual machine using our Snapshot.
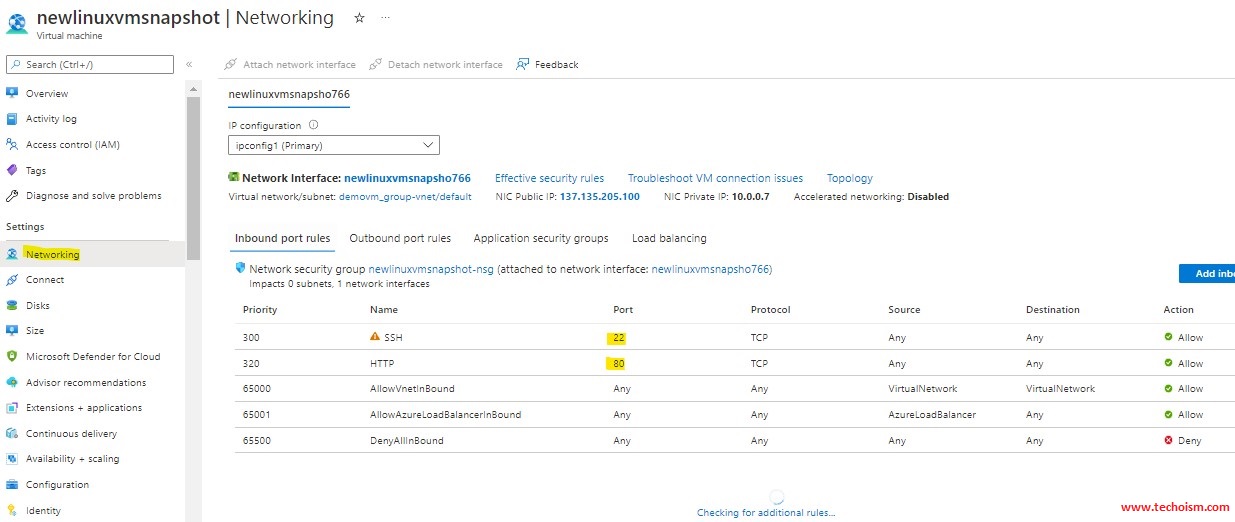
We have to add port 80 and port 22 to the Network security group.
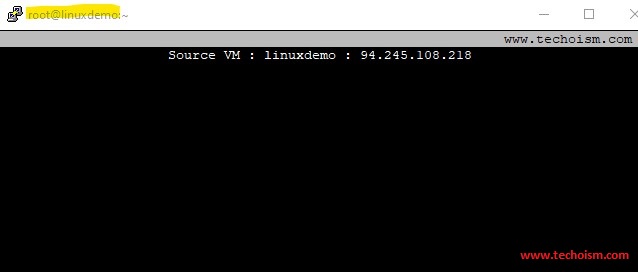
We have successfully deployed the copy of the source VM using the snapshot. Now we can test is using public IP.
Enjoy it!
