How to Install CentOS 8 with Screenshot
CentOS 8 is now released for productions use. CentOS 8 kernel version is now 4.18. The new version of CentOS 8 comes with new and exciting features. Installation of CentOS 8 is similar to the earlier versions of CentOS 7.
Useful Article:
This article will help you to install the CentOS 8.
Steps to install CentOS 8
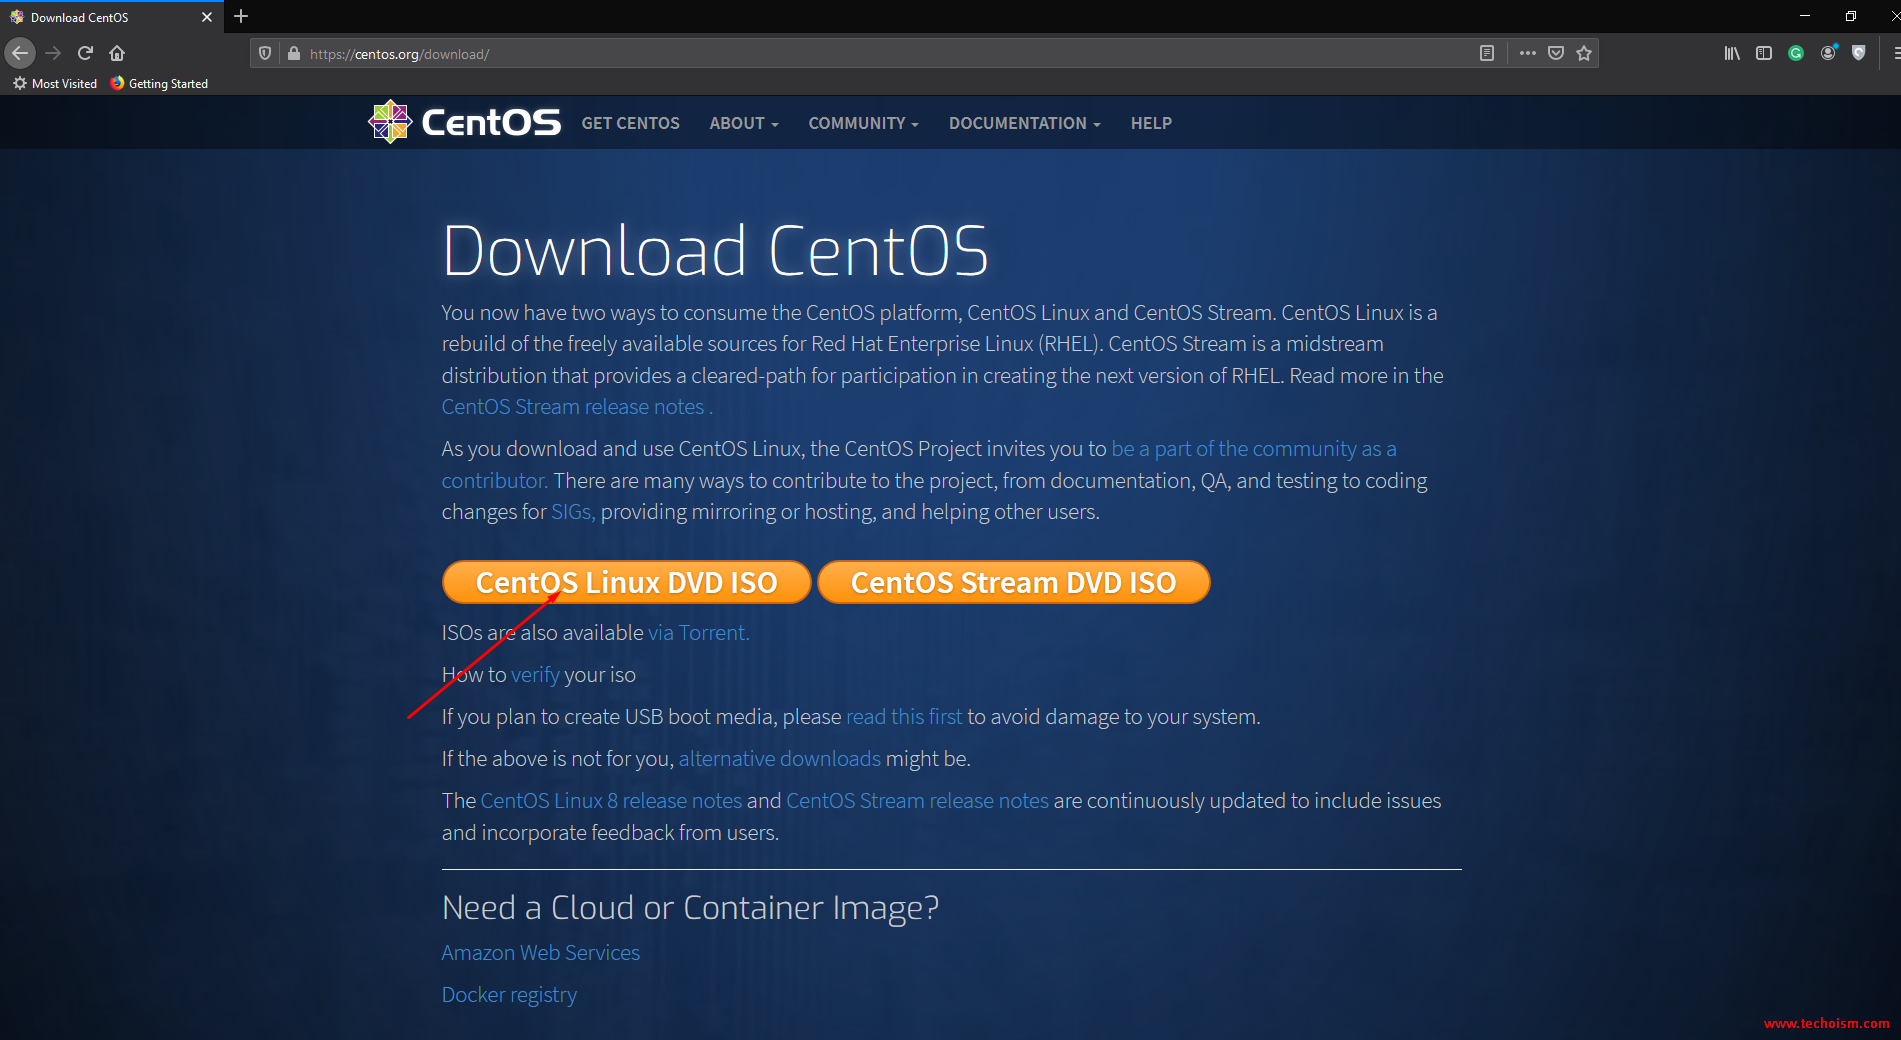
First, visit the official website of CentOS and click on CentOS Linux DVD ISO as marked in the screenshot below and make a bootable device.
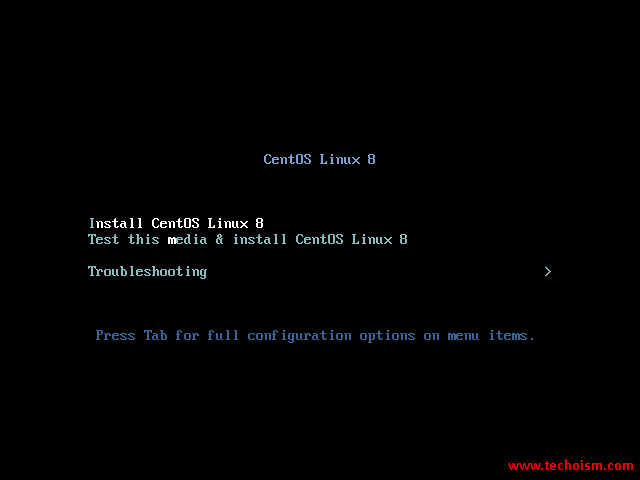
We will need first to insert the USB device and then boot on it and now, select Install CentOS 8 from the GRUB menu and press .
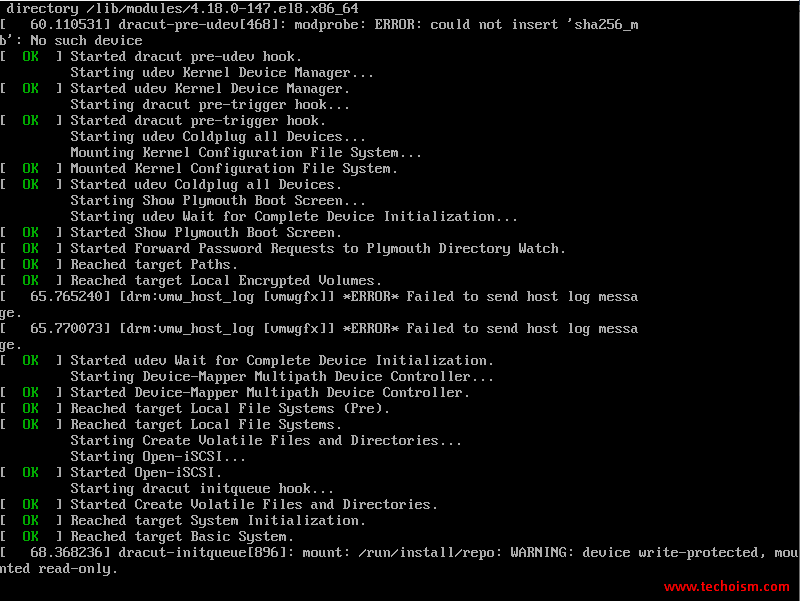
Boot messages will follow thereafter as shown.
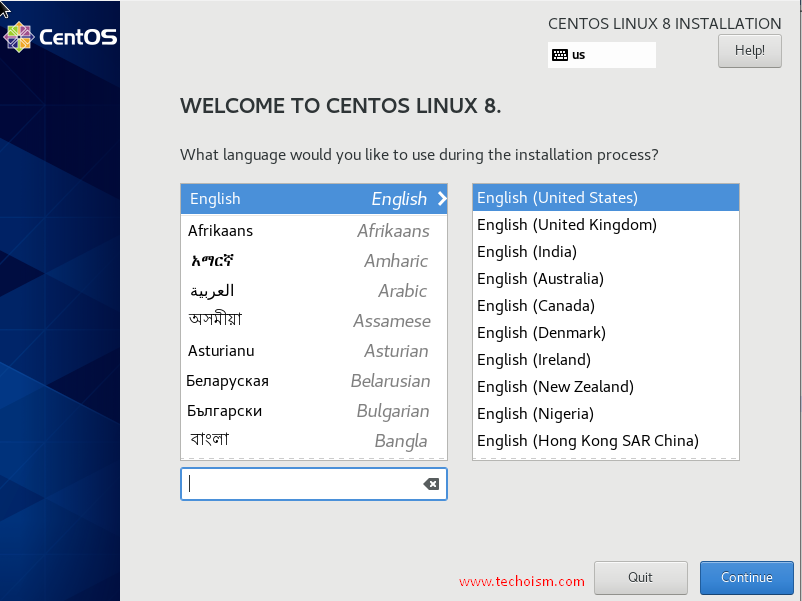
The CentOS 8 graphical installer should start. Now, choose the preferred language and click “Continue”.
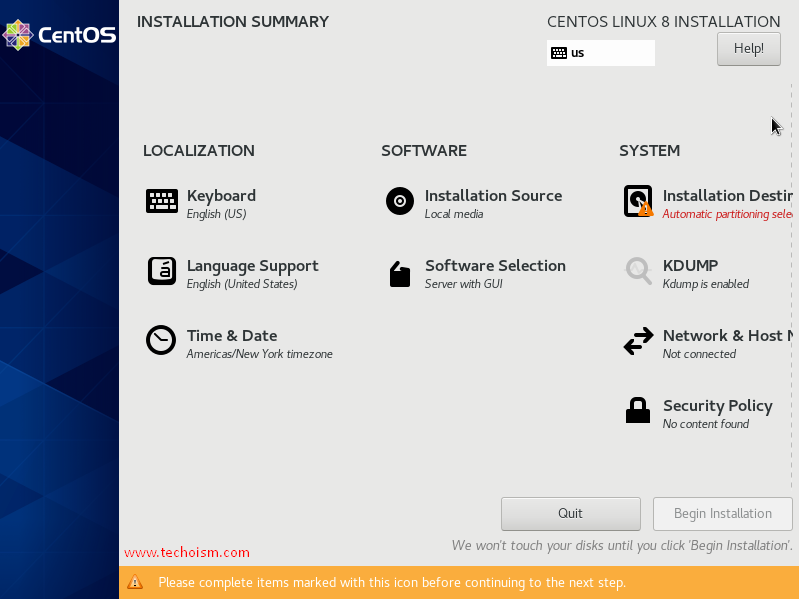
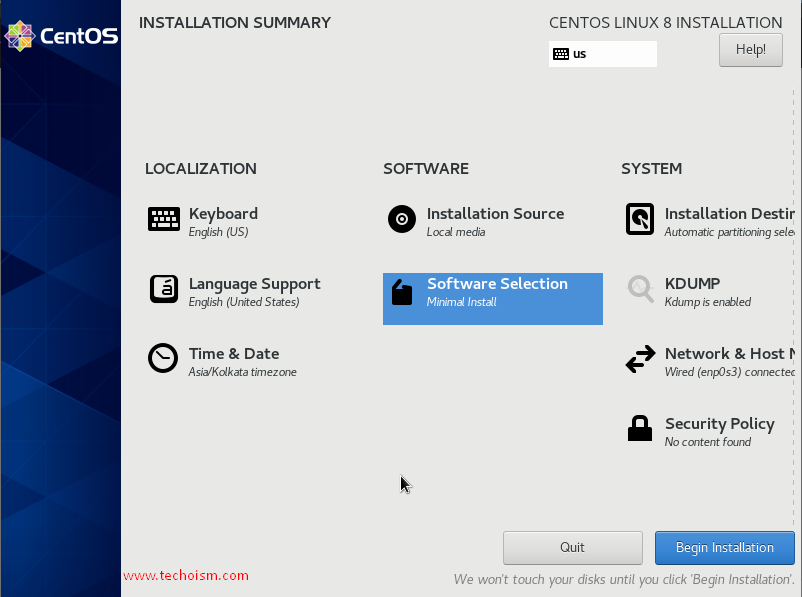
On the next screen, installation summary will be displayed. We will configure each of these options in turn.
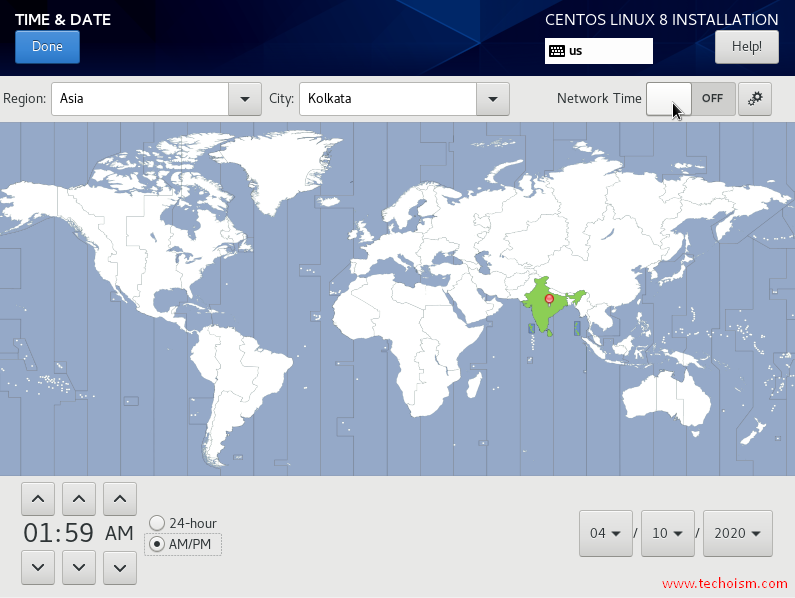
If you want to set up your time zone, click on Time & Date. Select your Region and City and click on Done.
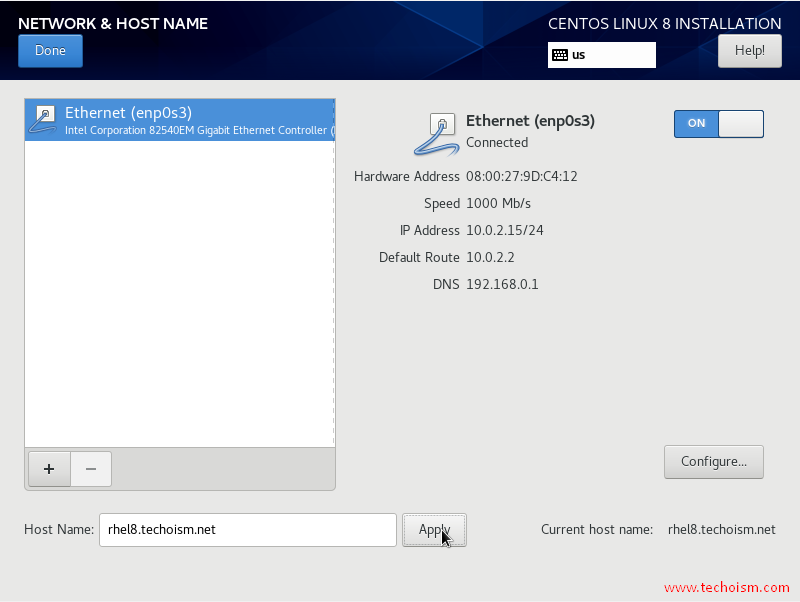
Now, click on Network & Host Name to configure it. The Network & Host Name section displays the active network interfaces on your PC. In this case, the active interface is enp0s3.
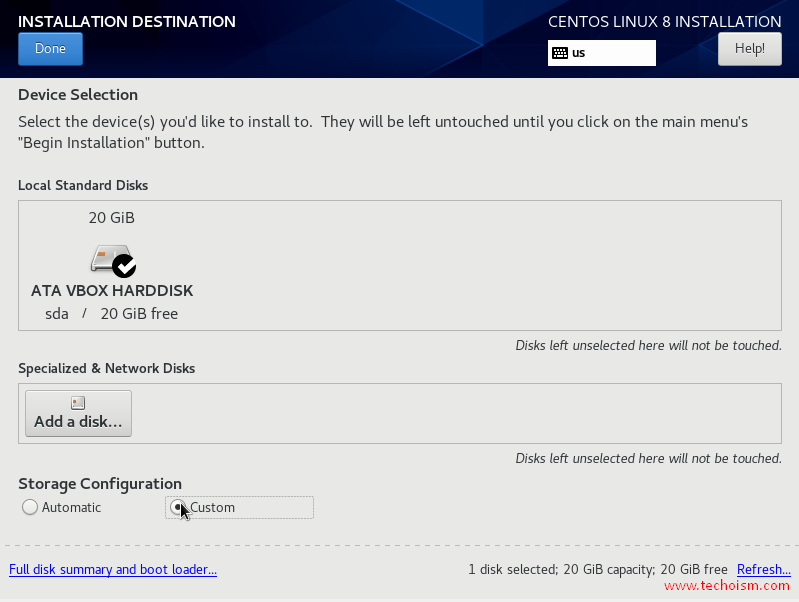
Select the Installation for the destination and select the device you’d like to install to.
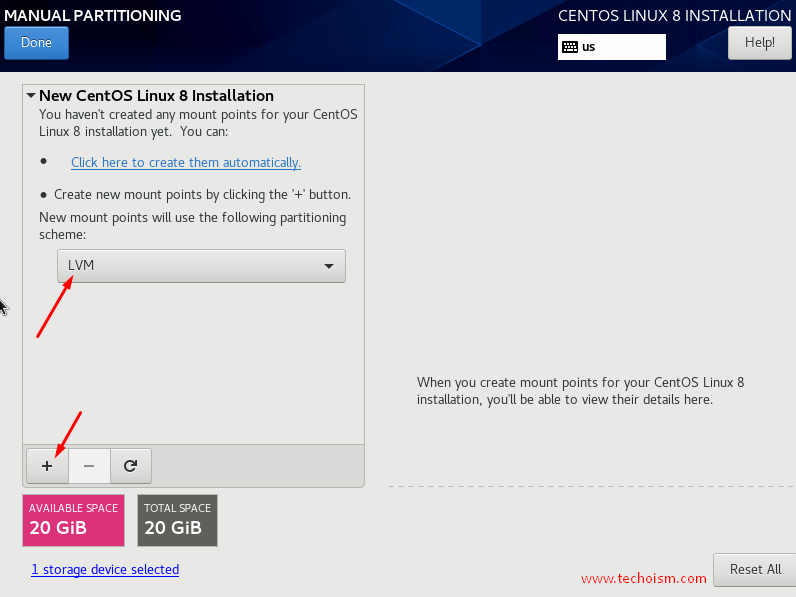
You haven’t created any mount points for your CentOS. Create the mount point by clicking on +. In this article we are creating 4 mount points.
1. /
2. /boot
3. swap
4. /var
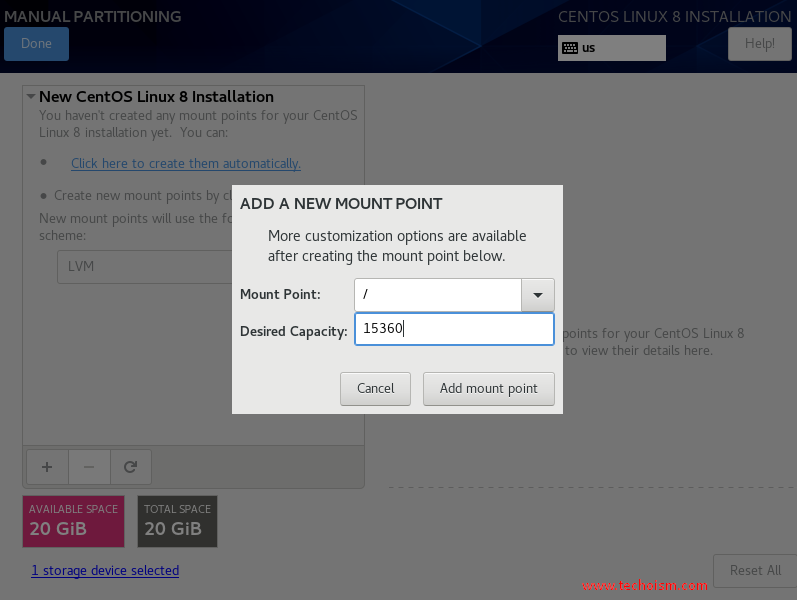
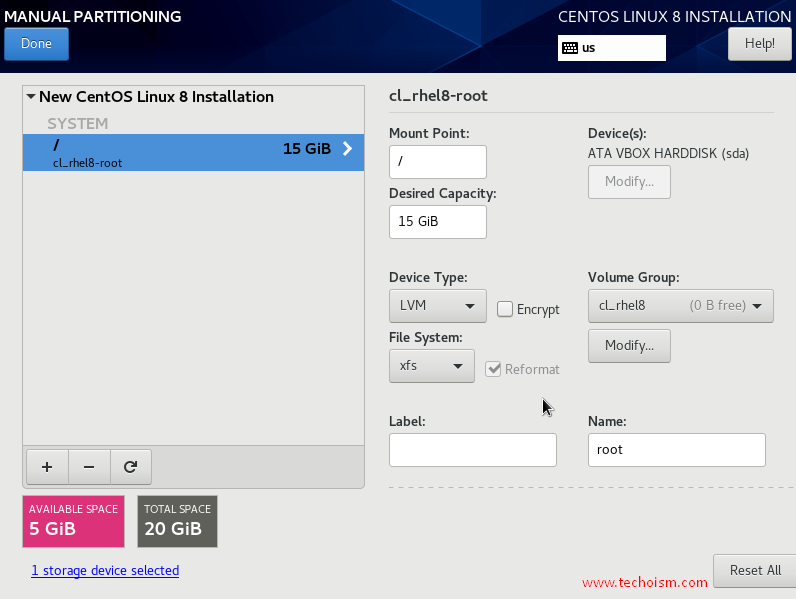
We will create first the / partition.
The same way we created / partition, we will create /boot partition

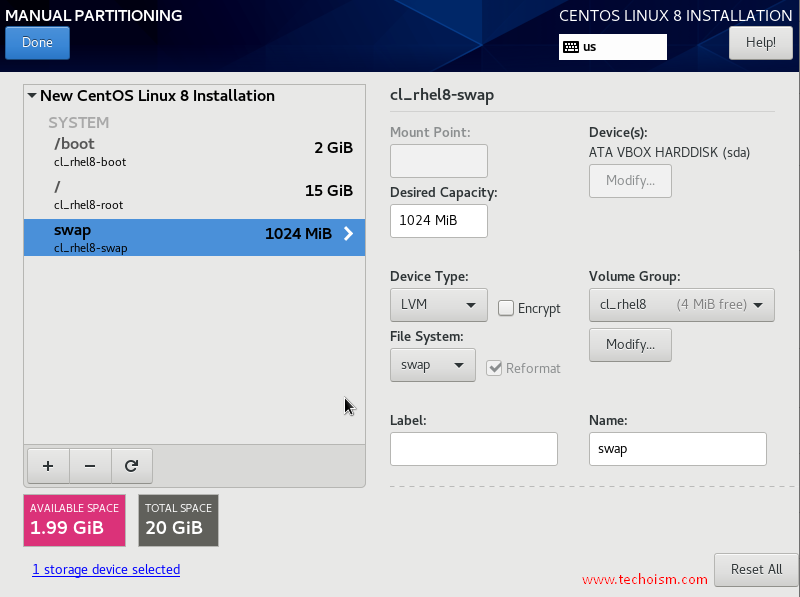
For the swap the filesystem will be not xfs but swap. You can have a look
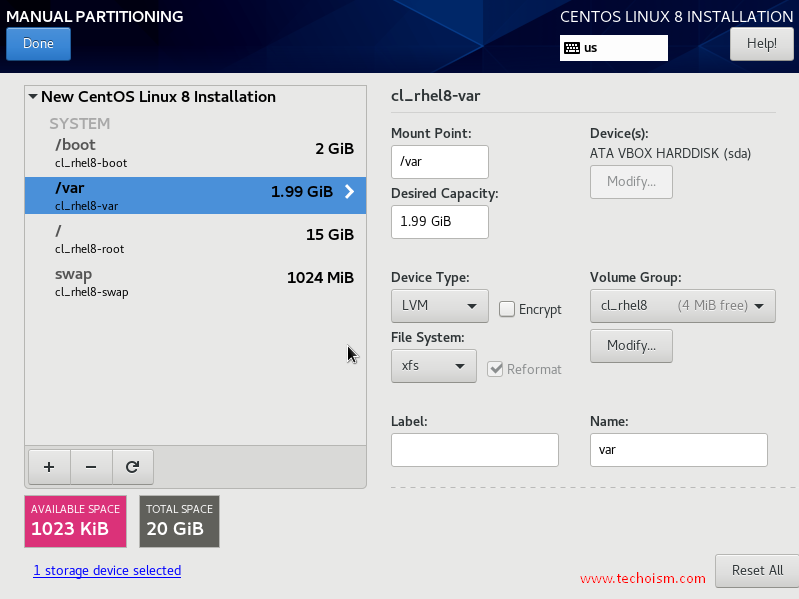
Now you can create the /var partition
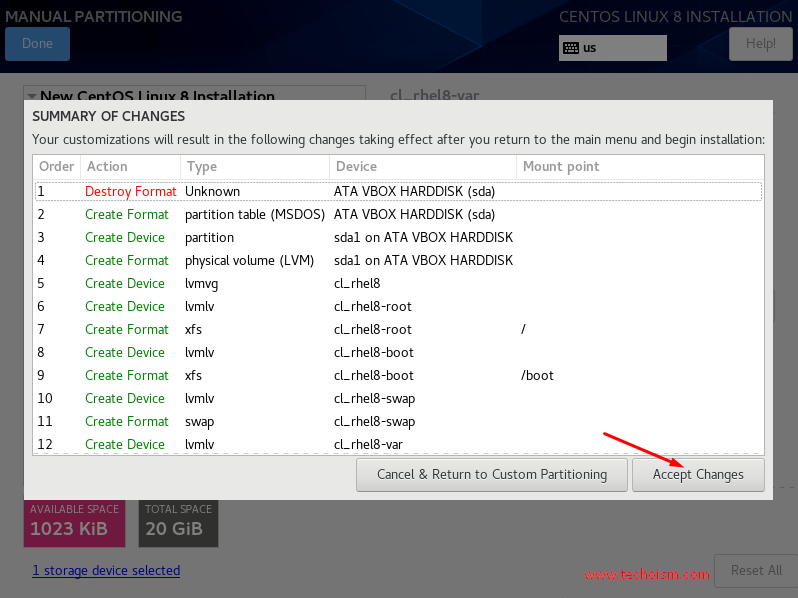
When you have finished, select done. You will see a windows with a summary of what has been done during the partitioning process. Click on Accept Changes to proceed.
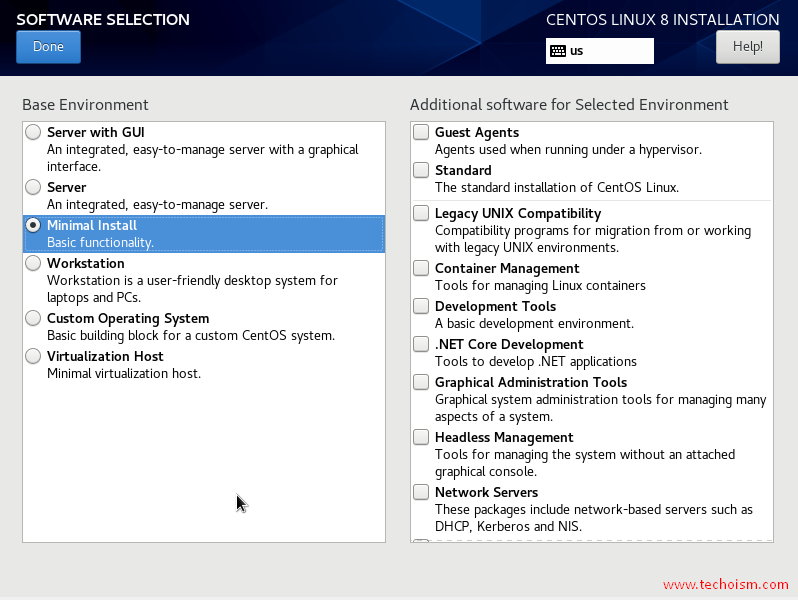
You will choose the environment of the server you want to install. You can choose additional software for selected environment. Here we are selecting Minimal environment.
Having configured all the options, click on ‘Begin the installation to commence the installation process.
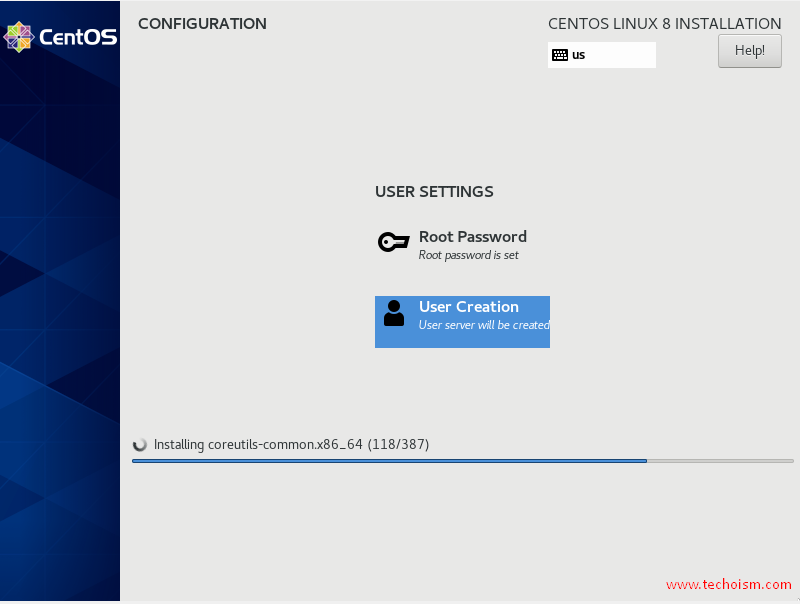
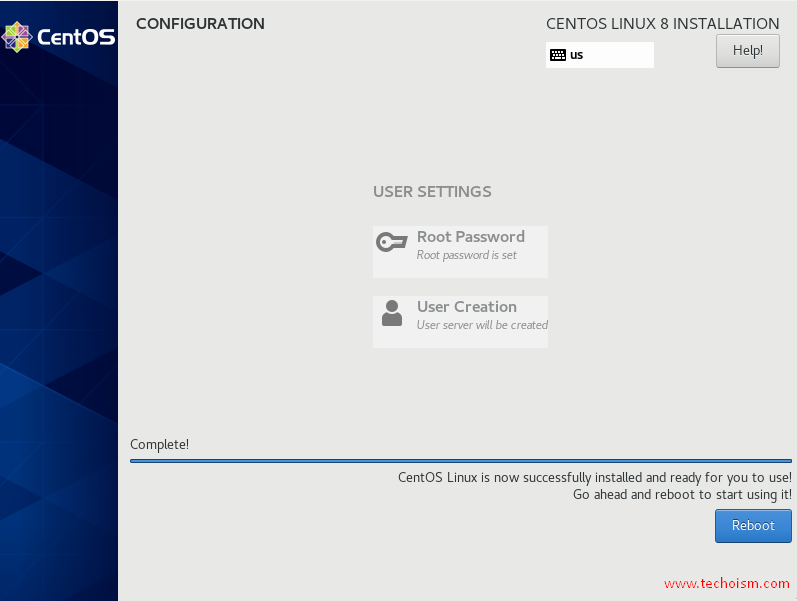
The next screen will prompt you to configure user account and root account as shown.
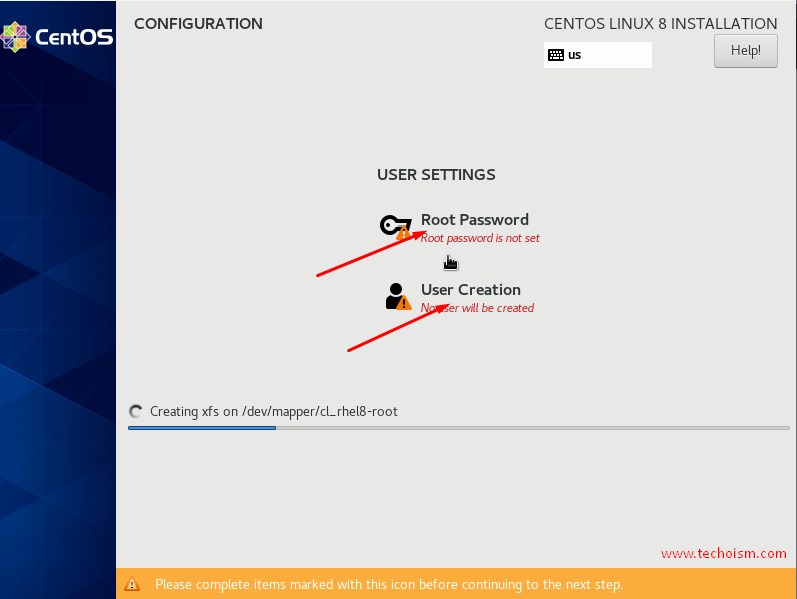
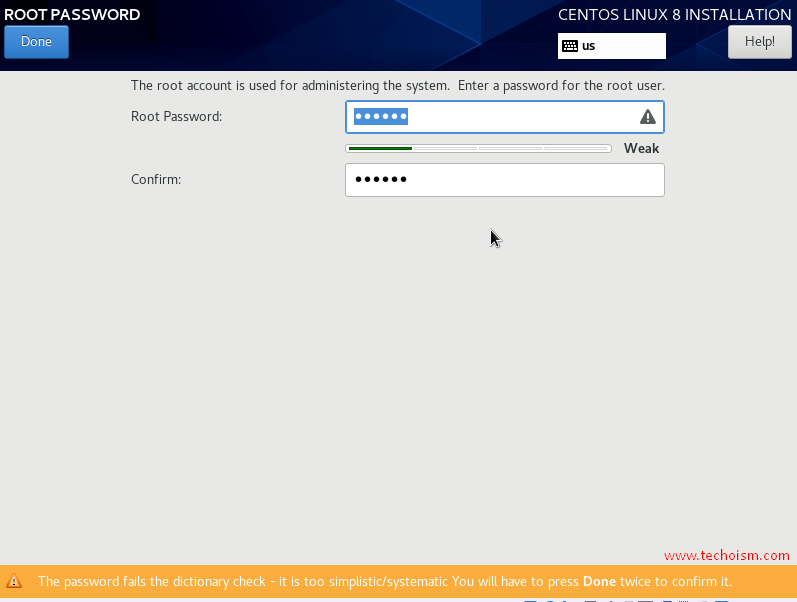
Click on the Root Password to configure the root password.
During the installation process, you can create your user account also.

The installation should continue and process takes a while depending on your internet speed.
Now the installation process can continue. It will ask you to reboot when the process will finish
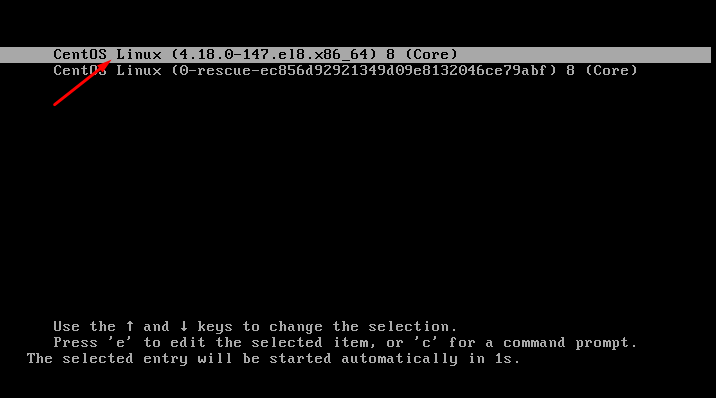
Upon rebooting, select the first option on the grub menu as shown.
Now installation has been completed and you can login into the server.
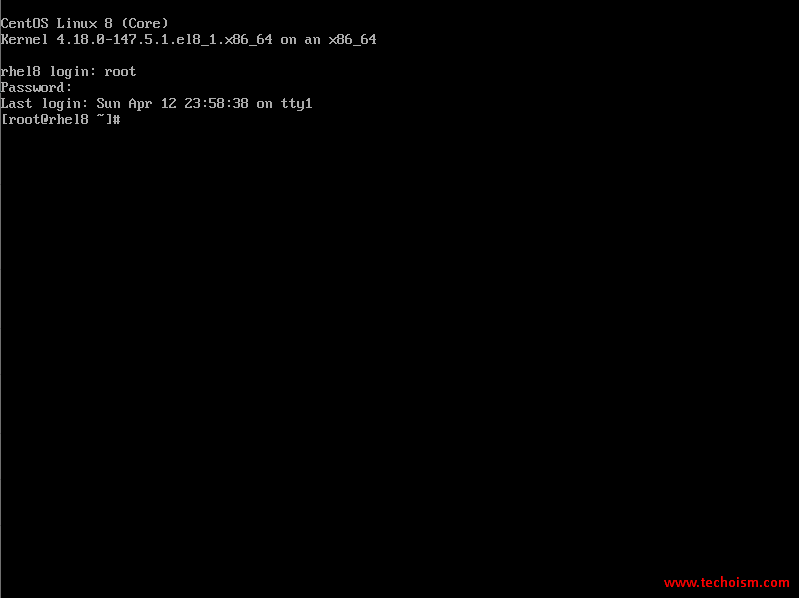
Enjoy it!
